CASSA
Getting Started
Create a company from an existing CASSA account
If you're registered as an employee, it's easy to create your own company from within CASSA.
Updated 2 days ago
What's covered in this article
This article contains the following (plus quick links to the relevant sections):
Once you have finished the employee registration process and entered your General Information, you can create your own company.
Note: you must be the business owner and/or an authorised company representative to create this company account.
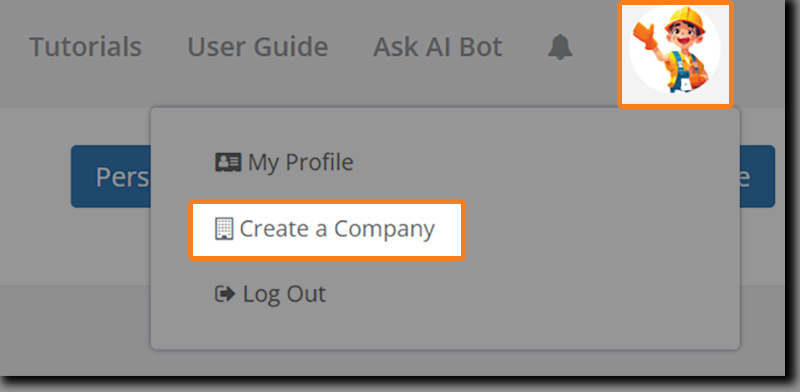
Click on your profile photo in the top right corner and then click on Create a Company:
You will be taken to the create a company form where you will add your company details: Company Name, address, postcode, and country:
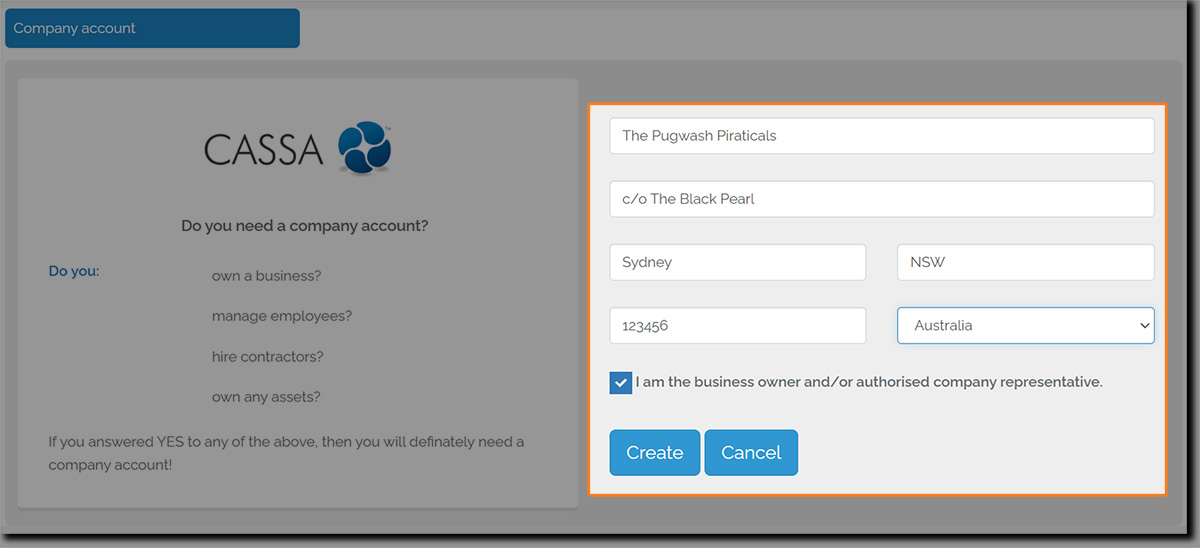
Once you’ve added your company details (double-check they’re correct), then click on the Create button.
This will take you back into the CASSA system and you’ll receive a notification that your company has been created successfully and you’ll then see the company information listed in the main navigation:
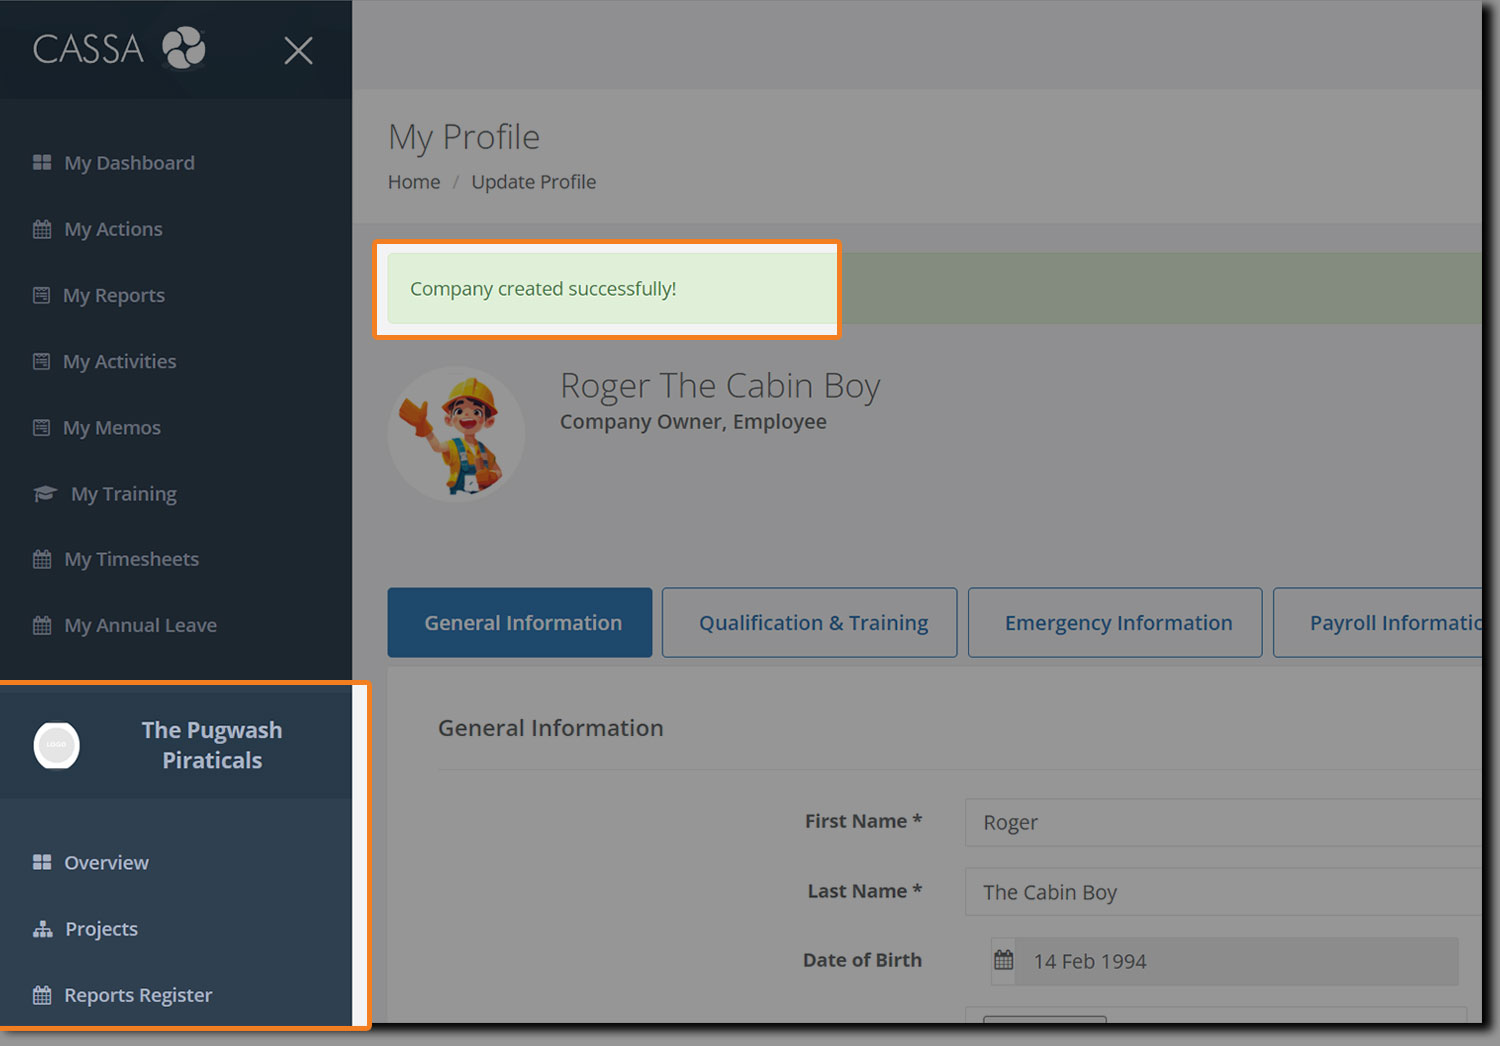
The next step is to complete the following company details:
General Information
License and Insurance
Company Bio
Privacy
Company Profile
To do this, in the main navigation scroll down so you can see Administration:
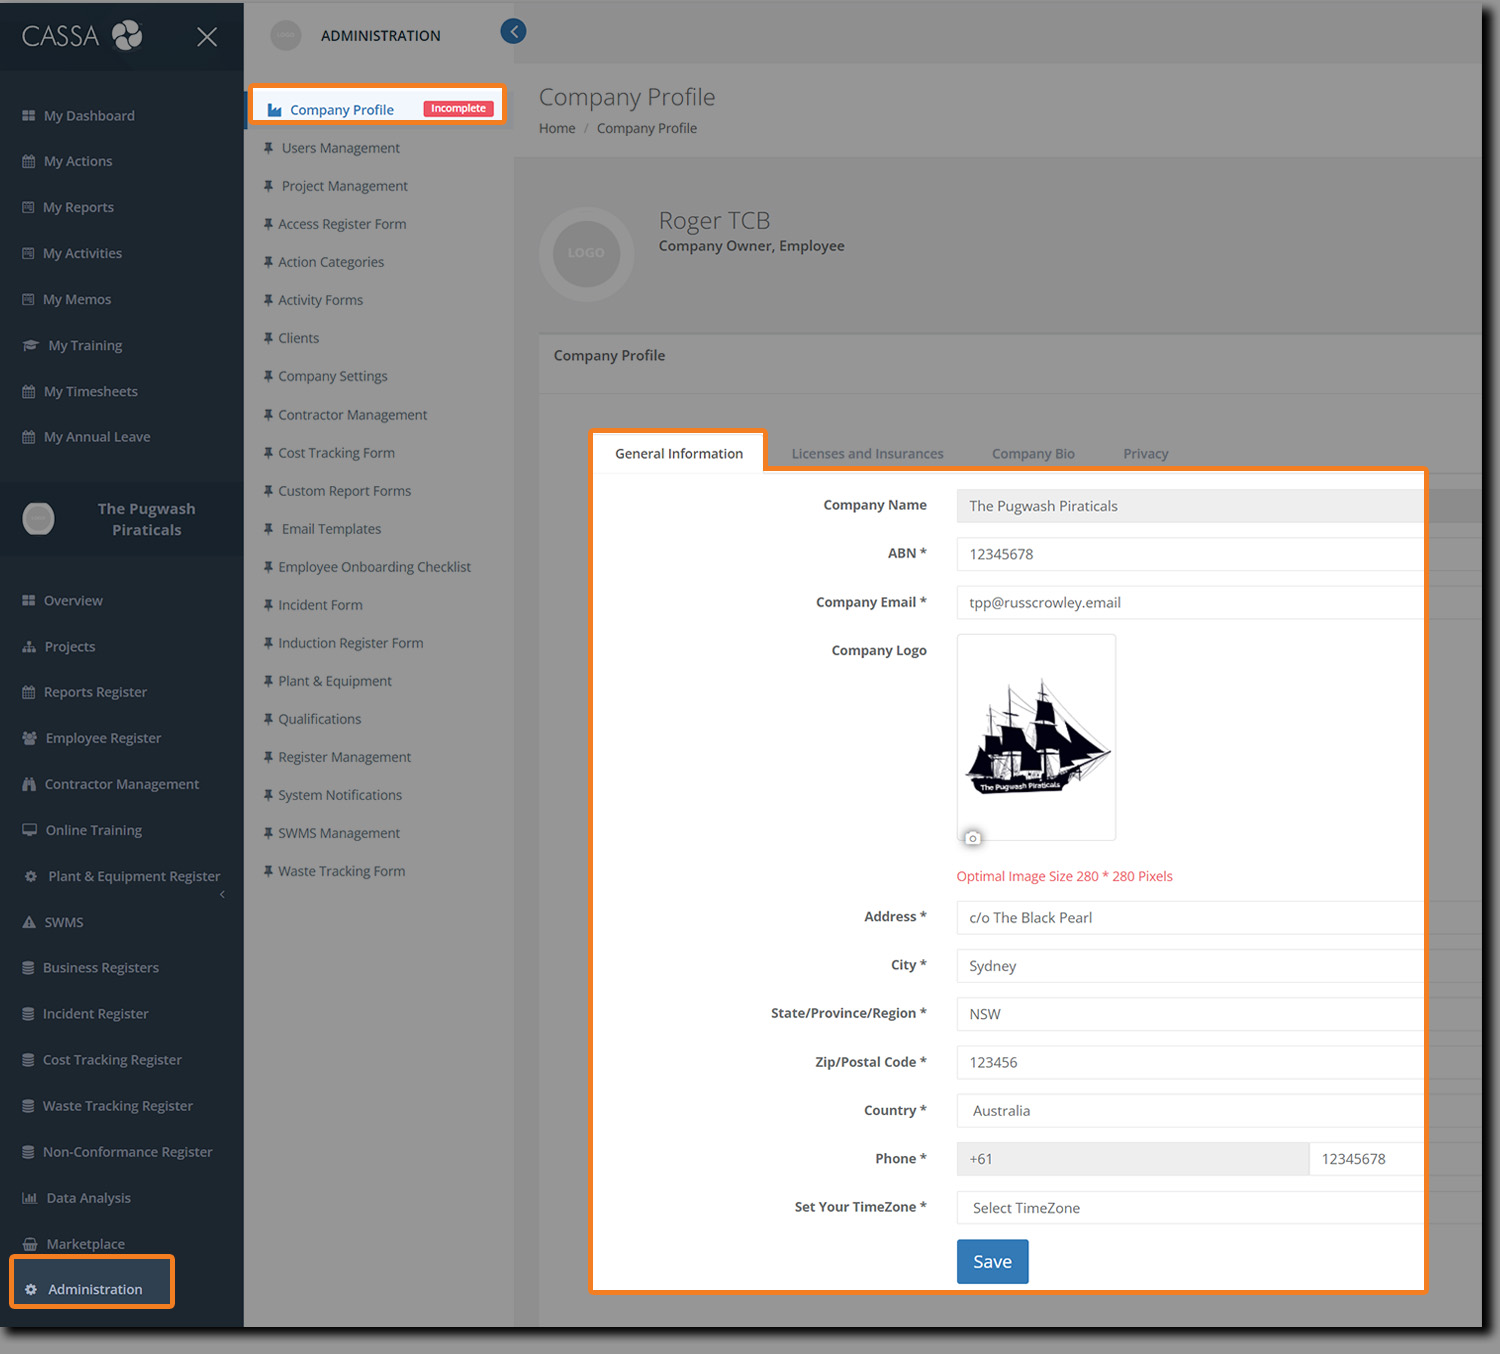
Click on Administration and then on Company Profile and you’ll see the General Information tab.
General Information
Within General Information, we recommend you add all your readily available information (hopefully you have this to hand), including ABN number, email address, your company logo, address, phone number, timezone, etc.
Once added, click on the Save button.
When you’re ready to add your Licenses and Insurance details, click on that tab and follow the instructions.
Licenses and Insurance
After clicking on the Licenses and insurances tab you’ll see the table grid, but not much else.

Click on the Add button to open the Add License and Insurance dialog:
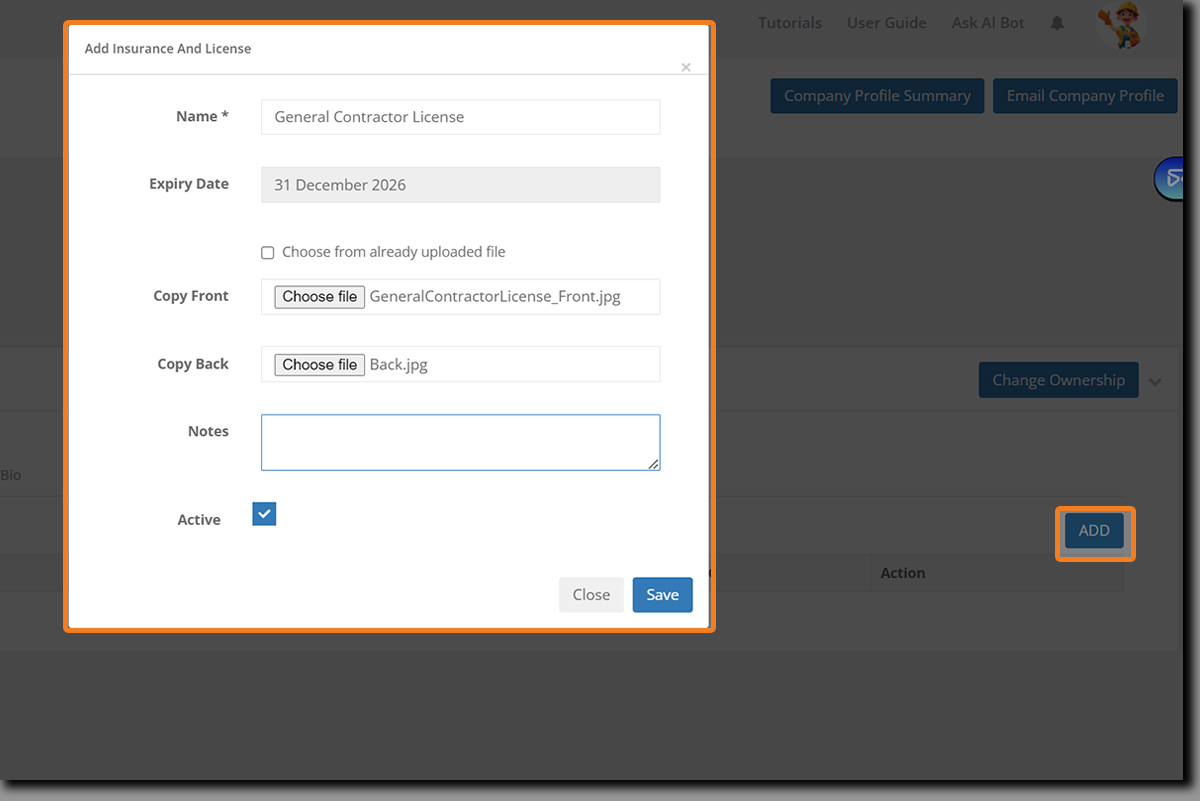
Add the license name, the expiry date, a copy of both the front and the back of the certificate, and any notes you’d like to add.
When done, click on Save to save your details and to close the dialog box.
When the screen refreshes, your insurance/license will be added to the Insurances and Licenses grid:

Repeat with additional licenses or qualifications and, when ready, click on the Company Bio tab.
Company Bio
After clicking on the Company Bio tab, you’ll see:
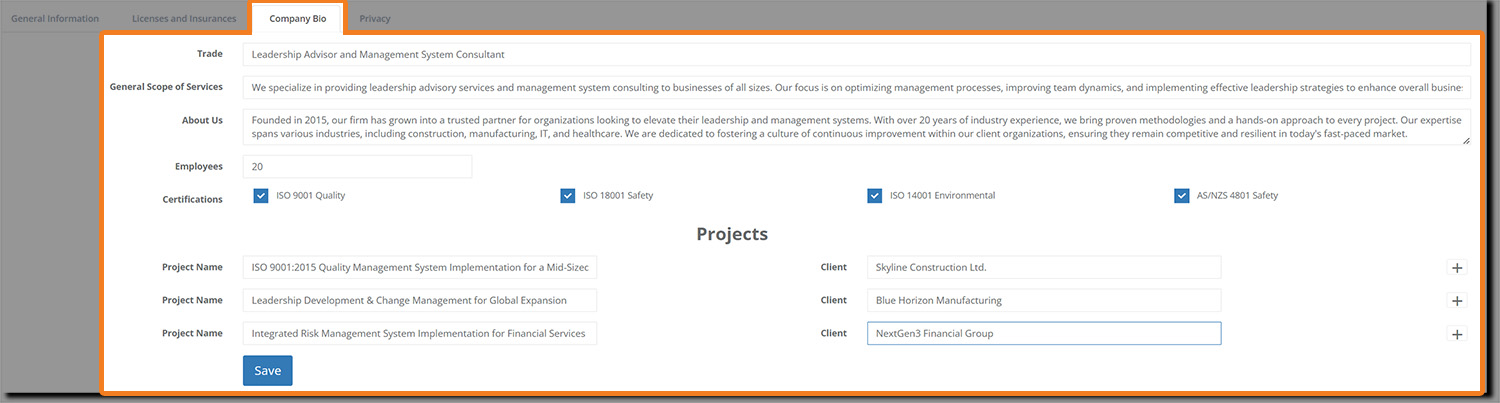
Naturally, your bio will be empty and just ready and waiting for you to add your own company information—Trade, General Scope of Services, About Us, etc.
To add more projects, click on the + button to the right of the client field.
Click on the Save button to save changes.
Privacy
The final tab in the Company Profile section is Privacy. Click on it and you’ll see:
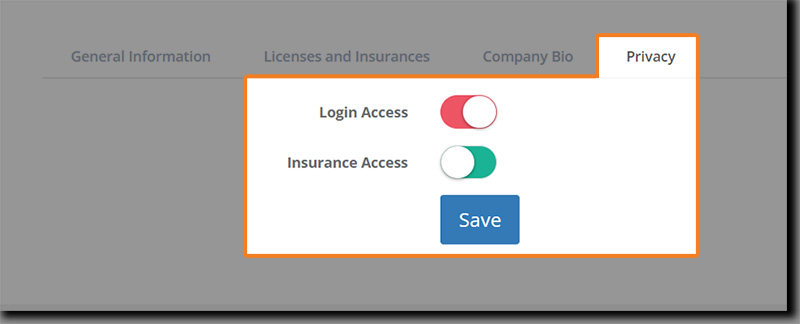
These items are both toggle options and are primarily used for when a company invites you to join them as a contractor.
Login Access – Determines whether you permit an authorised 3rd – party to login to and access your CASSA company account.
Insurance Access – This determines if an authorised 3rd-party can view and can assist you in adding your insurance details.
Toggle the options as required and once done, click on the Save button to save your changes and return to the main Company Profile dashboard.