CASSA
Projects
Add Project
This article walks you through the 6 steps for adding a project in CASSA including adding your general information, client, primary contact, employees, contractors, SWPS, etc.
Updated 2 weeks ago
What's covered in this article
This article contains the following (plus quick links to the relevant sections):
The client Projects section is designed to streamline the management of all activities related to a project within CASSA. However, before you can start managing your projects, you must first create one.
This procedure will walk you through, step-by-step, how to add a new project.
Here's a video where she show adding a new project as part of creating a SWMS:
Adding a Project
To add a new project, you must be logged into the CASSA dashboard.
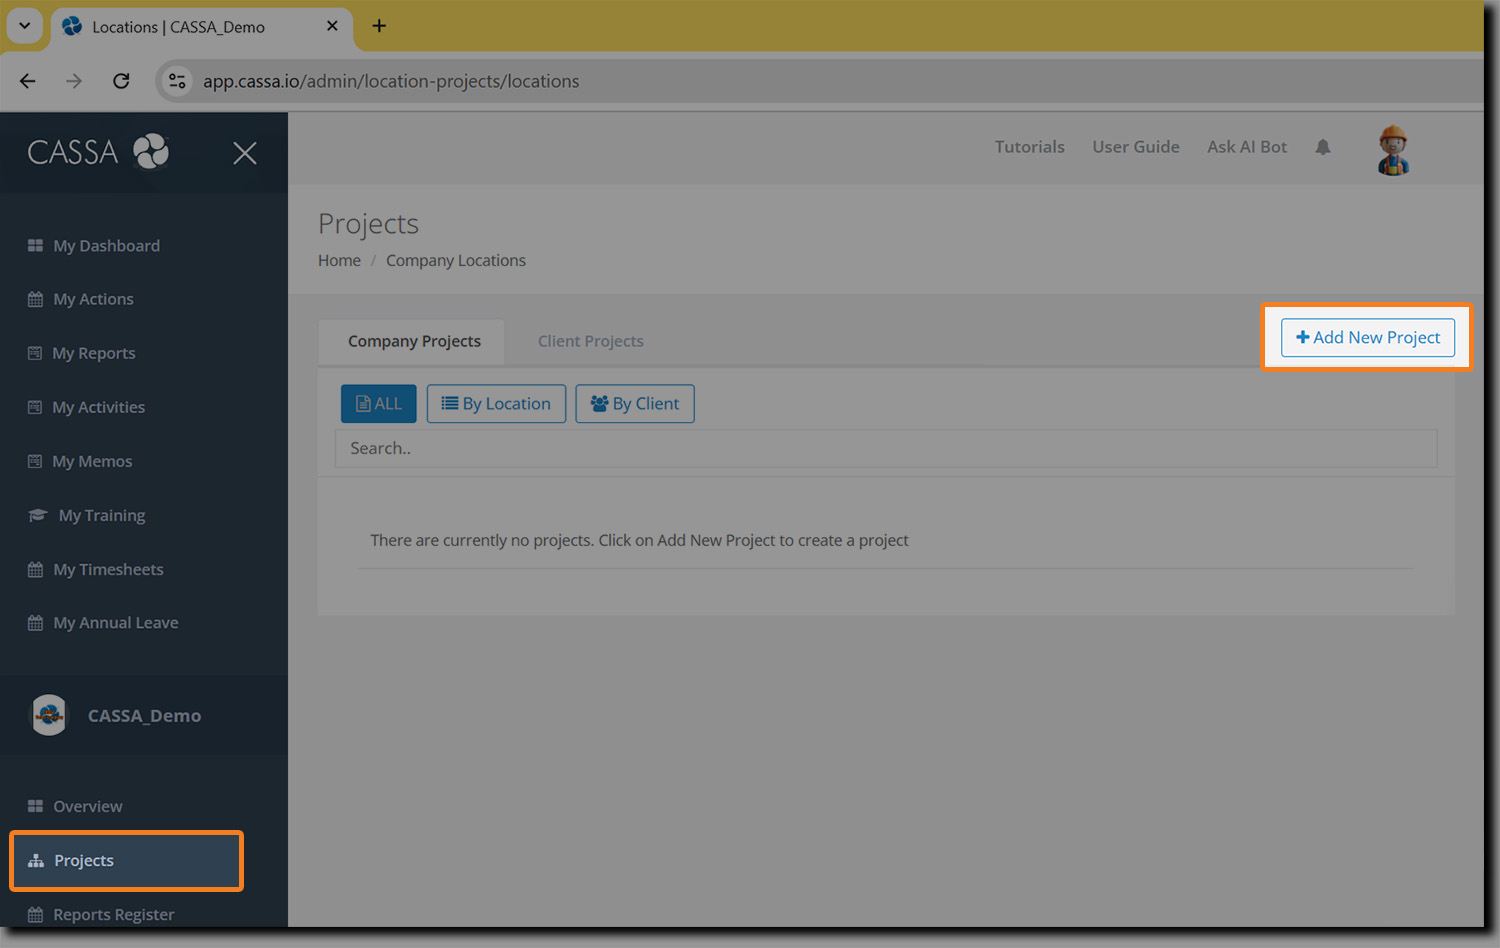
Click on Projects in the navigation bar and you will be taken to the main projects’ dashboard:
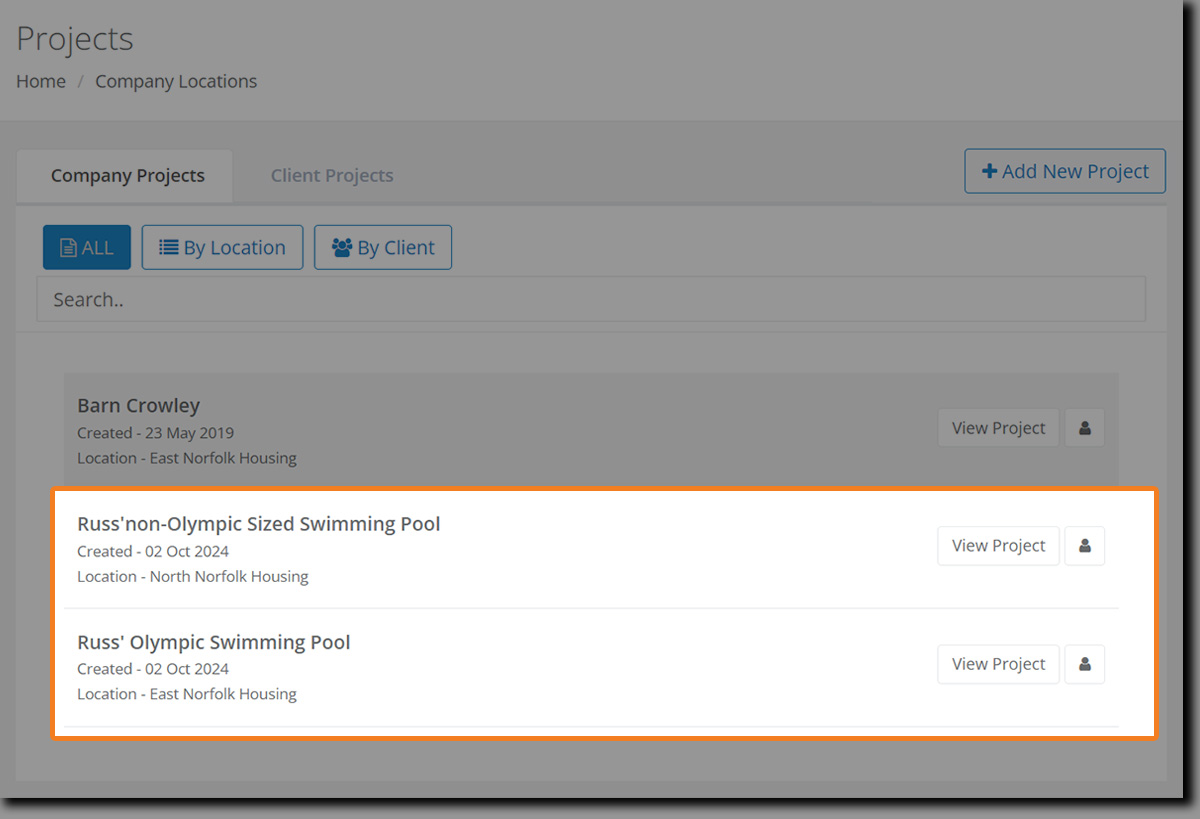
As you can see from the above image, I already have a project listed (Barn Crowley).
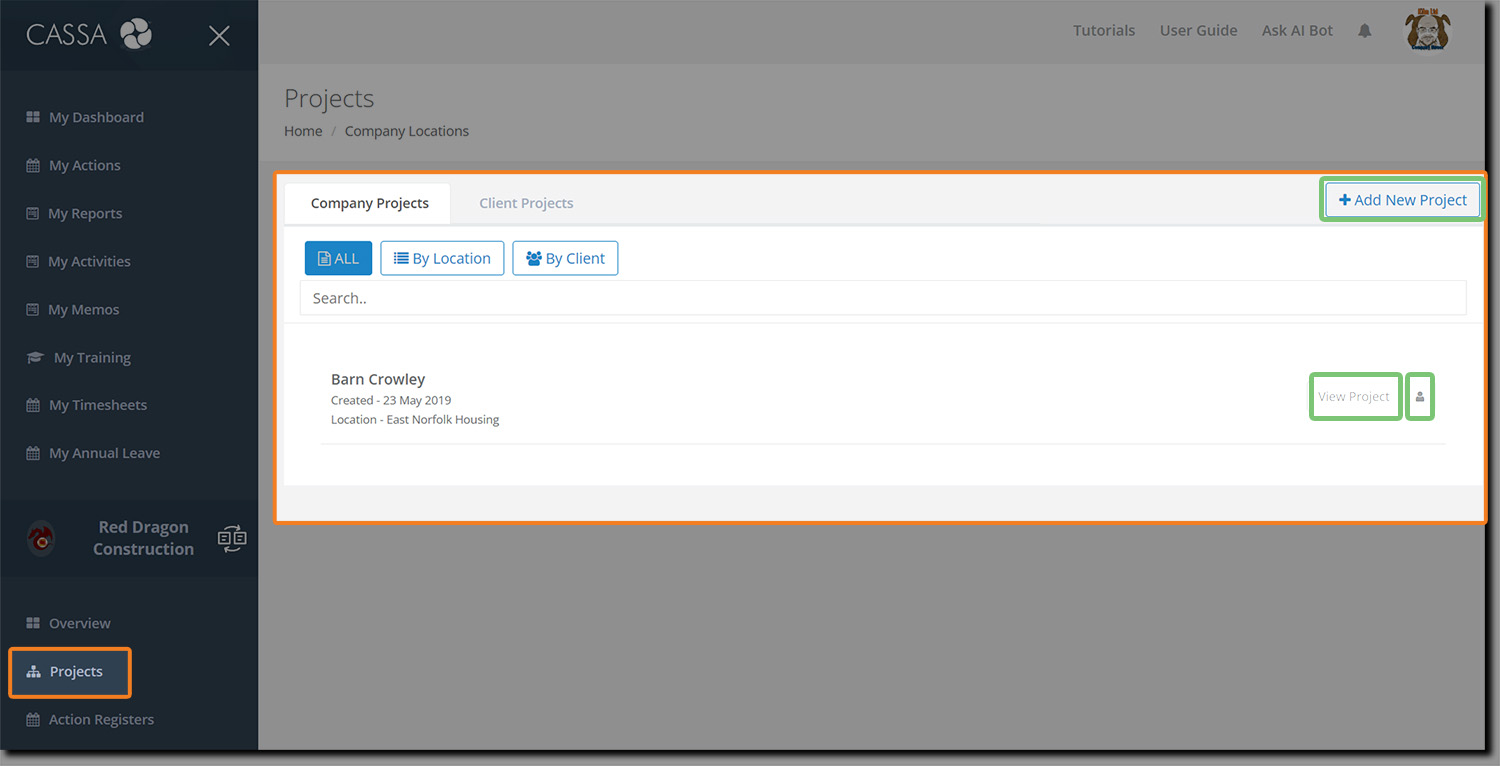
On this page you can also see:
The Company Projects and Client Projects tabs.
The All, By Location, and By Client filter buttons.
Within the individual project listing (Barn Crowley in this case), you have the View Project and view Assigned Users
The Add New Project button.
Click on the Add New Project button to create a new project. The screen will refresh, and you’ll be taken to the Add Project: Step 1 – General Information screen.
The image shows various project-related fields that you will need to complete but, for now, let’s focus on the 6 stages (or steps) for creating a new project.
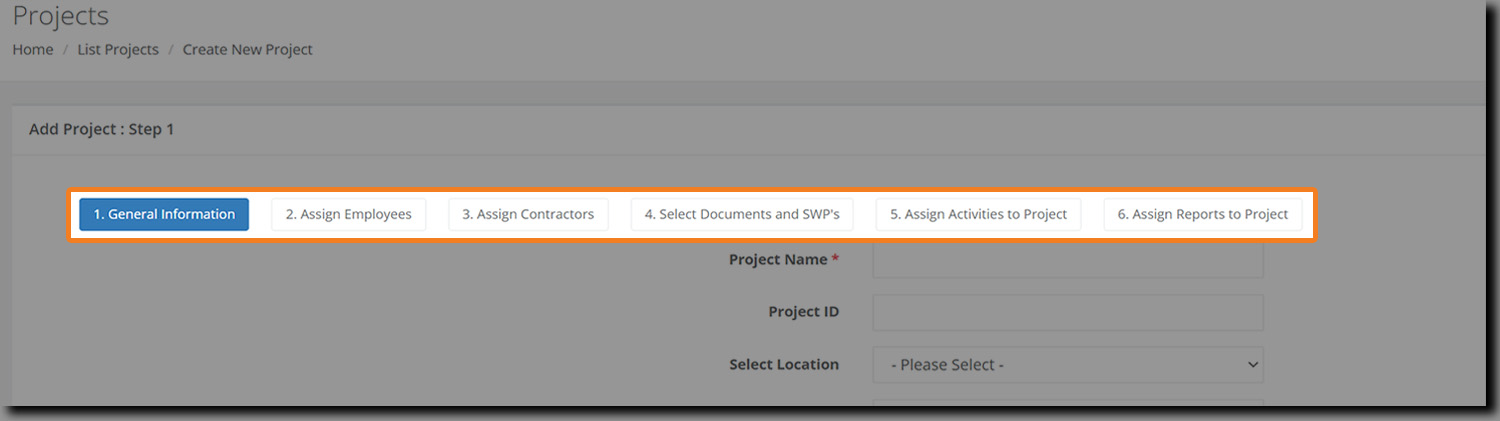
They’re ordered this way as it’s the best and most logical method of adding your project information (and to ensure you don't accidentally omit anything).
We’ll walk through them in turn.
Step 1: General Information
The General Information section displays by default whenever you add new project
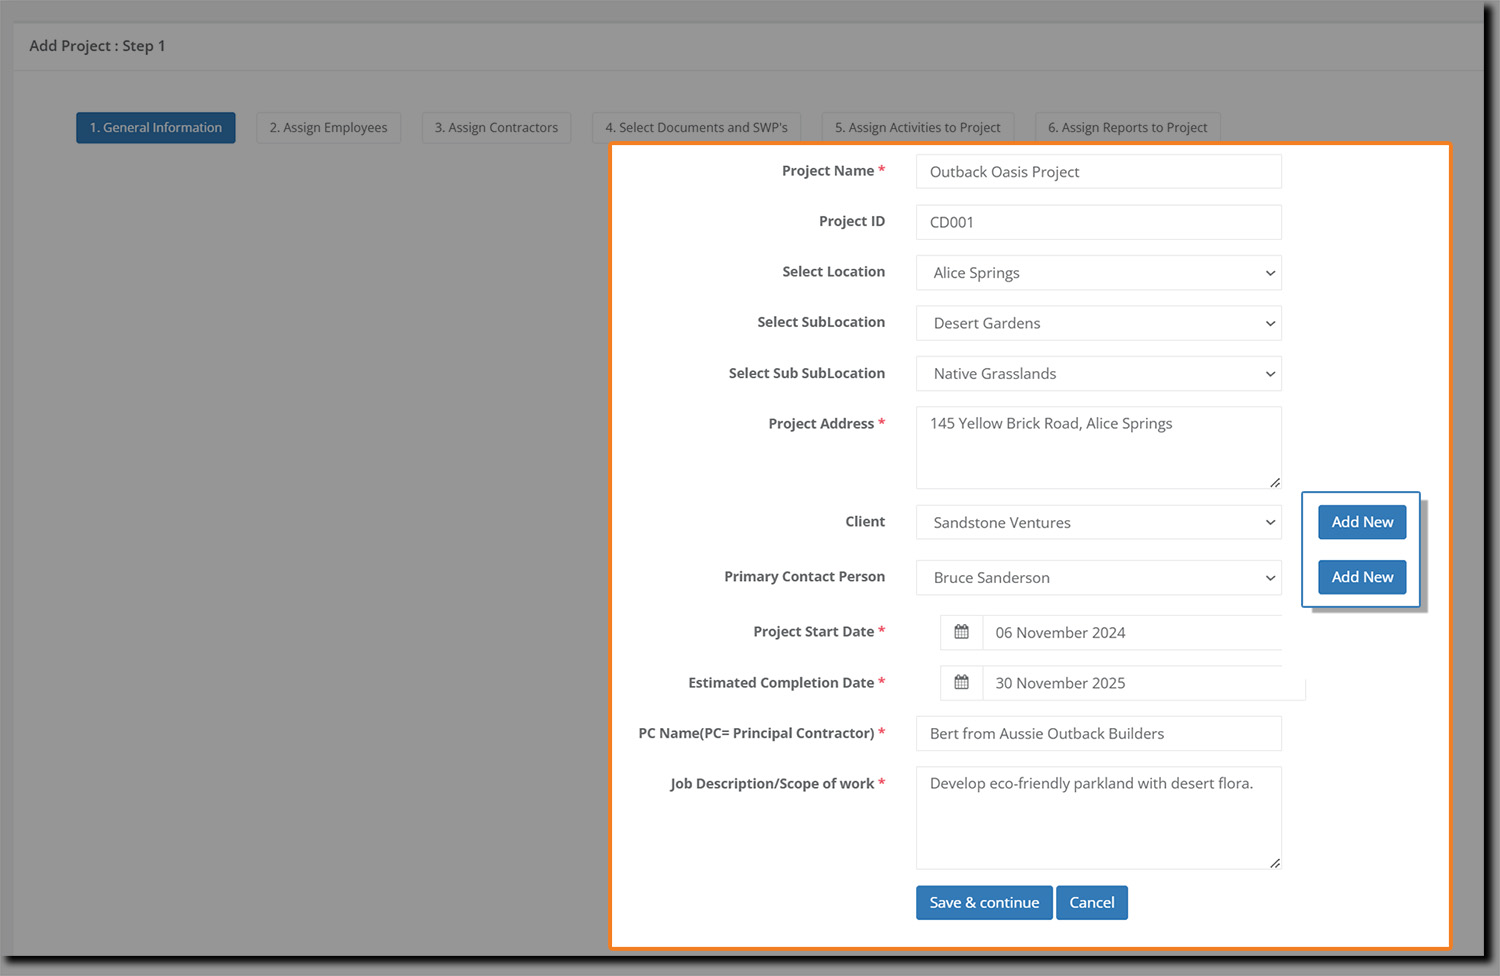
You must complete the following:
Project Name: This is a mandatory field and, as per the above, should be short, descriptive, accurate, and unambiguous.
Project ID: Enter your own unique ID number for the project (this doesn't come from CASSA).
Select Location: Choose the location of the project. (You can add project locations in Administration > Project Management.)
Select SubLocation: Select the sub-location of the project (as applicable).
Select Sub SubLocation: Select the sub sub-location of the project (as applicable).
Project Address: Enter the complete address of the project. This field is mandatory.
Client: Select the client’s name from the drop-down list. (You can add clients in Administration > Clients).
Note: The Add New client button next to the field. Click on it to open the Add New Client dialog window (see below).
Primary Contact Person: Select the person who can be contacted for project coordination.
Note: The Add New contact button next to the field. Click on it to add a new primary contact.
Project Start Date: Enter the start date of the project.
Estimated Completion Date: Enter the estimated completion date of the project.
PC Name: Enter the name of the Principal Contractor.
Job Description/Scope of Word: Enter a meaningful description or scope of work for the project, including any relevant links or websites. This description is inserted into the SWMS you generate in step 4, below.
After filling in all the information, click the "Save and Continue" button to save your changes and proceed to Step 2: Assign Employees.
Add Client
To add a new client:
Click on the Add New client button to open the dialog where you can add your client's details directly into the form:
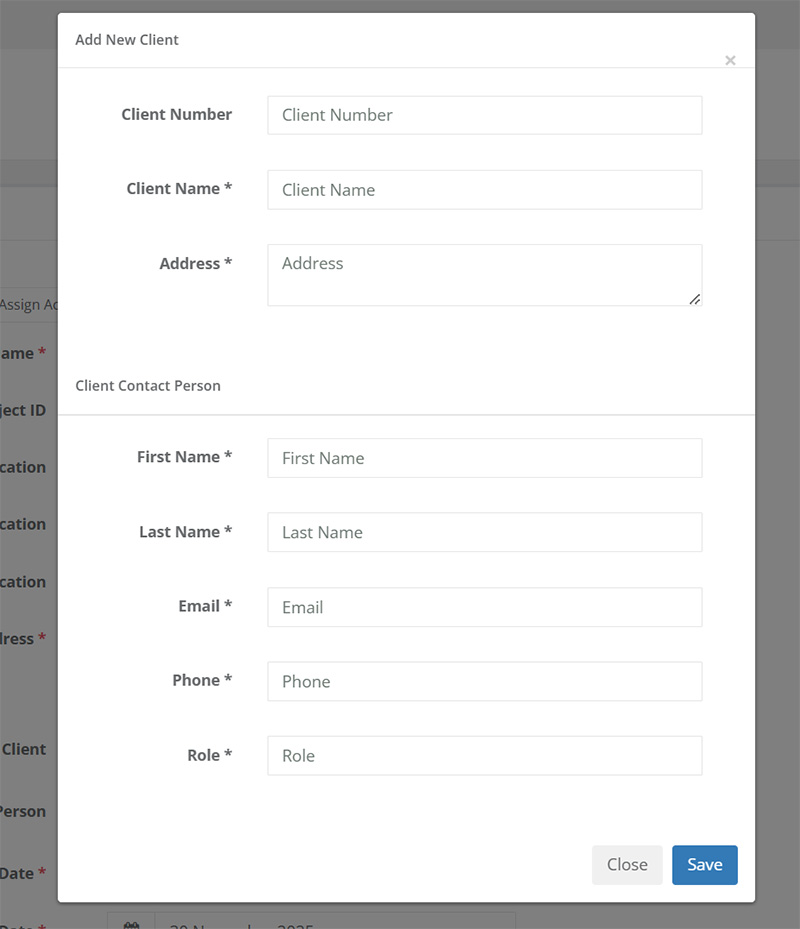
Note: all fields are mandatory.
Fill in your client's details and then click on the Save button to add this client and return to the General Information page.
Once you've added a client, you can now add the Primary Contact Person's details.
Add Primary Contact Person
To add a Primary Contact Person:
Click on the Add New button next to the field.
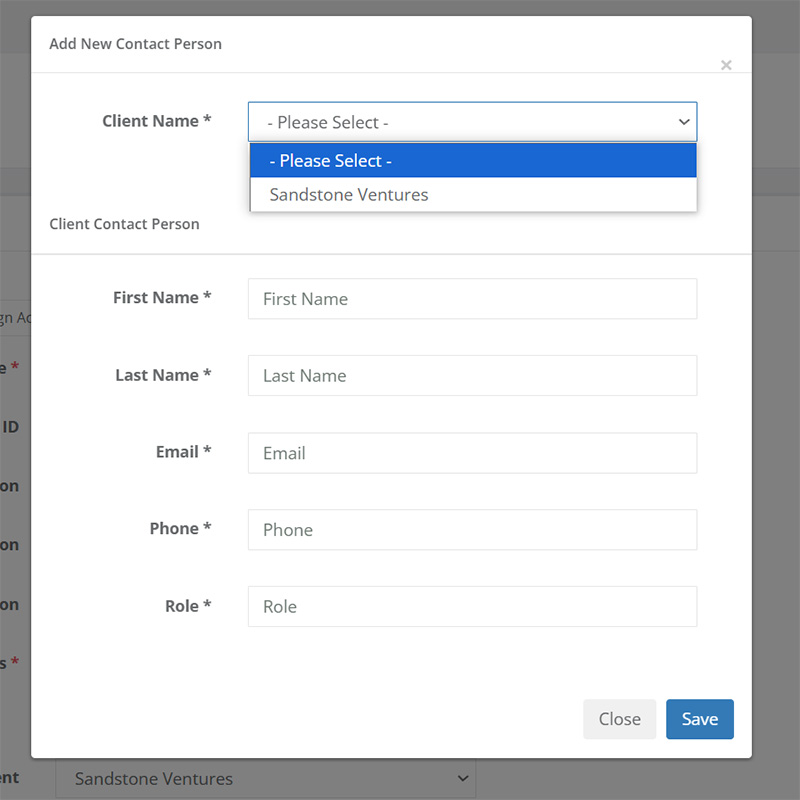
Select the client from the dropdown list, and then add the Client Contact Person's details.
Click on Save to close the dialog and to assign that person as the primary contact, and you'll be taken back to the General Information tab.
Step 2: Assigning Employees:
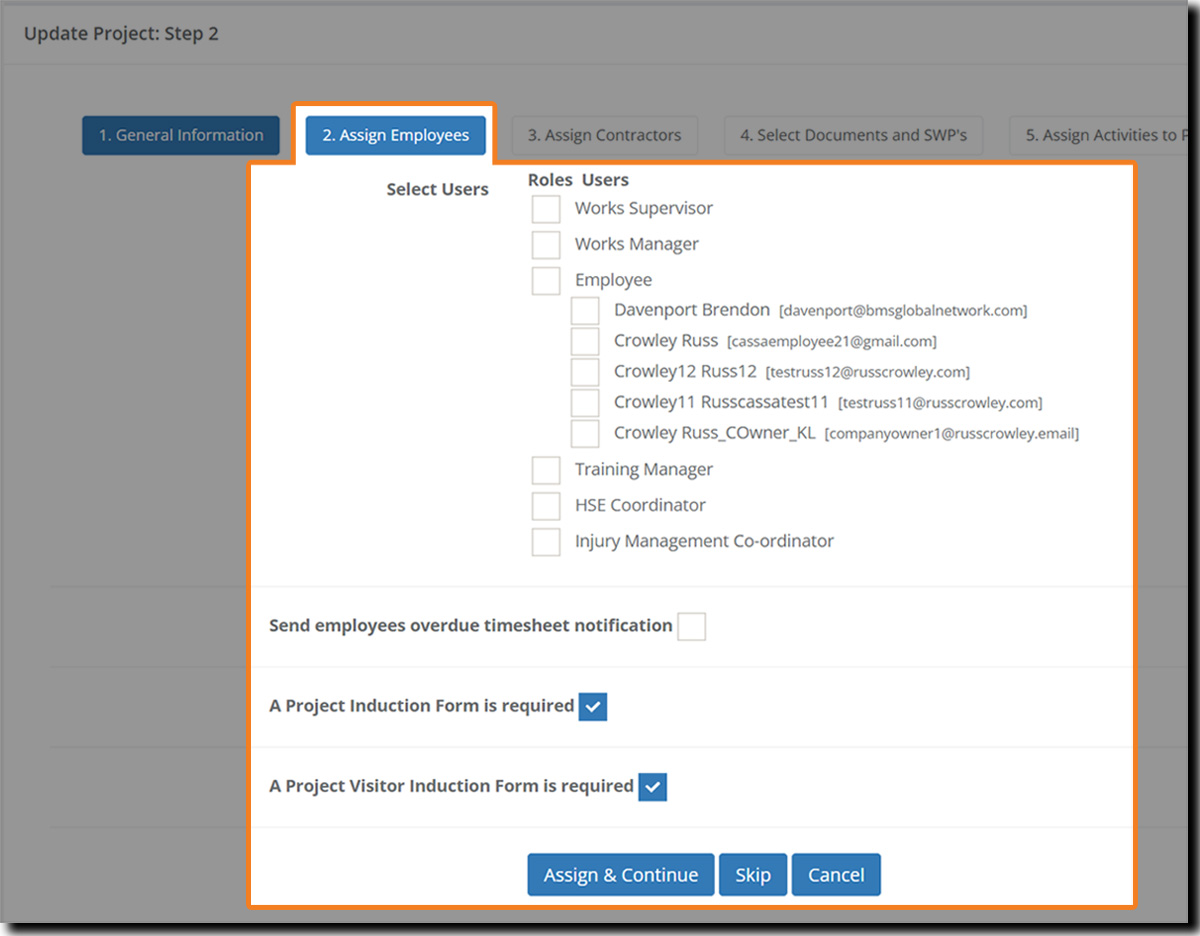
The Assign Employees section is where you will select your team and assign their project roles.
Note: You can skip this, and subsequent, steps if you’re not quite ready (or will have more to add later). Just click on the Skip button.
📘 Adding SWMS
Note: When you later add a SWMS, you will need to assign this to at least 1 employee. (To assign roles at a later date, check out the Assign Roles article.)
Allocating User Roles
What you see on this screen will depend on who’s been added to your system and what roles they have been assigned to. Several of these roles are default CASSA roles and you should be assigning them to your staff:
Work Supervisor
Work Manager
Training Manager
Company Admin
HSE Coordinator (Health, Safety, and Environment)
Injury Management Co-ordinator
To allocate your employees to these default roles, in the CASSA dashboard go to Administration > Users Management > User Role > Role Management and follow the steps there (this will be covered in another article soon).
From the image above, you can see several users are already listed under various roles.
Click on the respective check boxes to select the user(s) and your Assign Roles dashboard will look like:
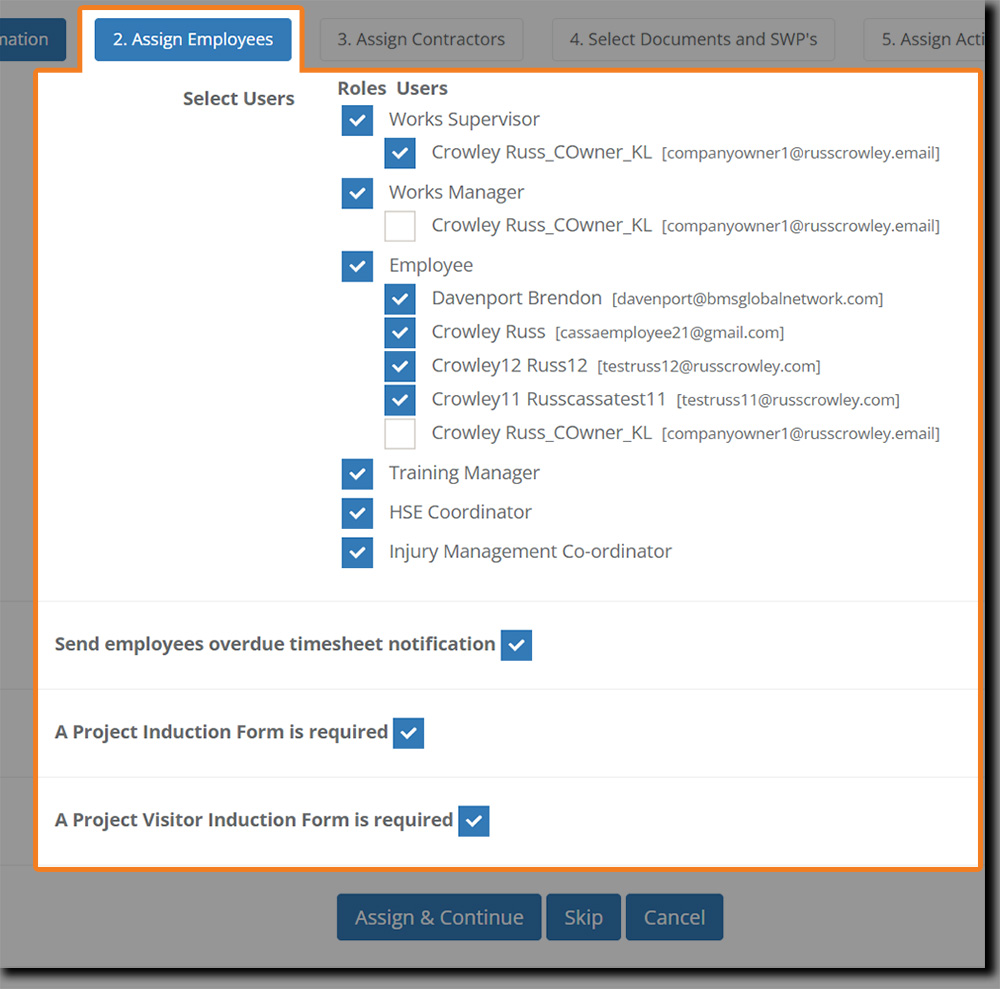
Once you’ve assigned your team their roles, you can also choose whether to send them an overdue timesheet notification, a Product Induction form, and a Project Visitor Induction form.
Send employees overdue timesheet notification: If employees are doing timesheets and don't submit by 6pm, they'll get a notification via email and via the app.
Product Induction Form: This is available in the full CASSA implementation system.
Project Visitor Induction Form: This is also available in the full CASSA implementation system.
Make your selection as appropriate and, when ready to continue, click on the Assign & Continue button. Your employees will then receive an email notification that they've been assigned to the project.
Step 3: Assigning Contractors
In step 3, you can assign external contractors to your project.
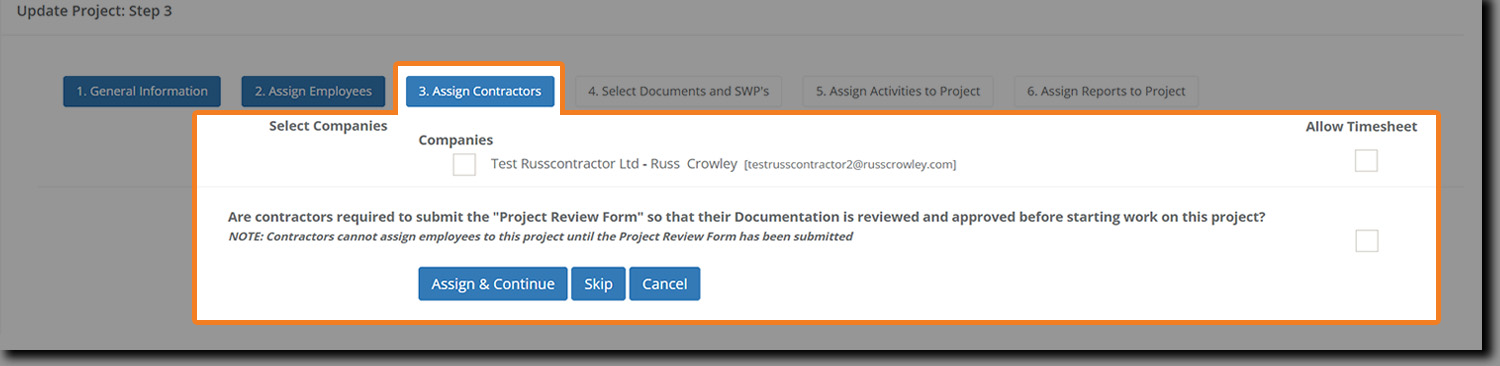
Select the appropriate company from the provided list.
If the contractor's name isn't listed, you can invite them directly using the Invite New Contractor button in Contractor Management (accessible from the main navigation).
To allow selected contractors to submit timesheets, check the box next to each company in the "Allow Timesheet" column.
If contractors are required to submit the Project Review Form so that their documentation is reviewed and approved before starting work on this project?" then also check this box. (This is available in the full CASSA implementation system.)
When checked, the allocated review form will display where you can then assign it to your respective users to review and acknowledge the correspondence.
Note: Contractors cannot assign employees to this project until the Project Review Form has been submitted.
When complete, click on the Assign & Continue button.
Step 4: Selecting documents and SWPs
Step 4 is where you select the necessary project documentation.
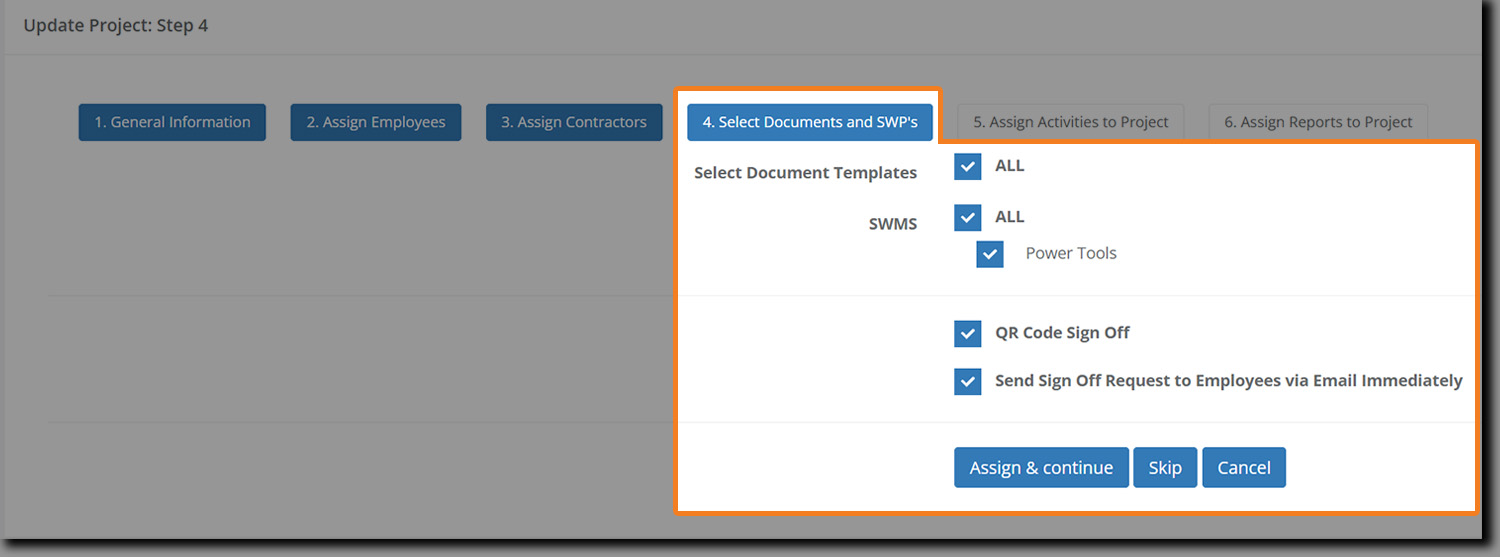
Select the required document templates and Safe Working Procedures, and then either select or deselect the QR Code Sign Off and Send Sign Off Request to Employees via Email Immediately boxes.
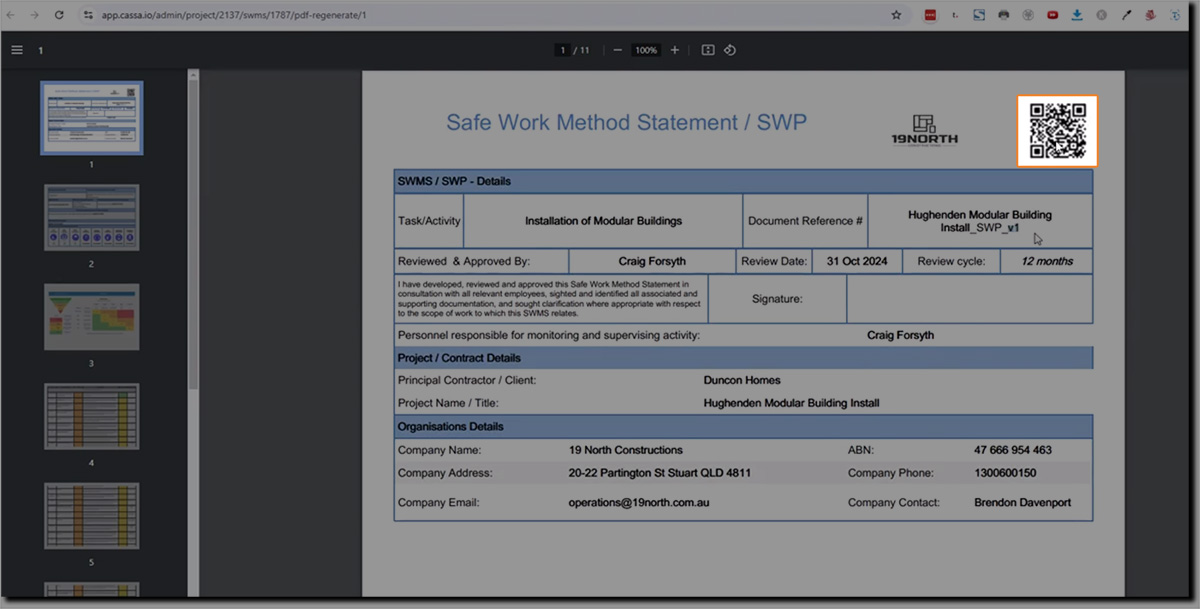
QR Code Sign Off: Places the Project QR code into the top right corner of the SWMS (see image below).
Send Sign Off Request to Employees via Email Immediately: Sends your selected employees an email instructing them to sign off on the SWMS.
Once complete, click on the Assign & Continue button.
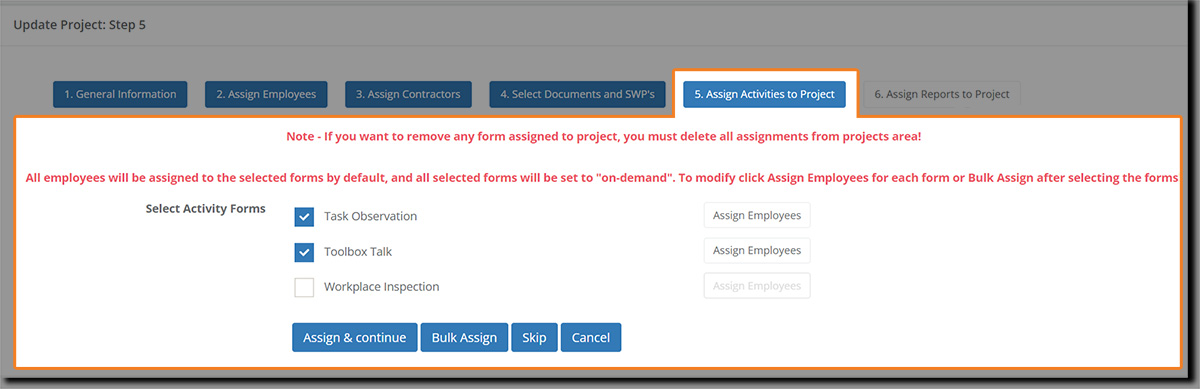
Step 5: Assign Activities to Project
In step 5, you can assign specific activities to the project.
As with previous steps, and as the below image shows, you can select the required activity forms and can then assign employees to those activities.
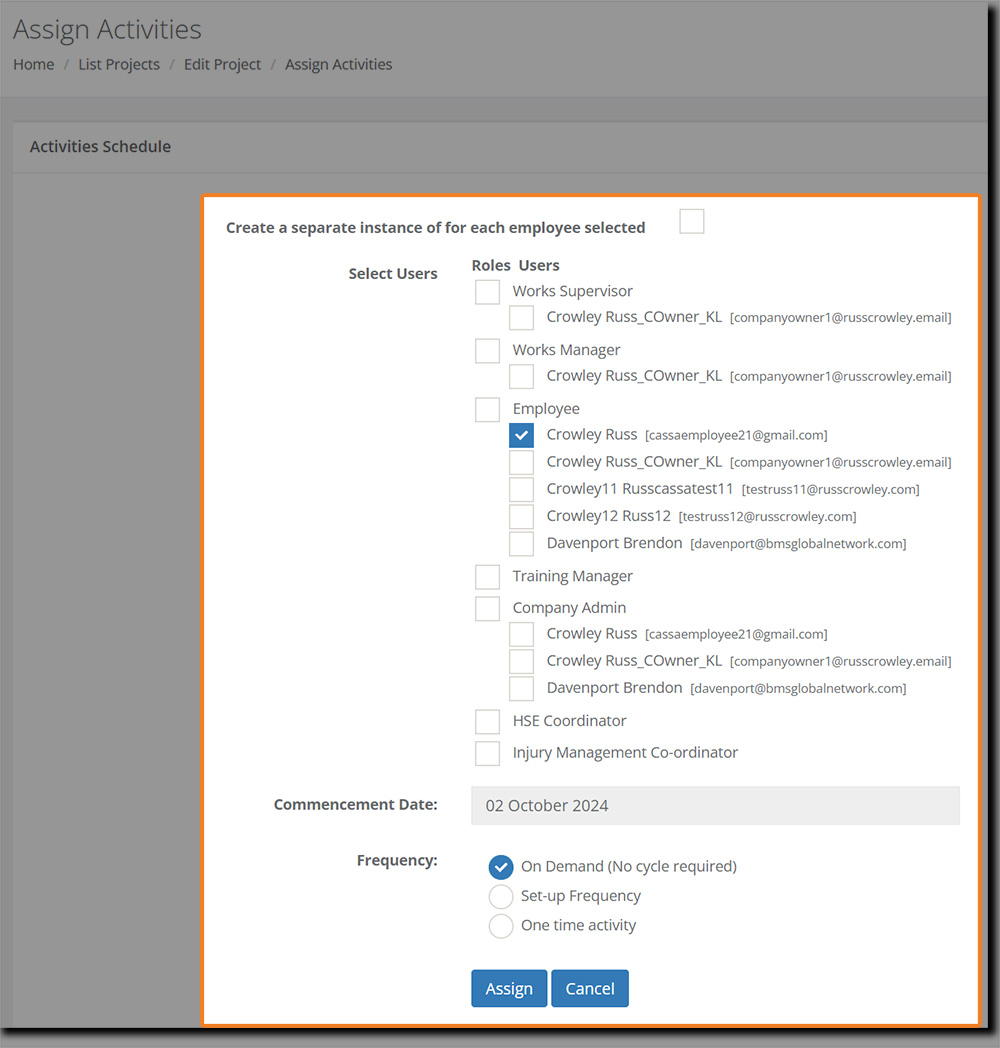
Select the required activity form checkbox and then click on the Assign Employees button to perform that task. You will see:
As before, you can select users by name or by role.
The commencement date is today’s date, and you can select the activity Frequency from one of the 3 options:
On Demand (No cycle required)
Set-up Frequency
One time activity.
Make your selection and then click on Assign to close the schedule and return to Step 5 or click on Cancel to close the schedule without making any changes.
Once you’ve completed assigning activities to projects click on the Assign & Continue button.
Step 6: Assign Reports to Project
In the last of the 6 steps to adding a new project, we will assign reports to the project.
Reports are created in Administration > Custom Report Forms. However, at present, though no reports have been created for this demo account, the functionality here will be the same as with previous steps.
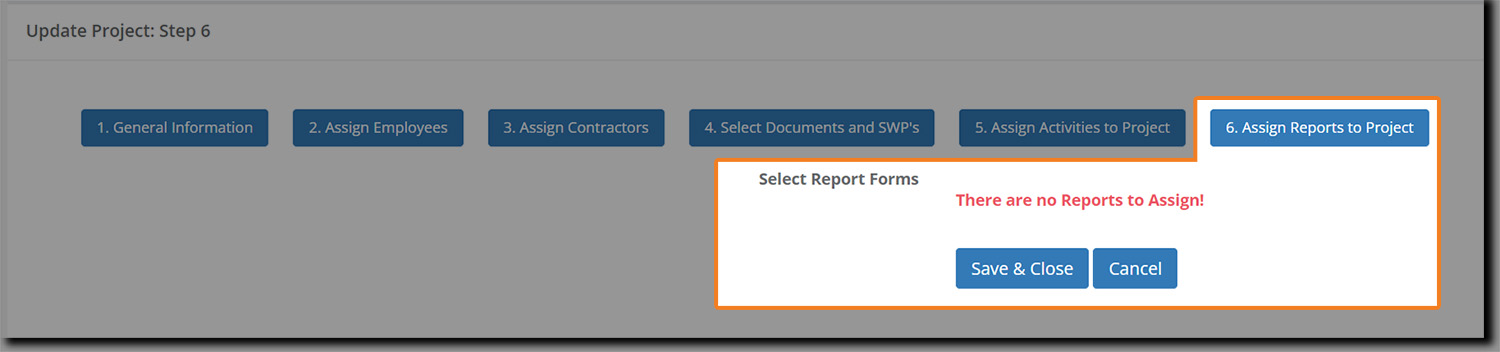
Once you’ve finished assigning reports to your project, click on the Save & Close button.
The screen will refresh, you’ll be taken back to your project dashboard, and your just-added project will be added to the list of available projects: