CASSA
Plant & Machinery
Plant & Machinery
This article guides you on adding and managing your plant and machinery items, including operator checklists, maintenance actions, etc.
Updated 1 day ago
What's covered in this article
This article contains the following (plus quick links to the relevant sections):
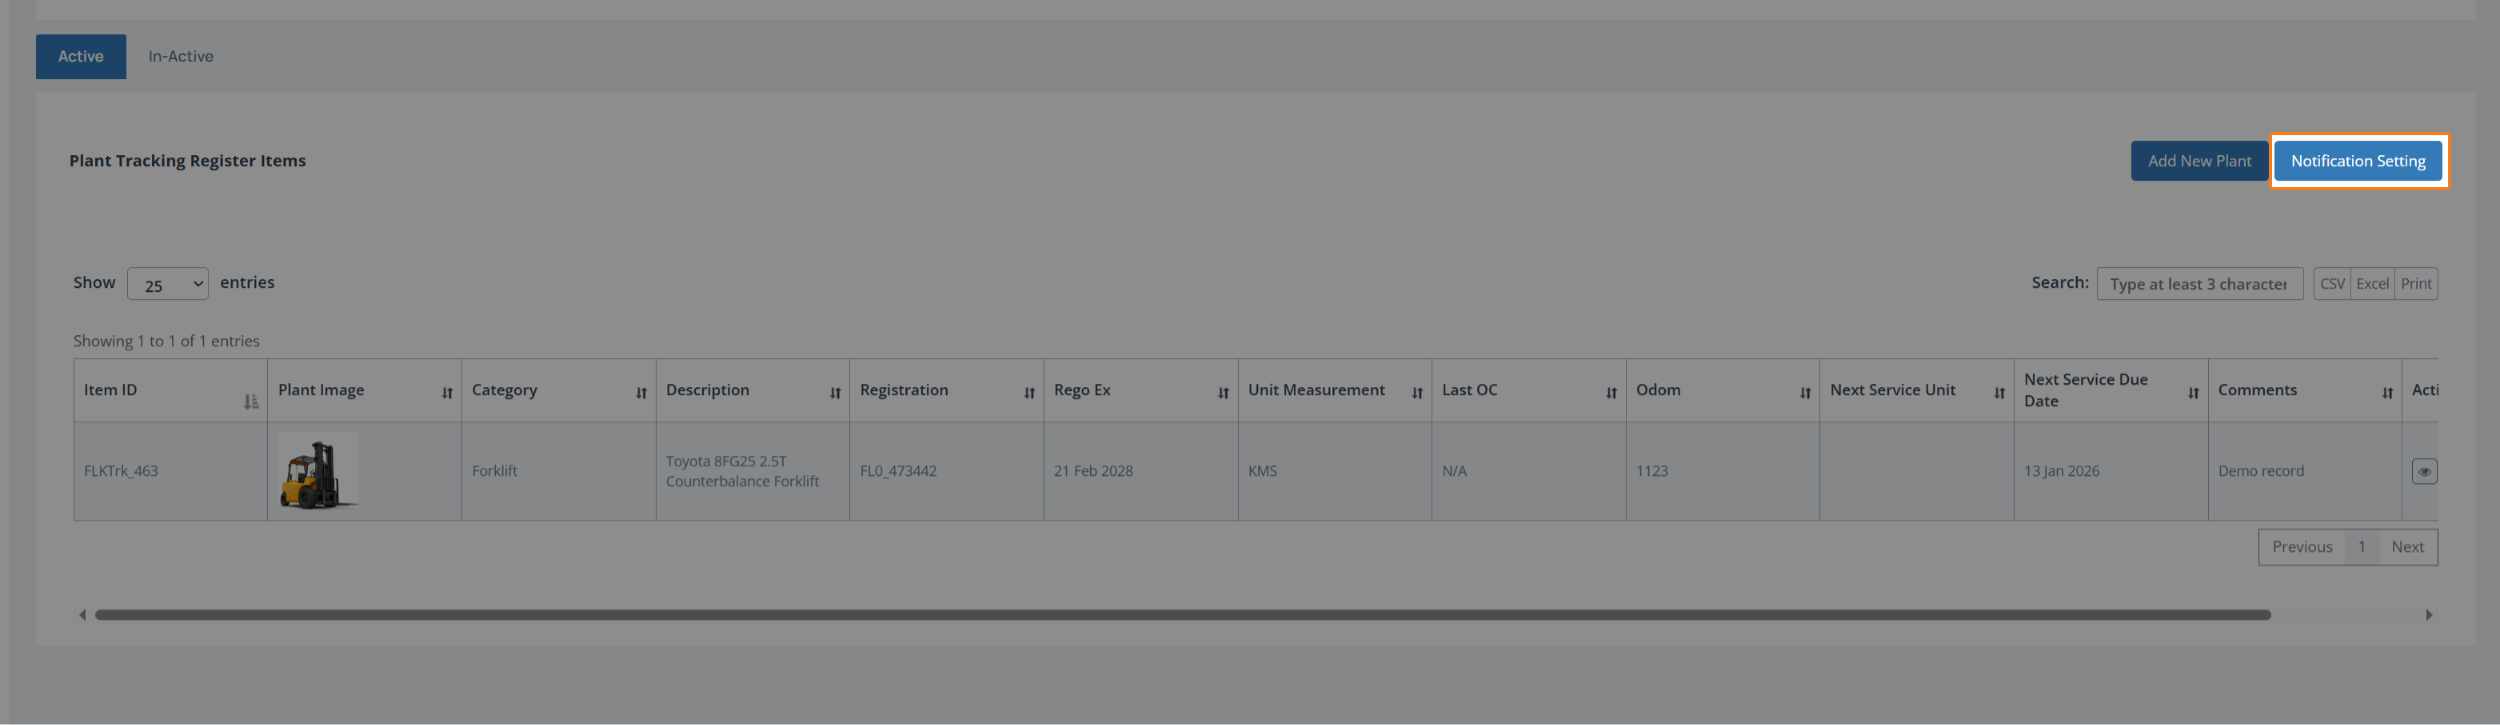
To access the Plant Tracking Register, click on Plant & Machinery in the main navigation and the register dashboard will show:
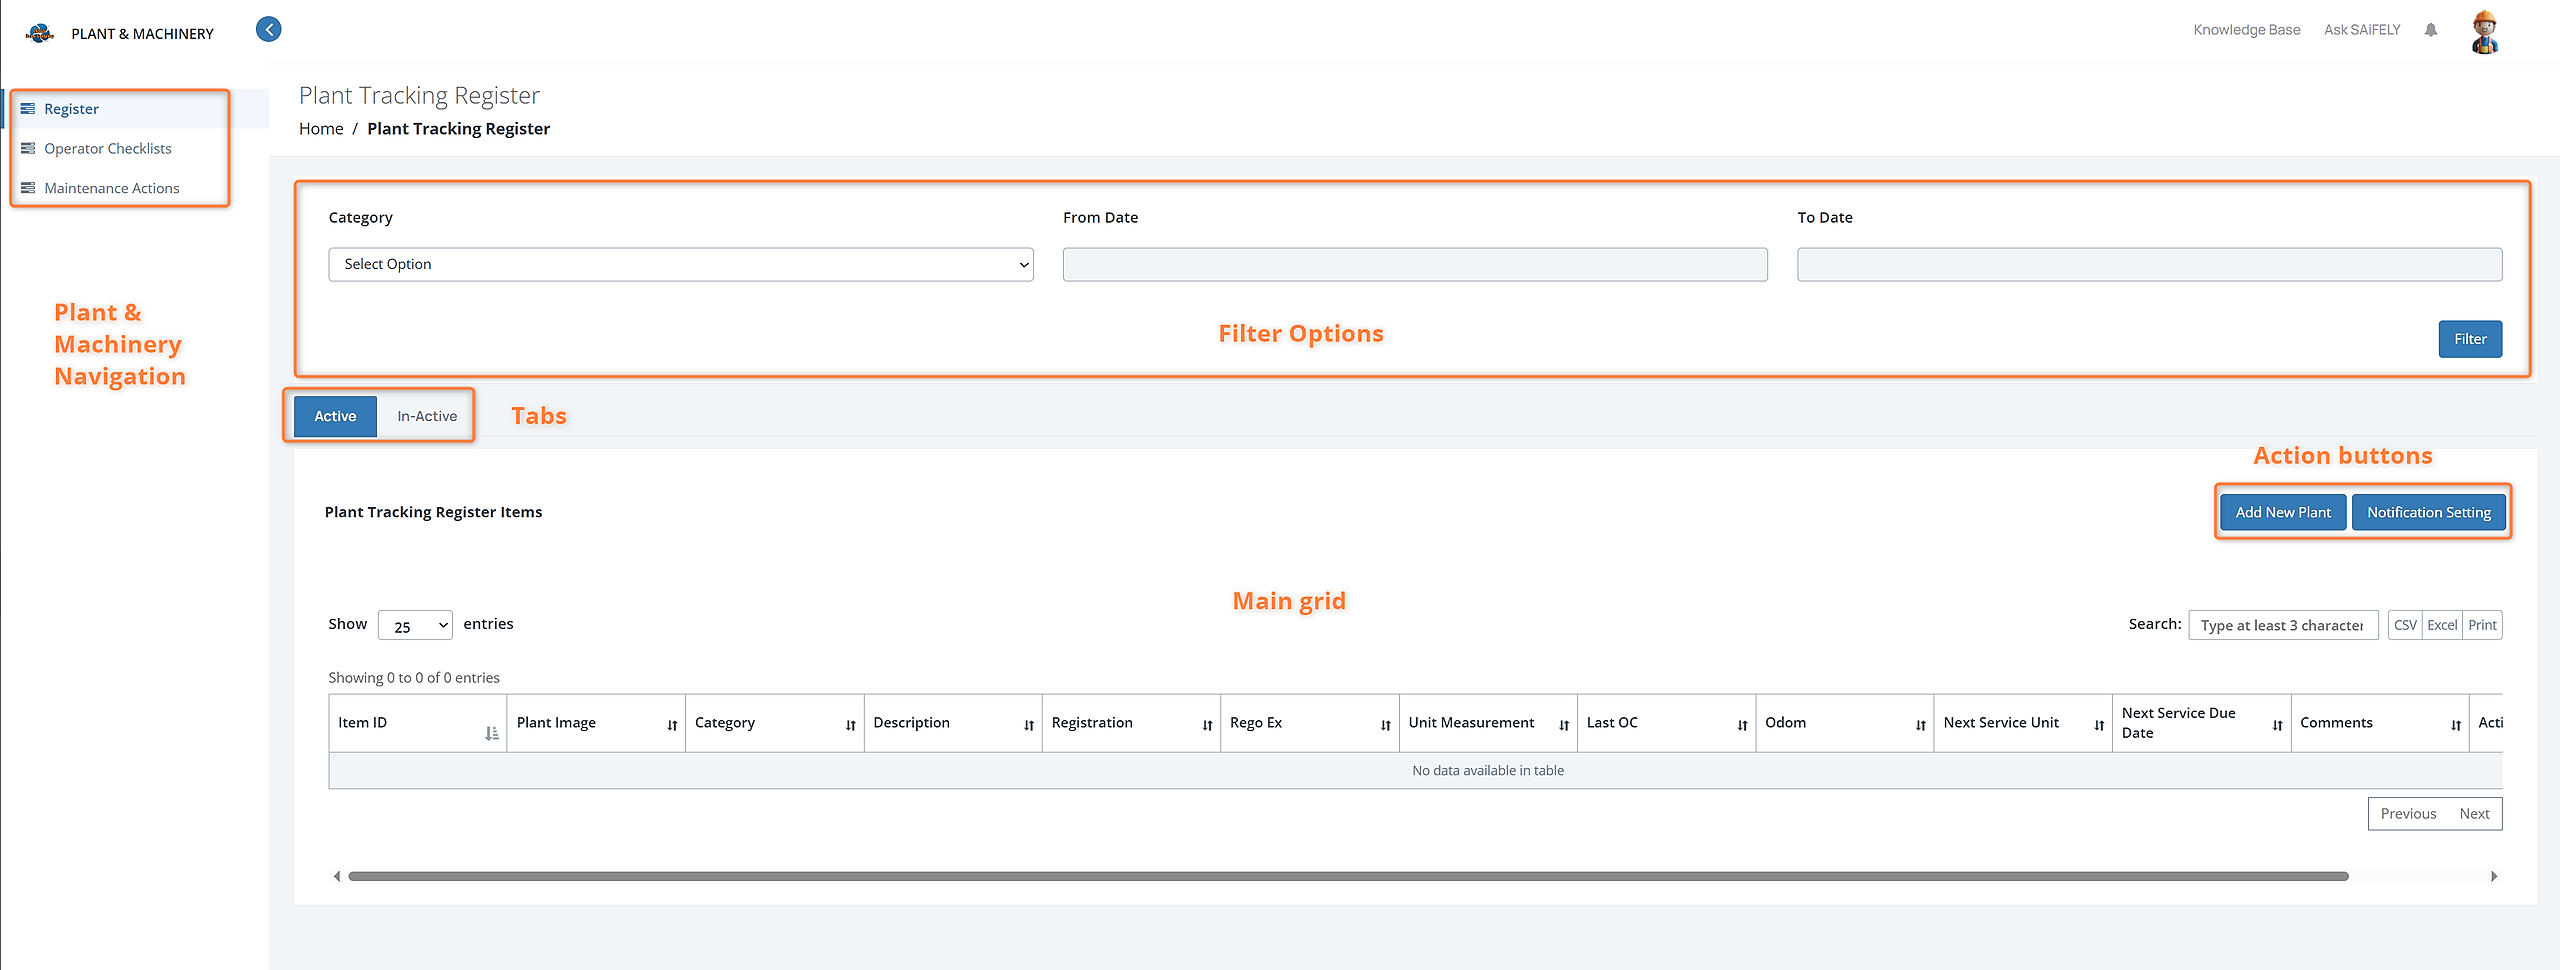
Dashboard
As you can see in the dashboard, we have:
The Plant & Machinery navigation including Register, Operator Checklists, and Maintenance Actions
Filter options, including Category and To and From dates
Active and Inactive tabs
Add New Plant and Notification Settings action buttons.
Main grid display.
We’ll start with the register
Register
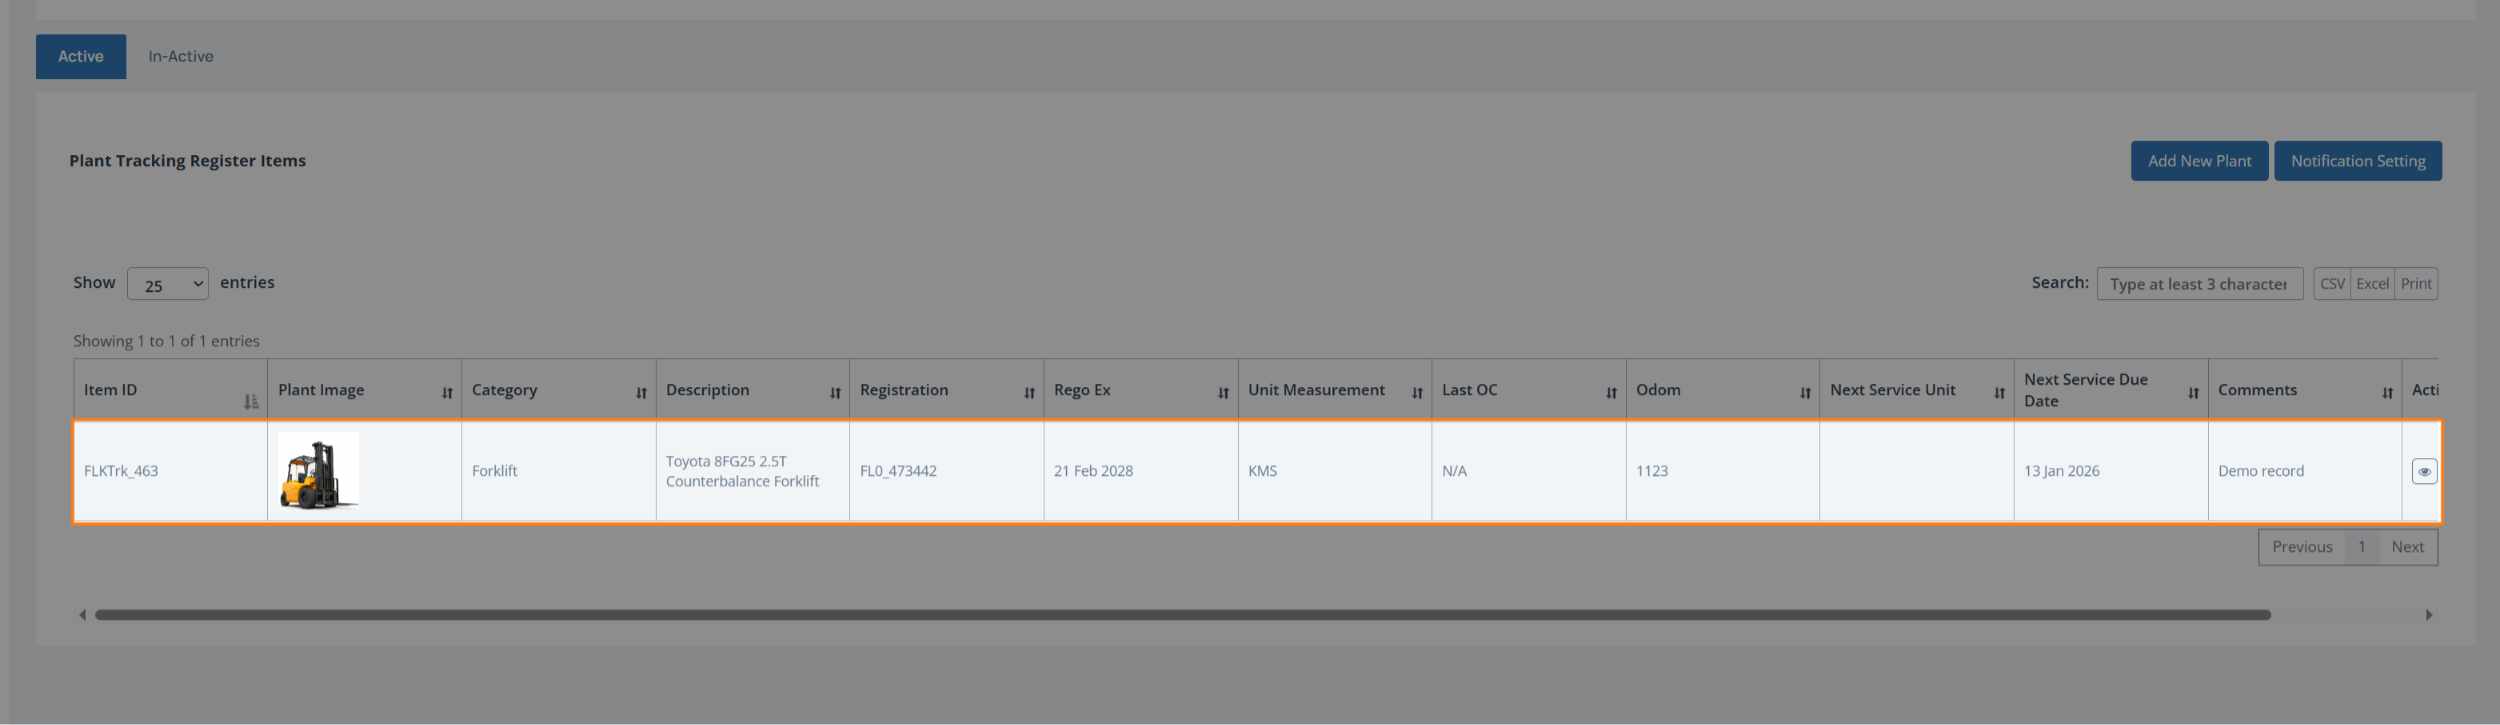
The main grid display will show a list of all your registered plant and machinery items and added details, including Item ID, Plant Image, Category, Description, Registration, Rego Ex, Unit Measurement, Last OC, Odom, Next Service Unit, Next Service Due Date, Comments, and Action.
Add New Plant
To add a new plan item:
Click on the Add New Plant button and you’ll see the Custom Plant Tracking form:
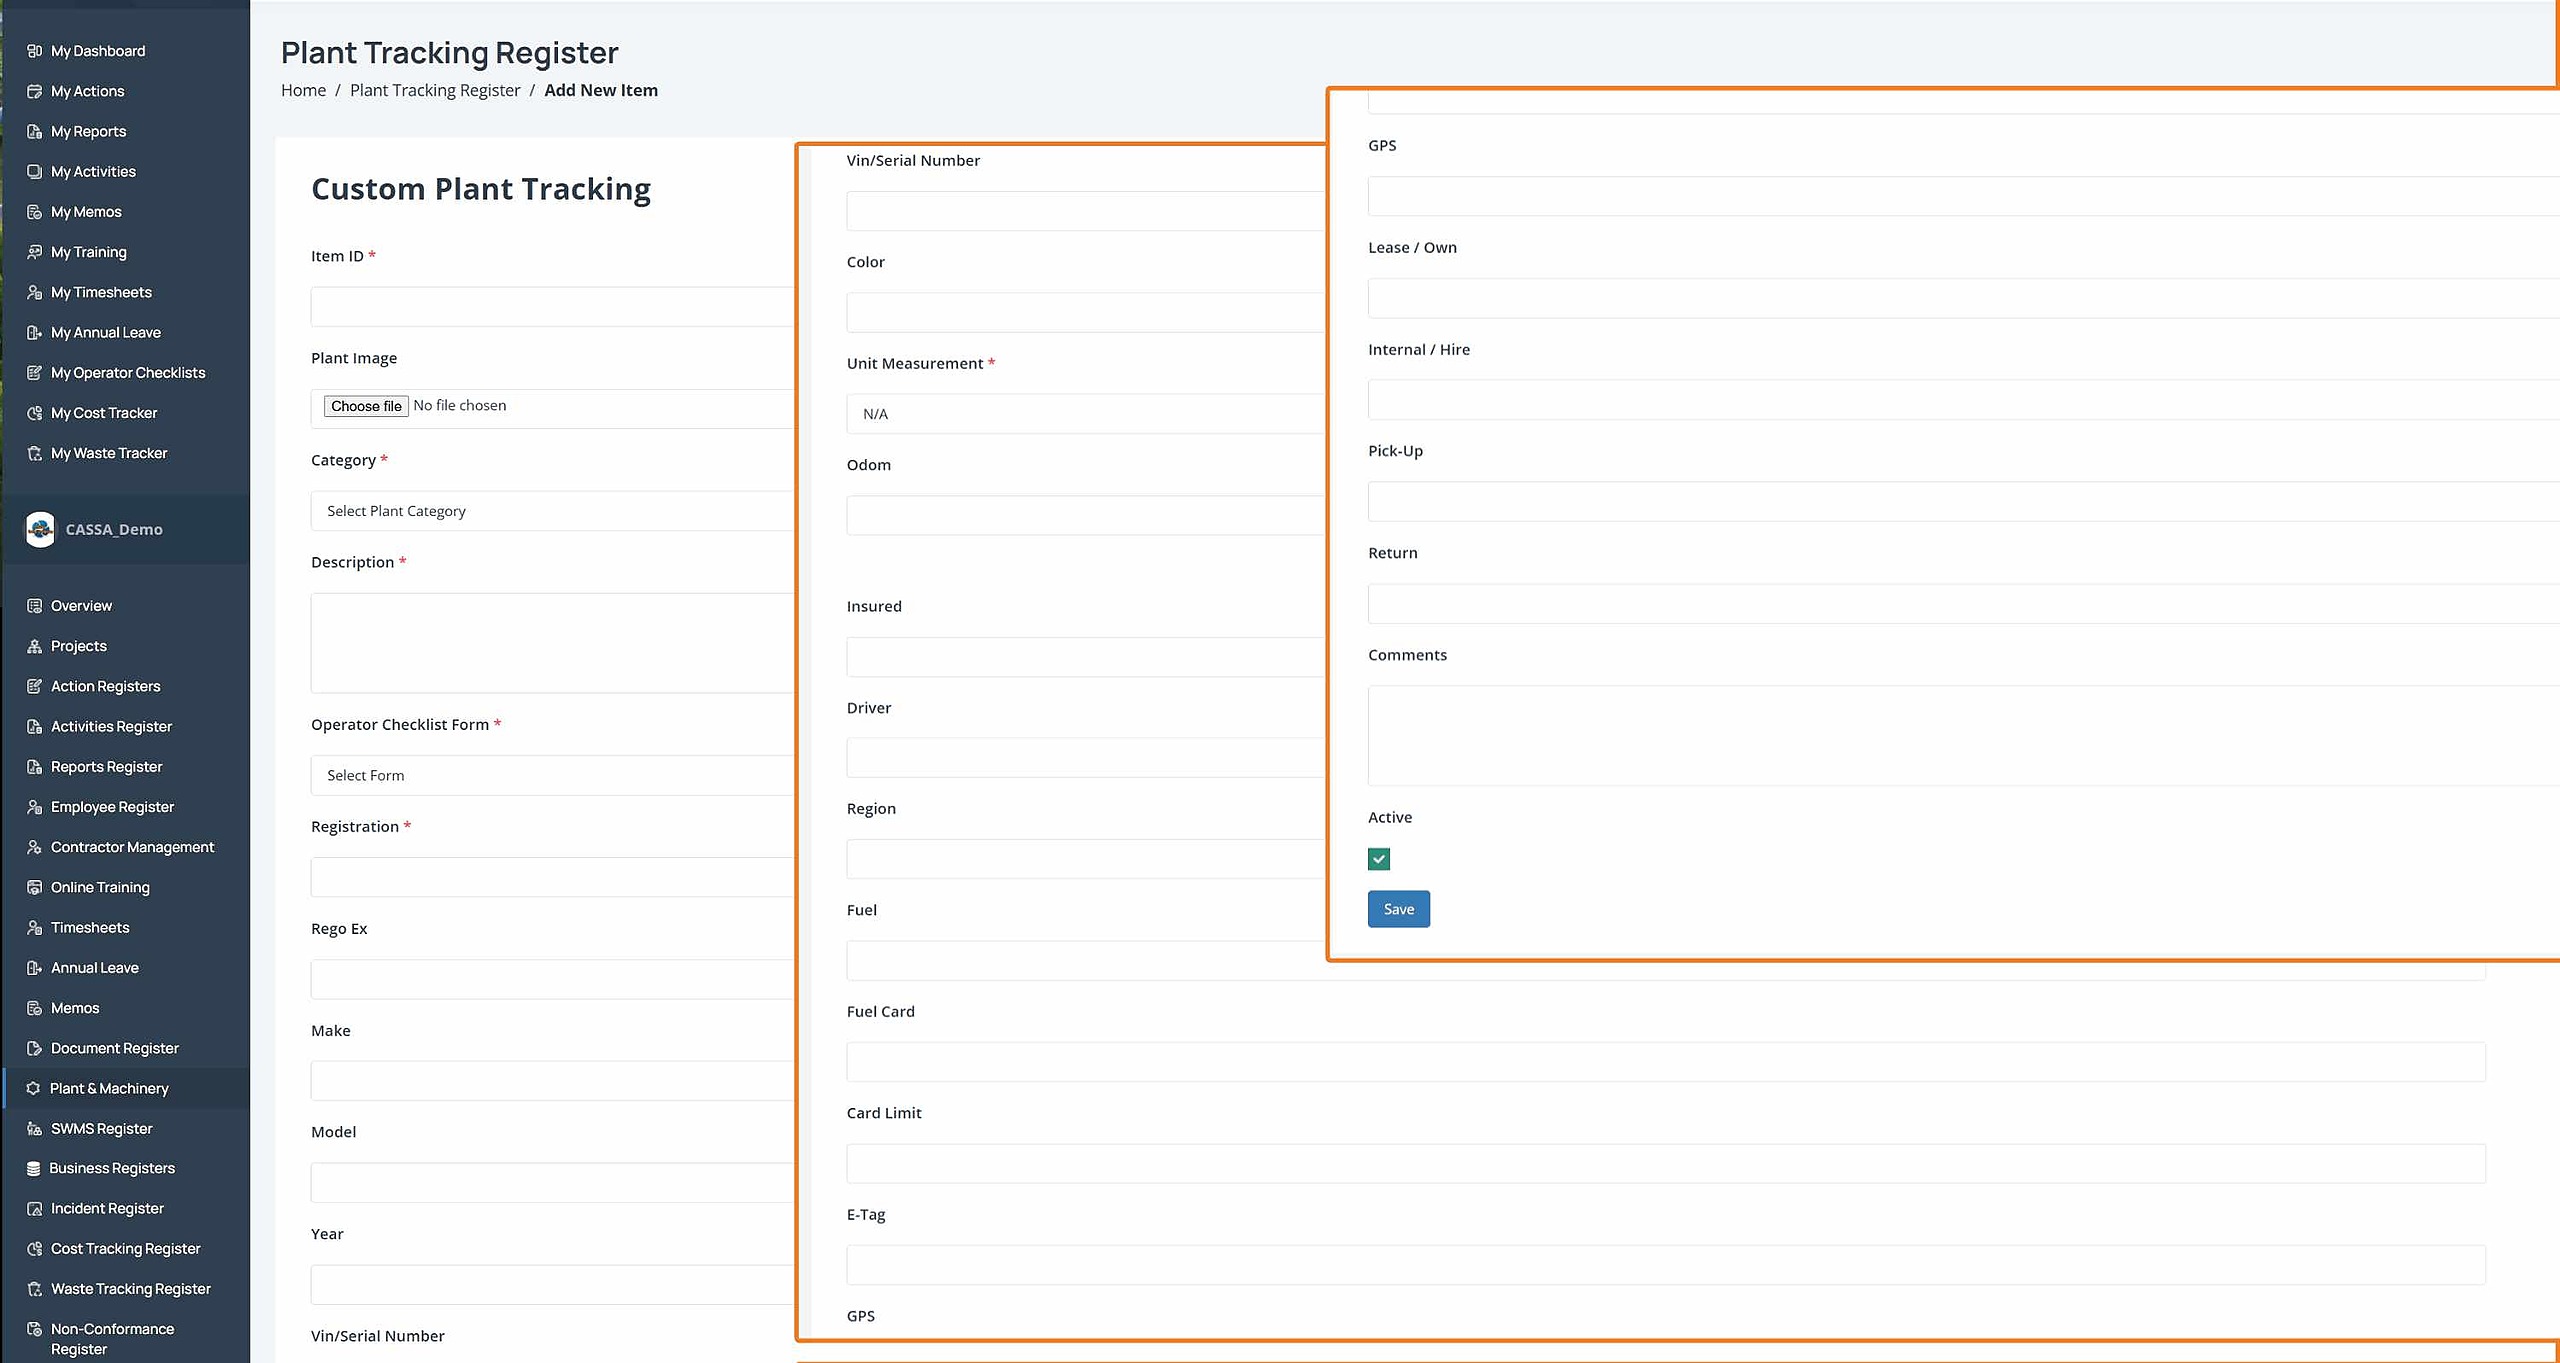
As you can see, there are several fields to complete and, as always with CASSA, the more information you can add, the better it’ll work for you hereafter.
You’ll notice the ‘Active’ checkbox at the end. Deselect this if you’re adding machinery that is currently inactive (inactive items do not have notifications).
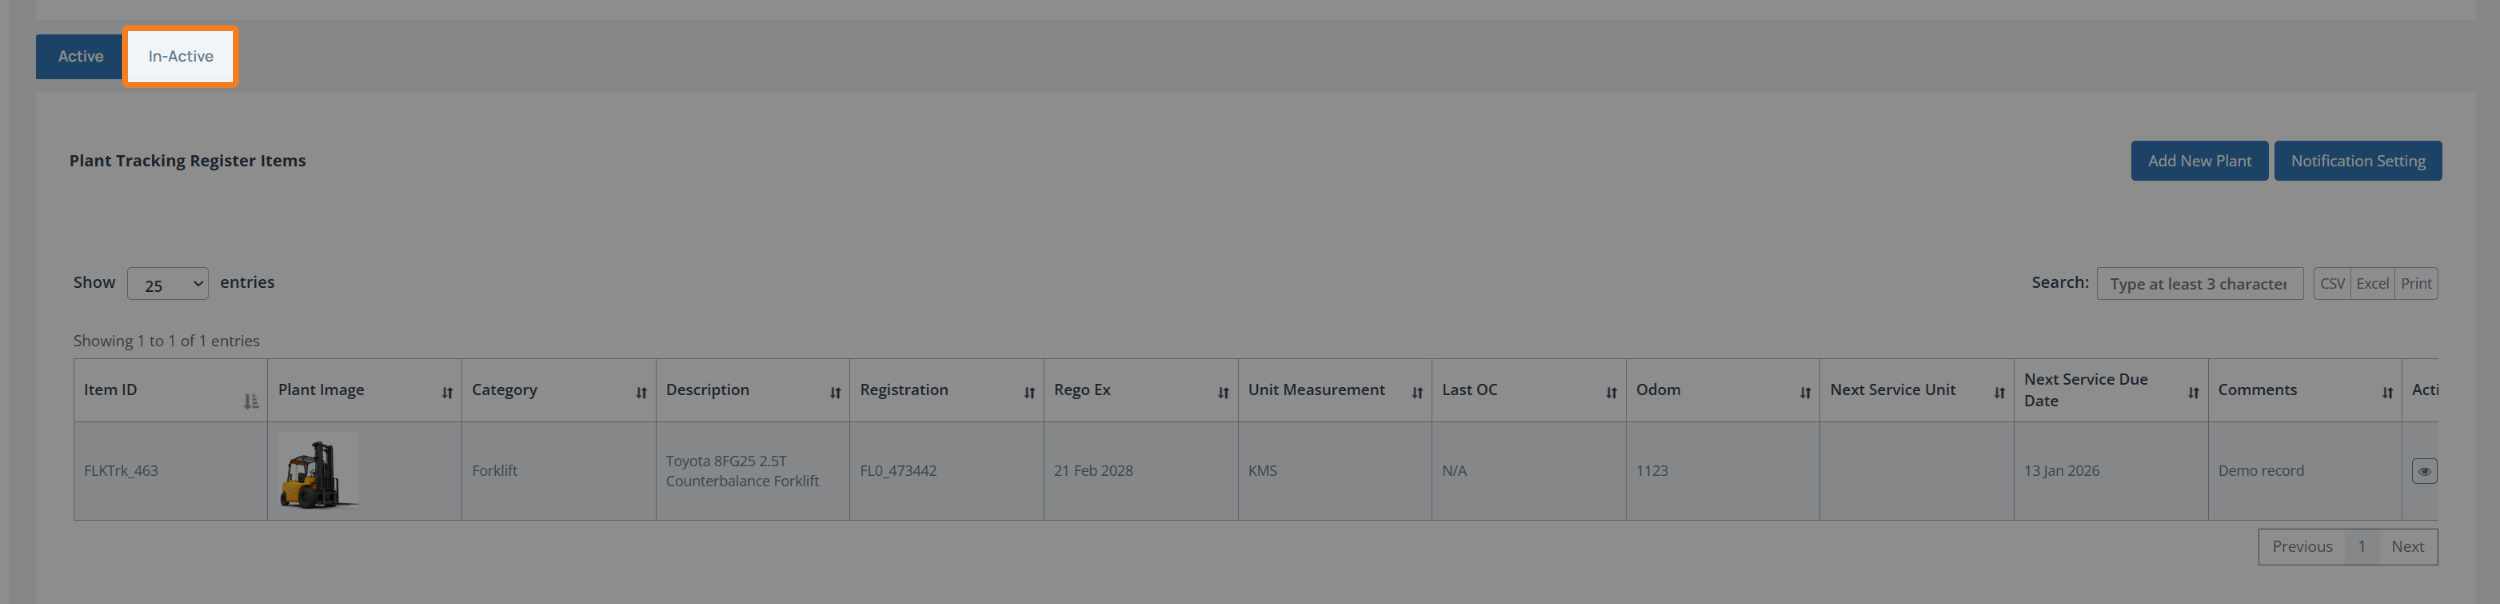
To view inactive items, click on the Inactive tab.
Once completed, click on the Save button and your information will save, the screen will refresh, and you’ll be taken to the main grid where you’ll see your newly added item:
Set Notification Settings
Next, you will want to setup your notifications settings. There are 2 steps to this:
Assign users
Select the notification settings type.
To setup notification settings:
Click on the Notification Setting button:
You’ll then see the Assign Users tab on the Plant Tracking Settings page:
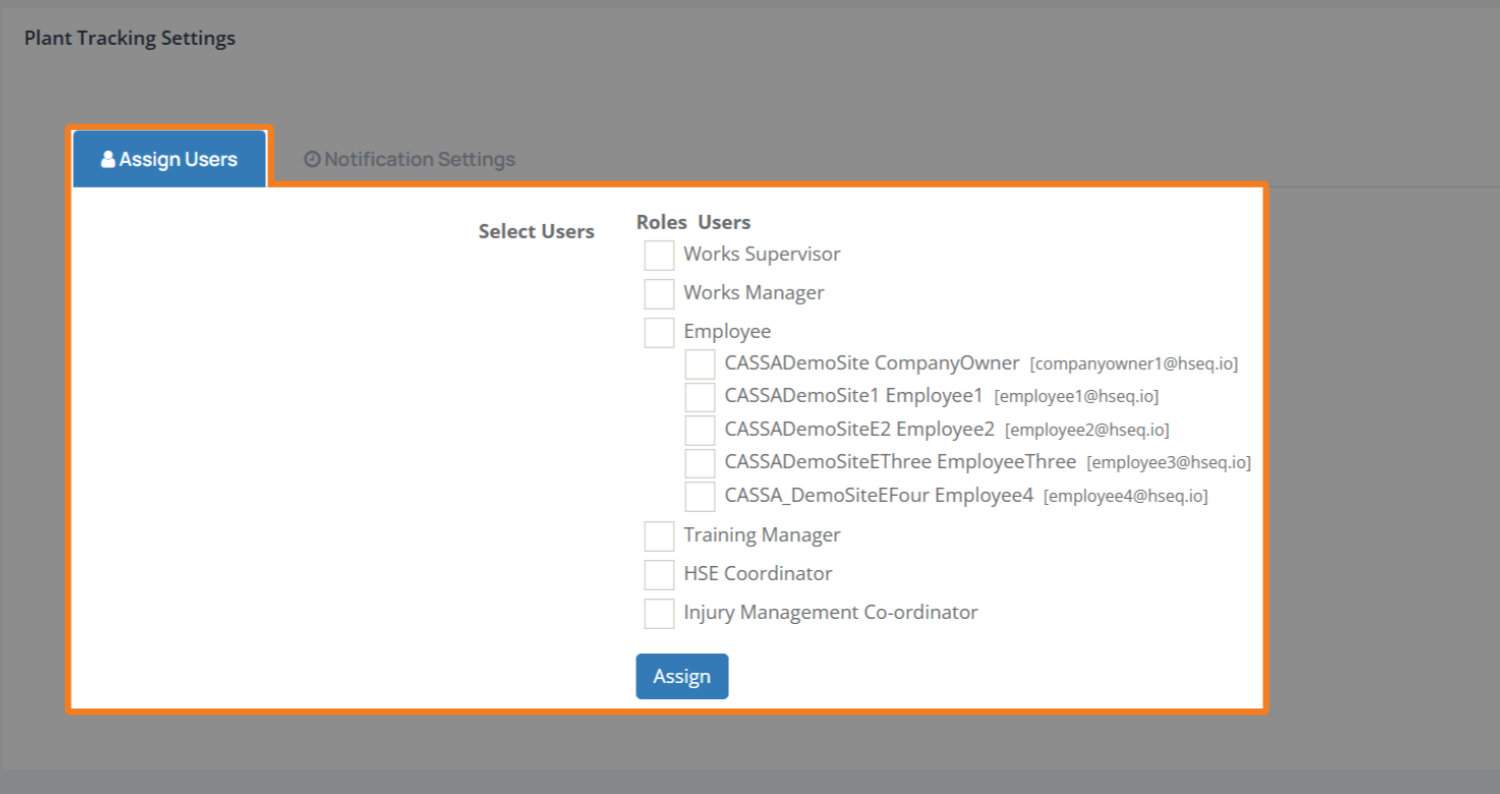
Select the users/roles to be notified. As you can see, you can select by role, by user, or a combination thereof. When done, click on the Assign button.
Next, click on the Notification Settings tab to set the type of notifications to be sent:
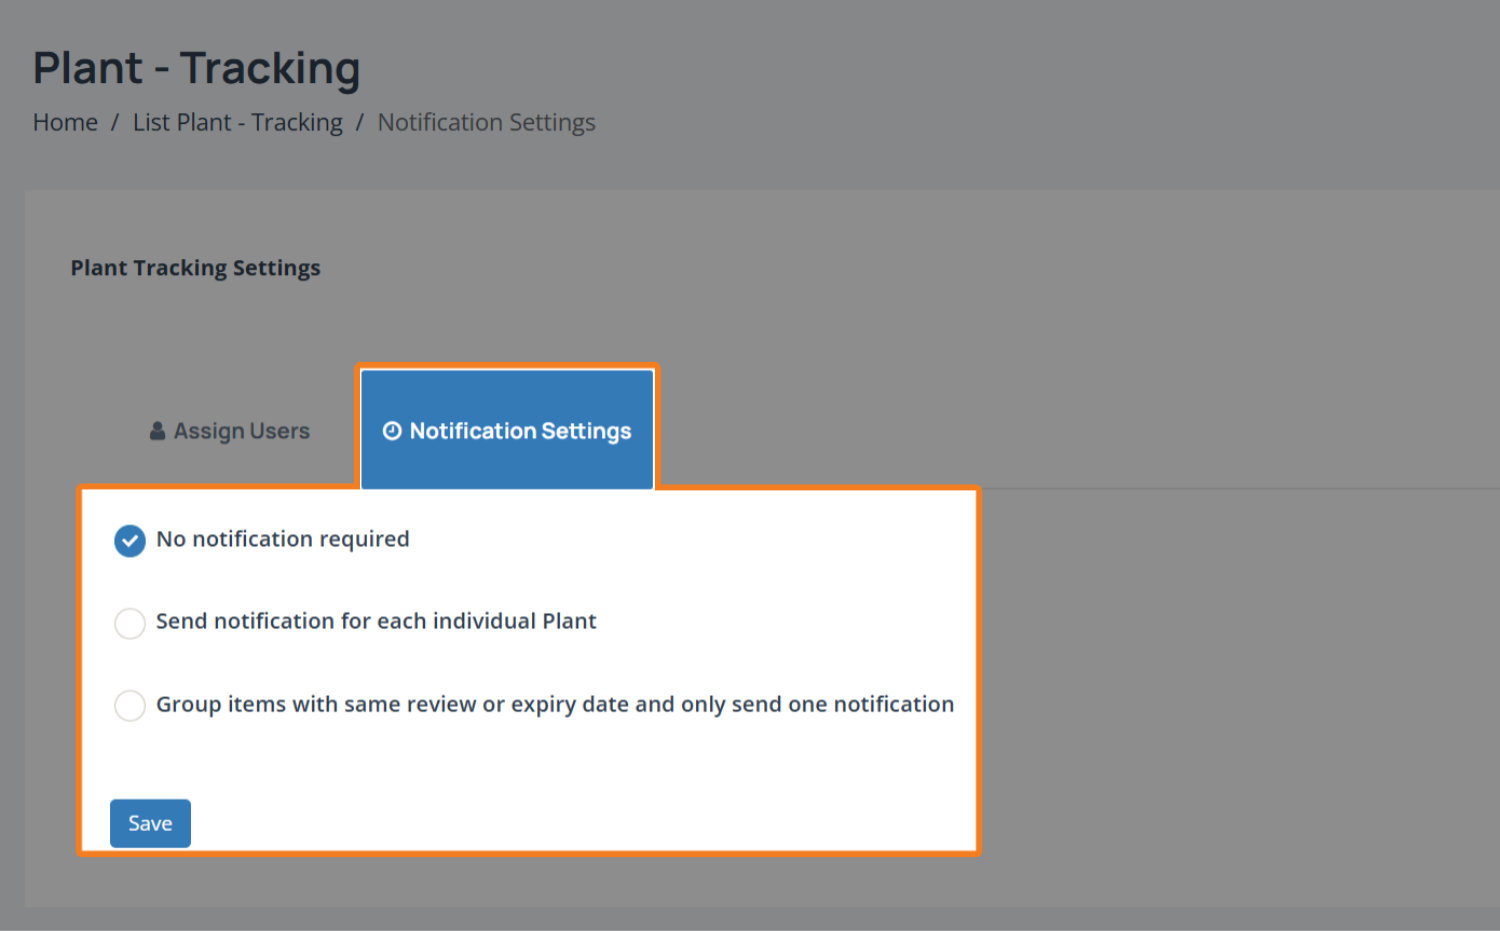
You now have 3 notification options:
No notification required – No notifications will be sent to anyone.
Send notification for each individual Plant – A notification will be sent for each plant item. If you have a large number of plant items, this option will send emails for each one and will result in the largest number of email notifications.
Group items with same review or expiry date and only send one notification – This setting will result in the smallest number of email notifications.
If you select either of the send notification options, you can configure them to either send them daily or each time an Operator Checklist is submitted. Either way, you can enter a custom message for the notification:
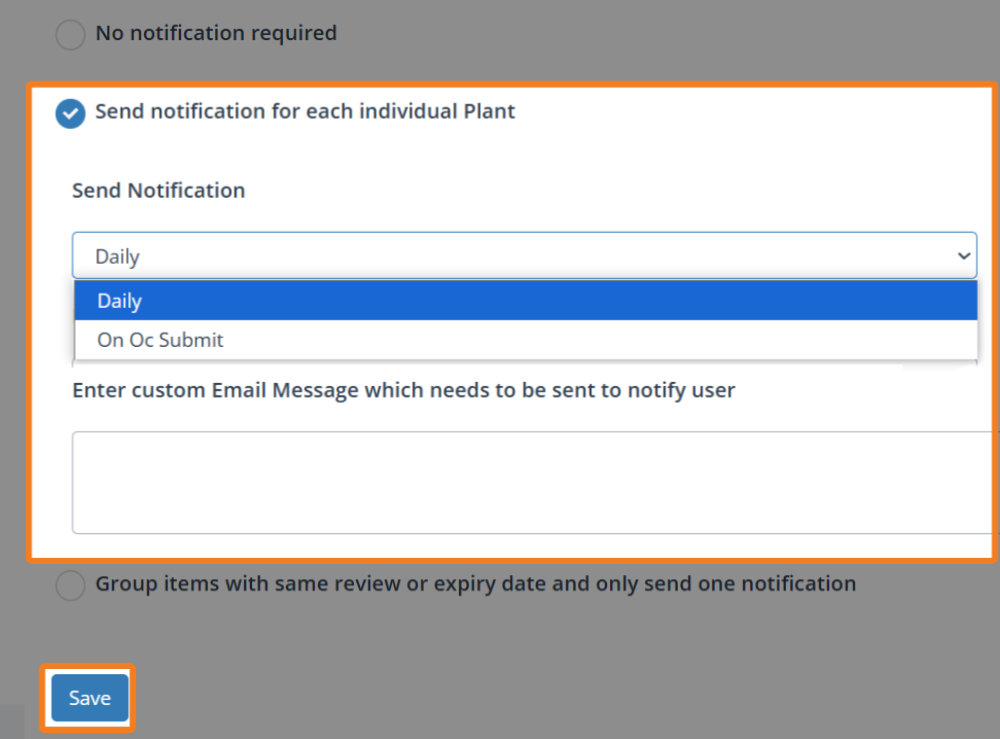
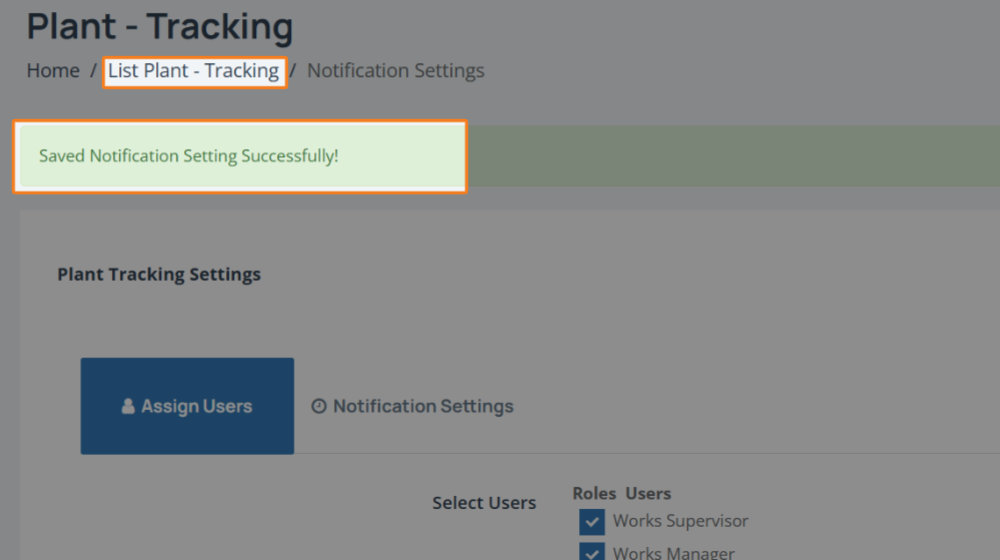
Select your required notification setting and then click on Save. After a second or 2, you’ll see the notification that your changes have been saved.
Click on List Plant – Tracking in the menu breadcrumbs to return to the main grid:
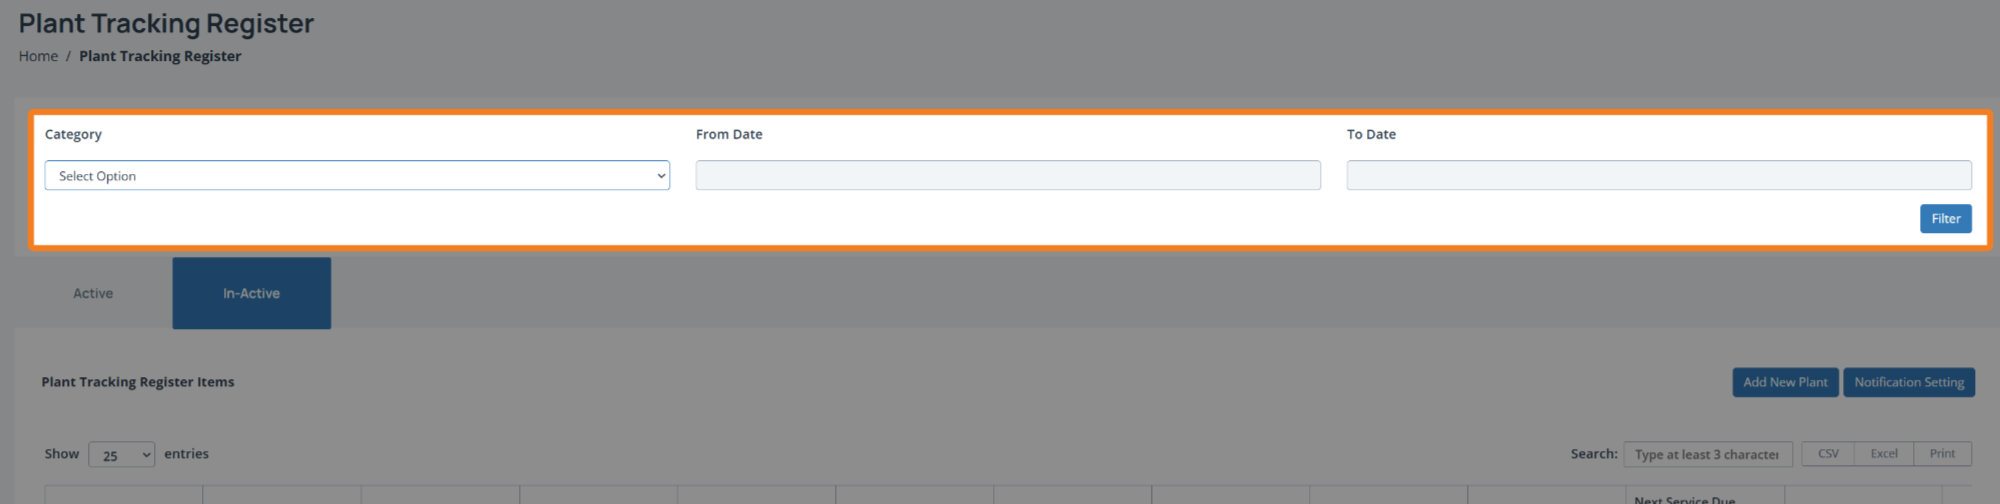
Search & Filter
The filter and search functionality allows you to quickly identify and select different types of plant and equipment. You can select from, and search based on, the following:
Plant Category
From and to dates
Click on the Category dropdown and select the item from the list:

Click on the From date and select the required date from the date picker:
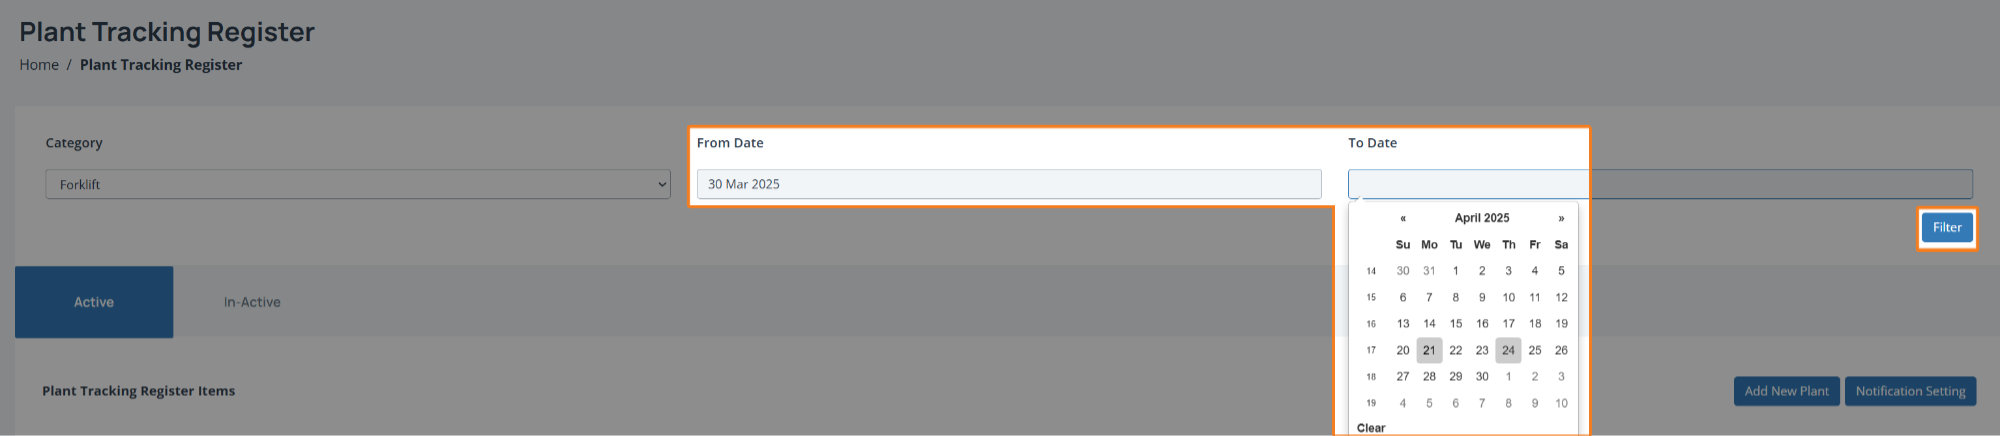
Do the same for the To date and when ready click on the Filter button to apply that filter.
You will then see the results of your search. Refine as necessary.
Tabs
Also on the main grid are the Active and Inactive tabs. The active tab is selected by default and will contain all active items. Inactive items will be available via the inactive tab.
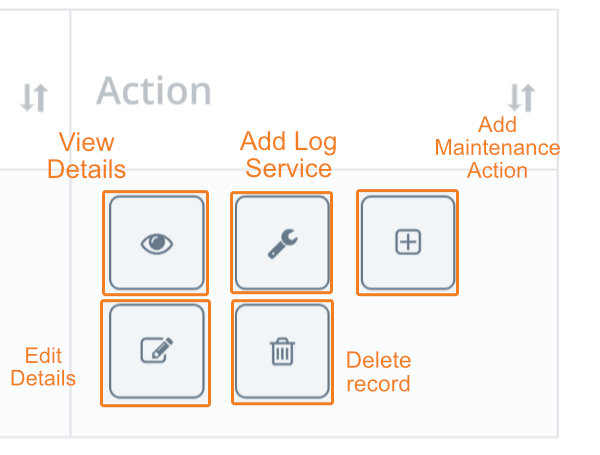
Individual Plant Register Actions
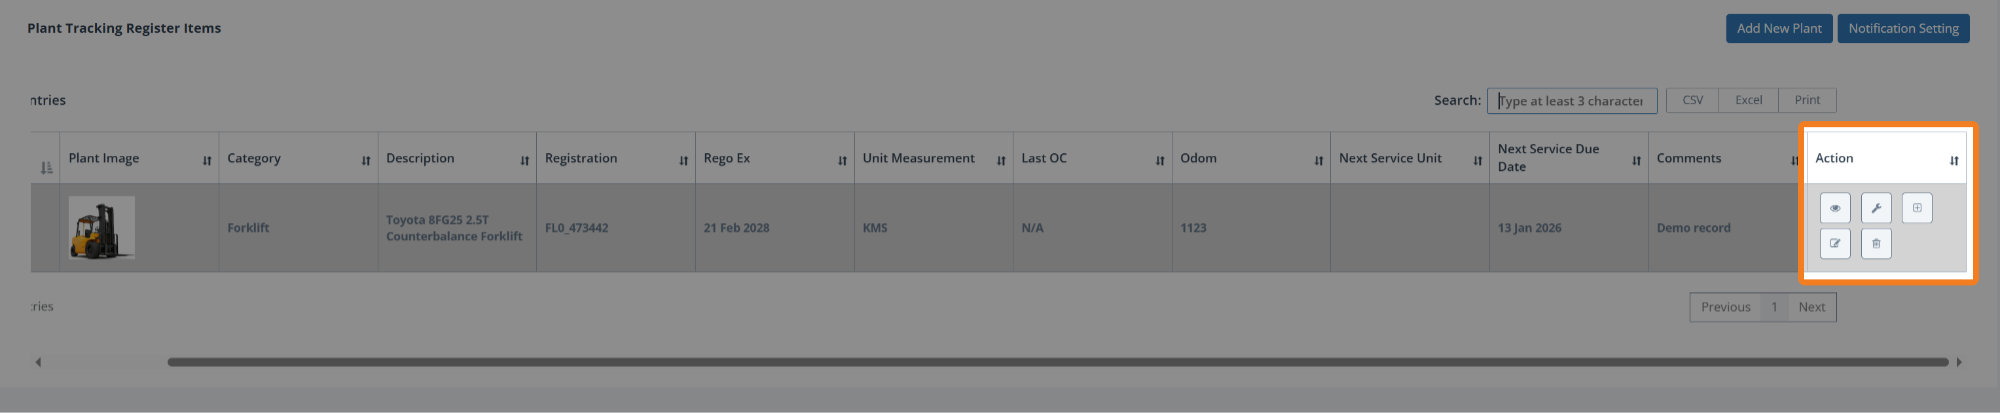
For each registered plant item, you can access 1 or more actions.
Note: If you can’t see the Action column in the grid, use the horizontal scroll bar and then you’ll see the following buttons:
View Plant Details
Add Log Service
Add Maintenance Action
Edit plant
Delete plant
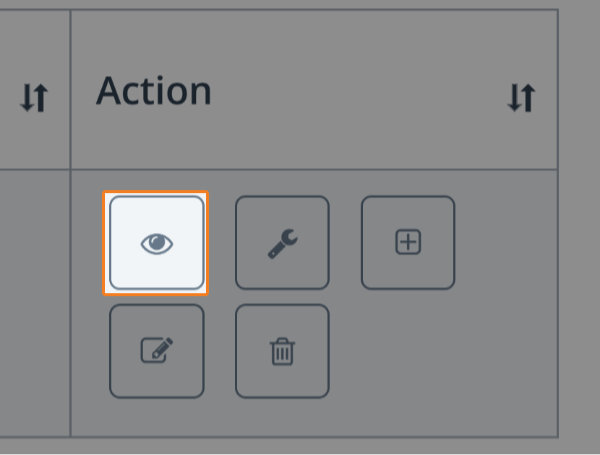
View Plant Details
To view plant details, click on the View Details button:
You’ll then see the Plant Details screen:
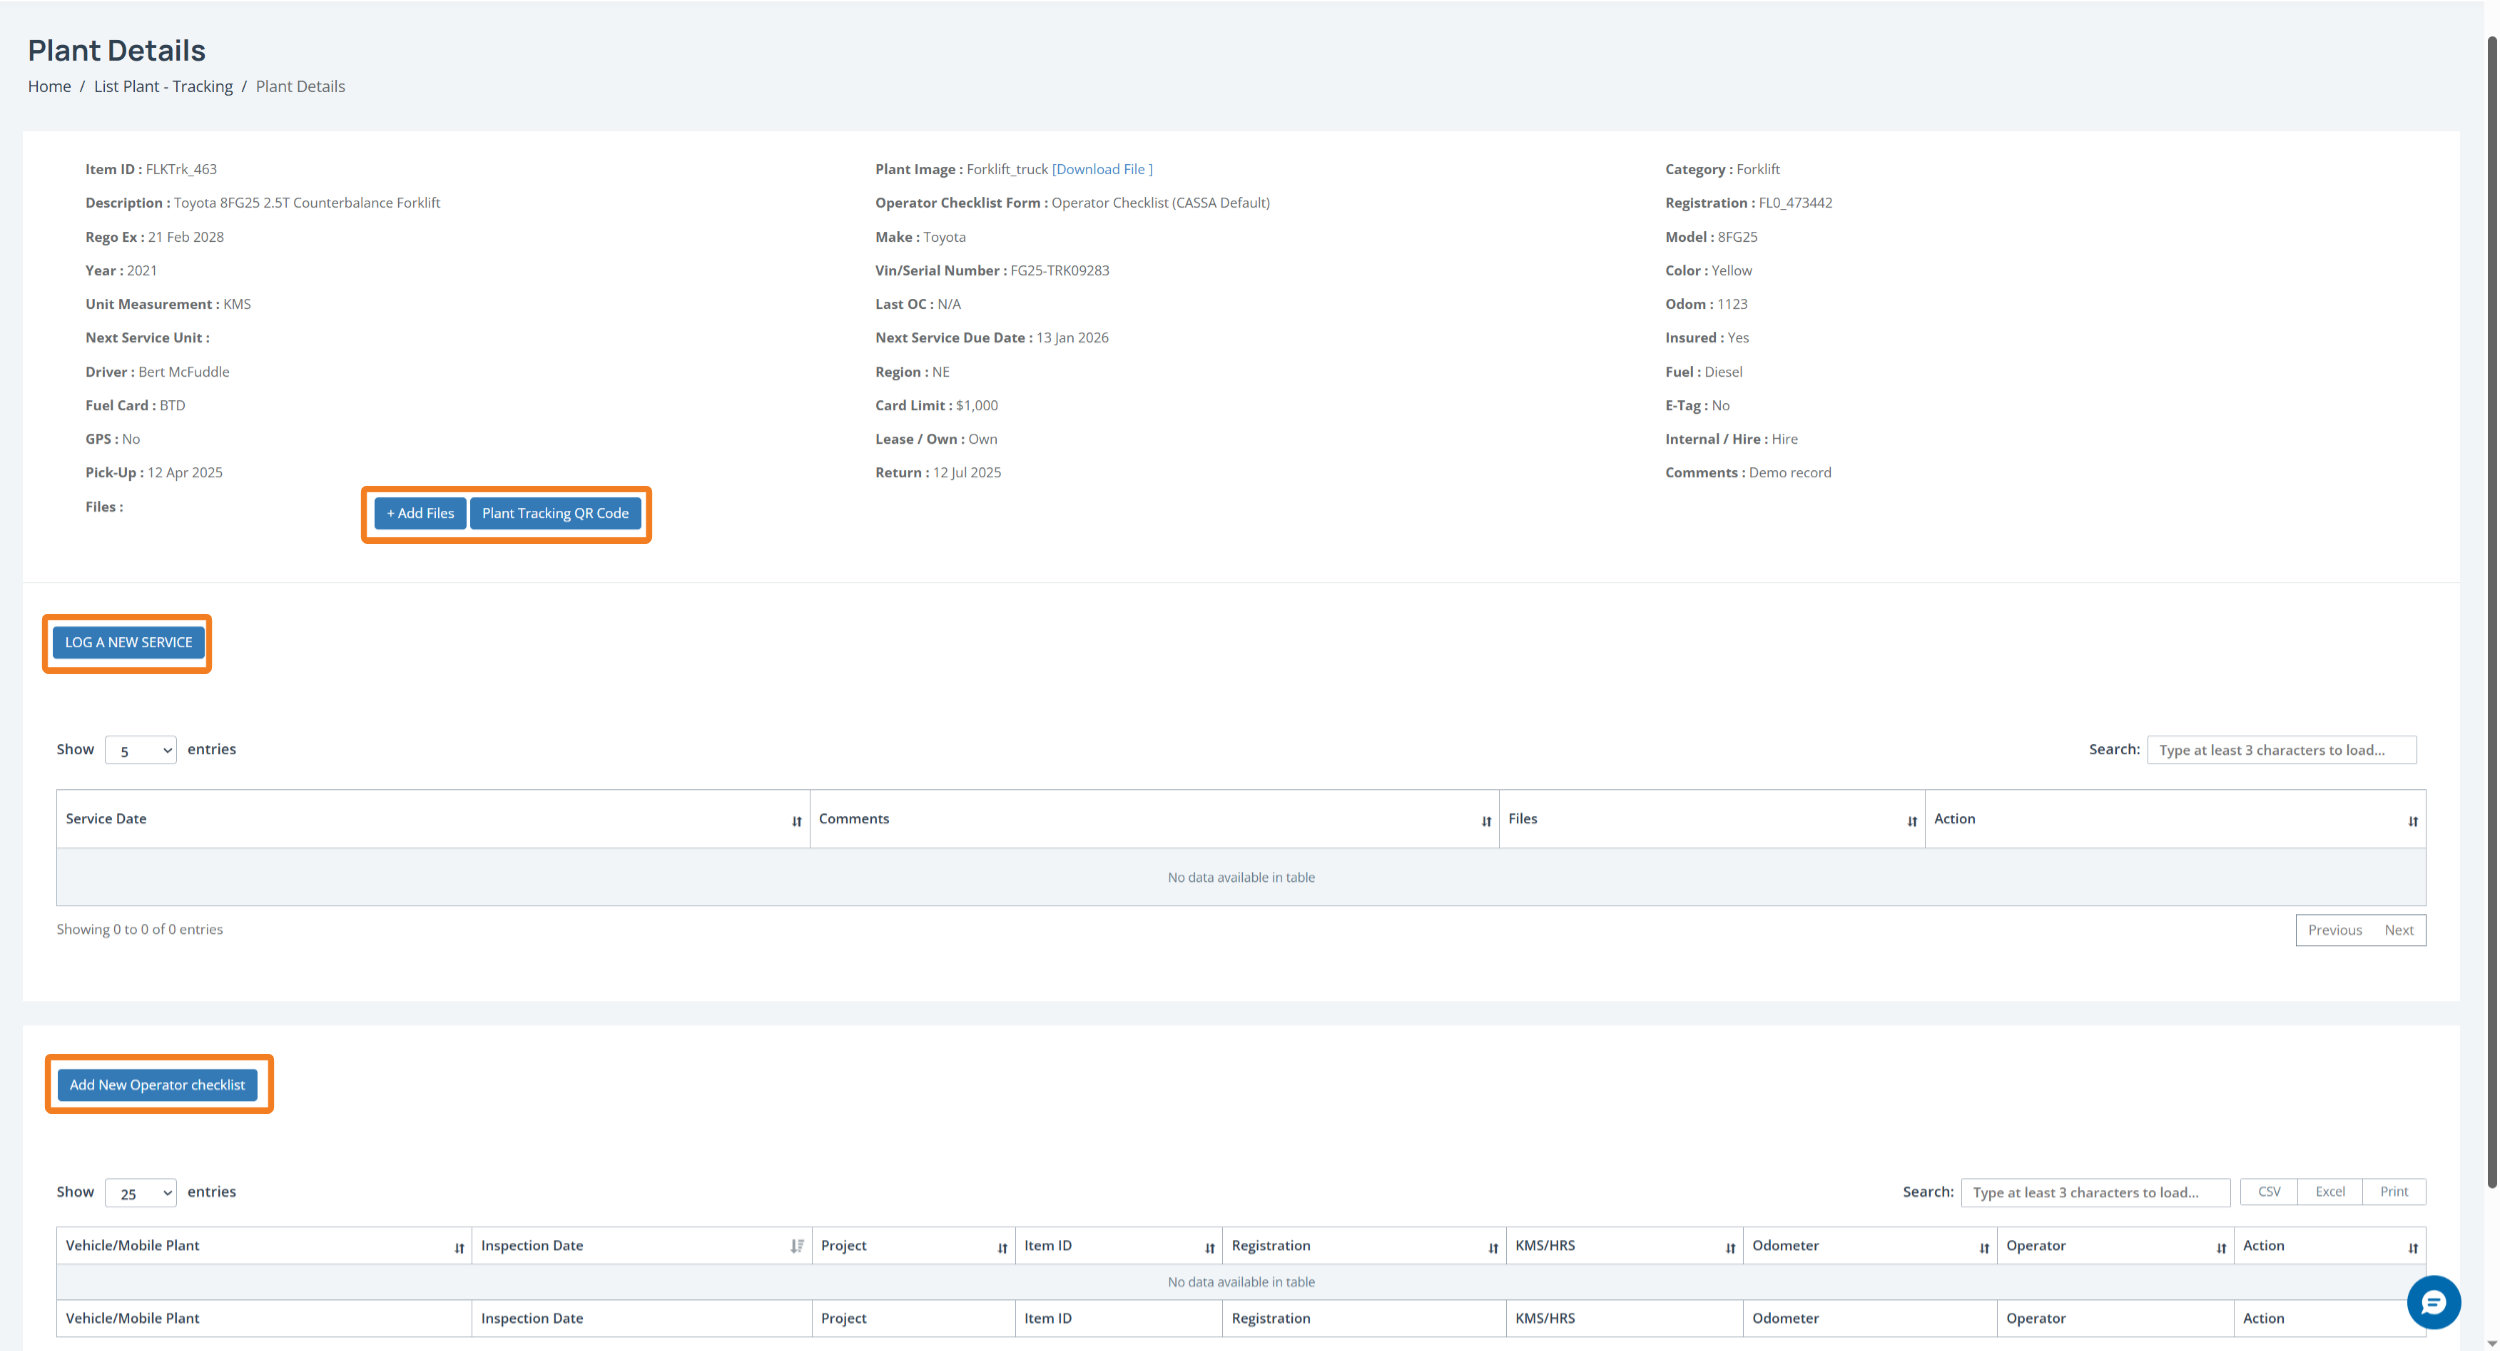
As this is in View mode, you can’t edit any plant details However, as highlighted in the above image, you can perform the following:
Add Plant Files
Get the Plant Tracking QR Code
Log a New Service
Add New Operator Checklist
Add Plant Files
To add plant-related files:
Click on the +Add Files button and you’ll see:
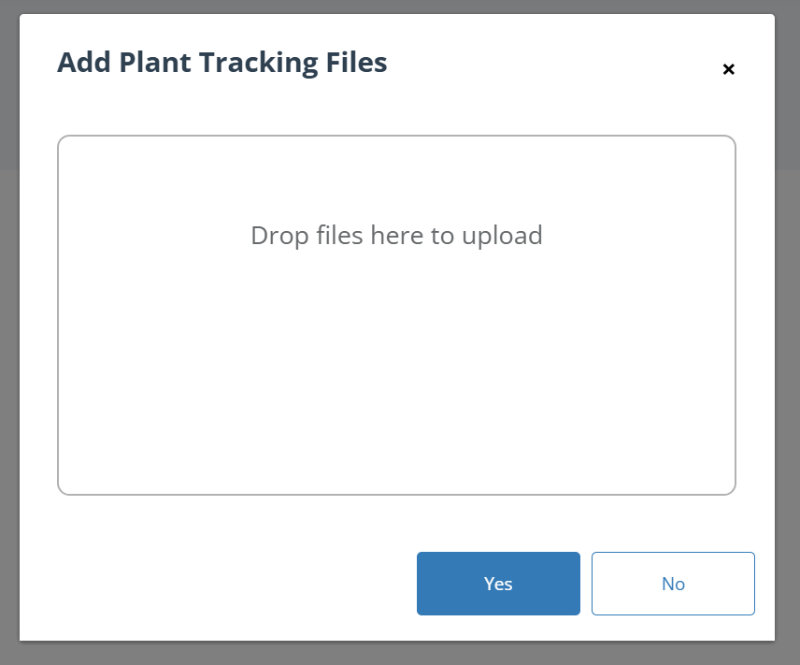
You can either drag-and-drop files from your computer or if you click in the Drop files here… area, the file Open dialog will display where you can navigate to, select your files, and upload them that way.
Once added, click on the Yes button and your files will be uploaded to the plant record.
Get the Plant Tracking QR Code
Click on the Get QR Code button and your Plant Details QR Code will open in a new tab:
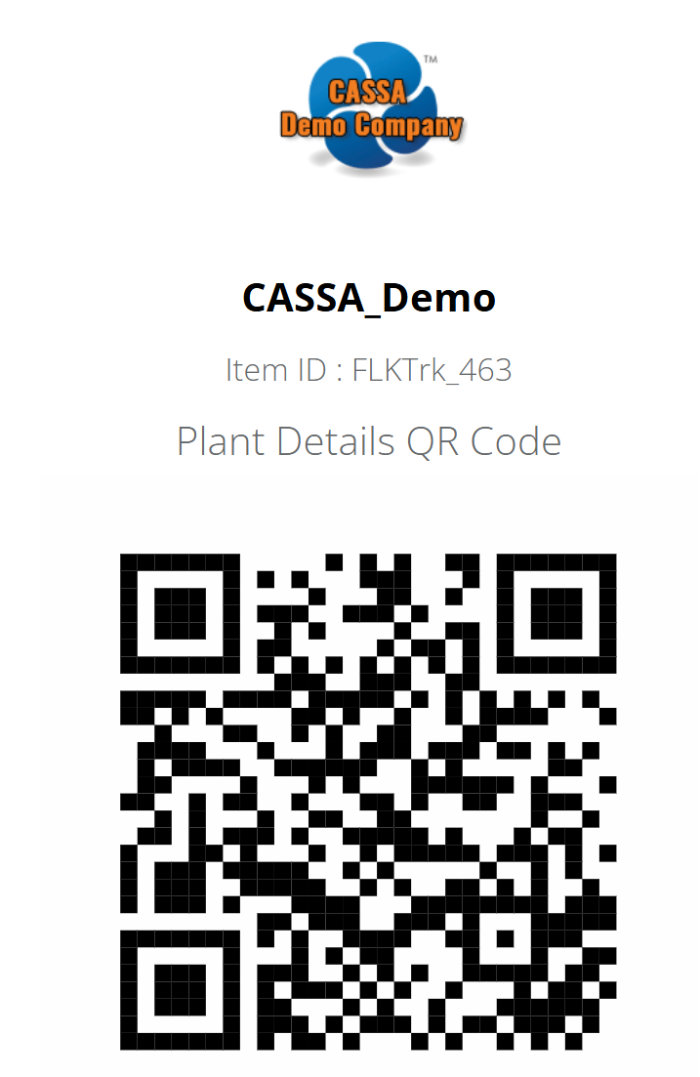
You can save this image to your device or scan it in the normal fashion.
Add Log Service
To add/log a new service:
Click on the Log a New Service button and the Add Log Service dialog box will display:
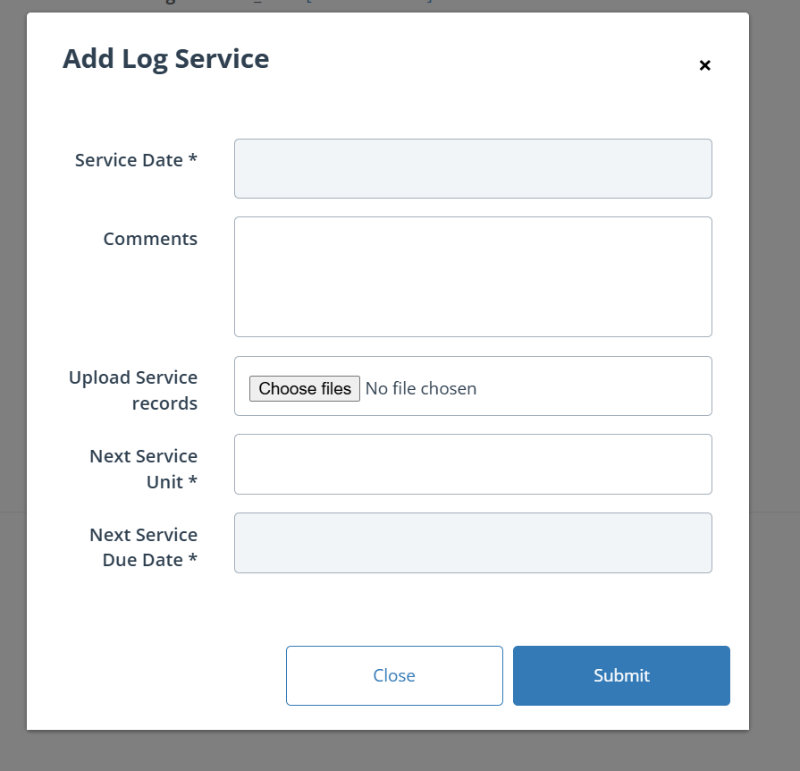
2. Here you add your: Service Date, any Comments, your Next Service Unit, Next Service Due Date, and can upload any service records.
3. When complete, click on the Submit button to close the dialog box and return to the plant details grid where you’ll see your log service added:

Edit plant
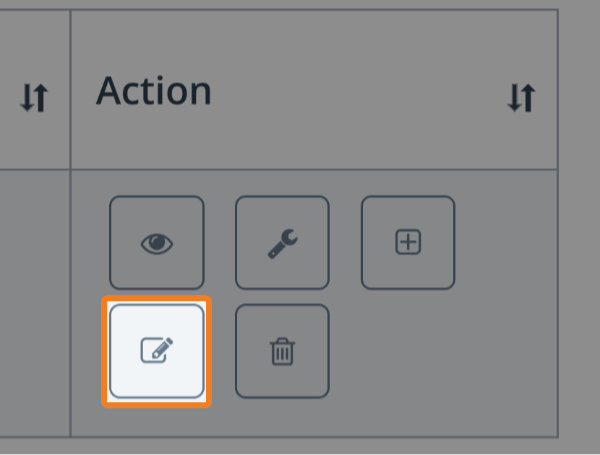
To edit the plant record:
Click on the Edit button of the record you wish to edit
The record will open in Edit mode:
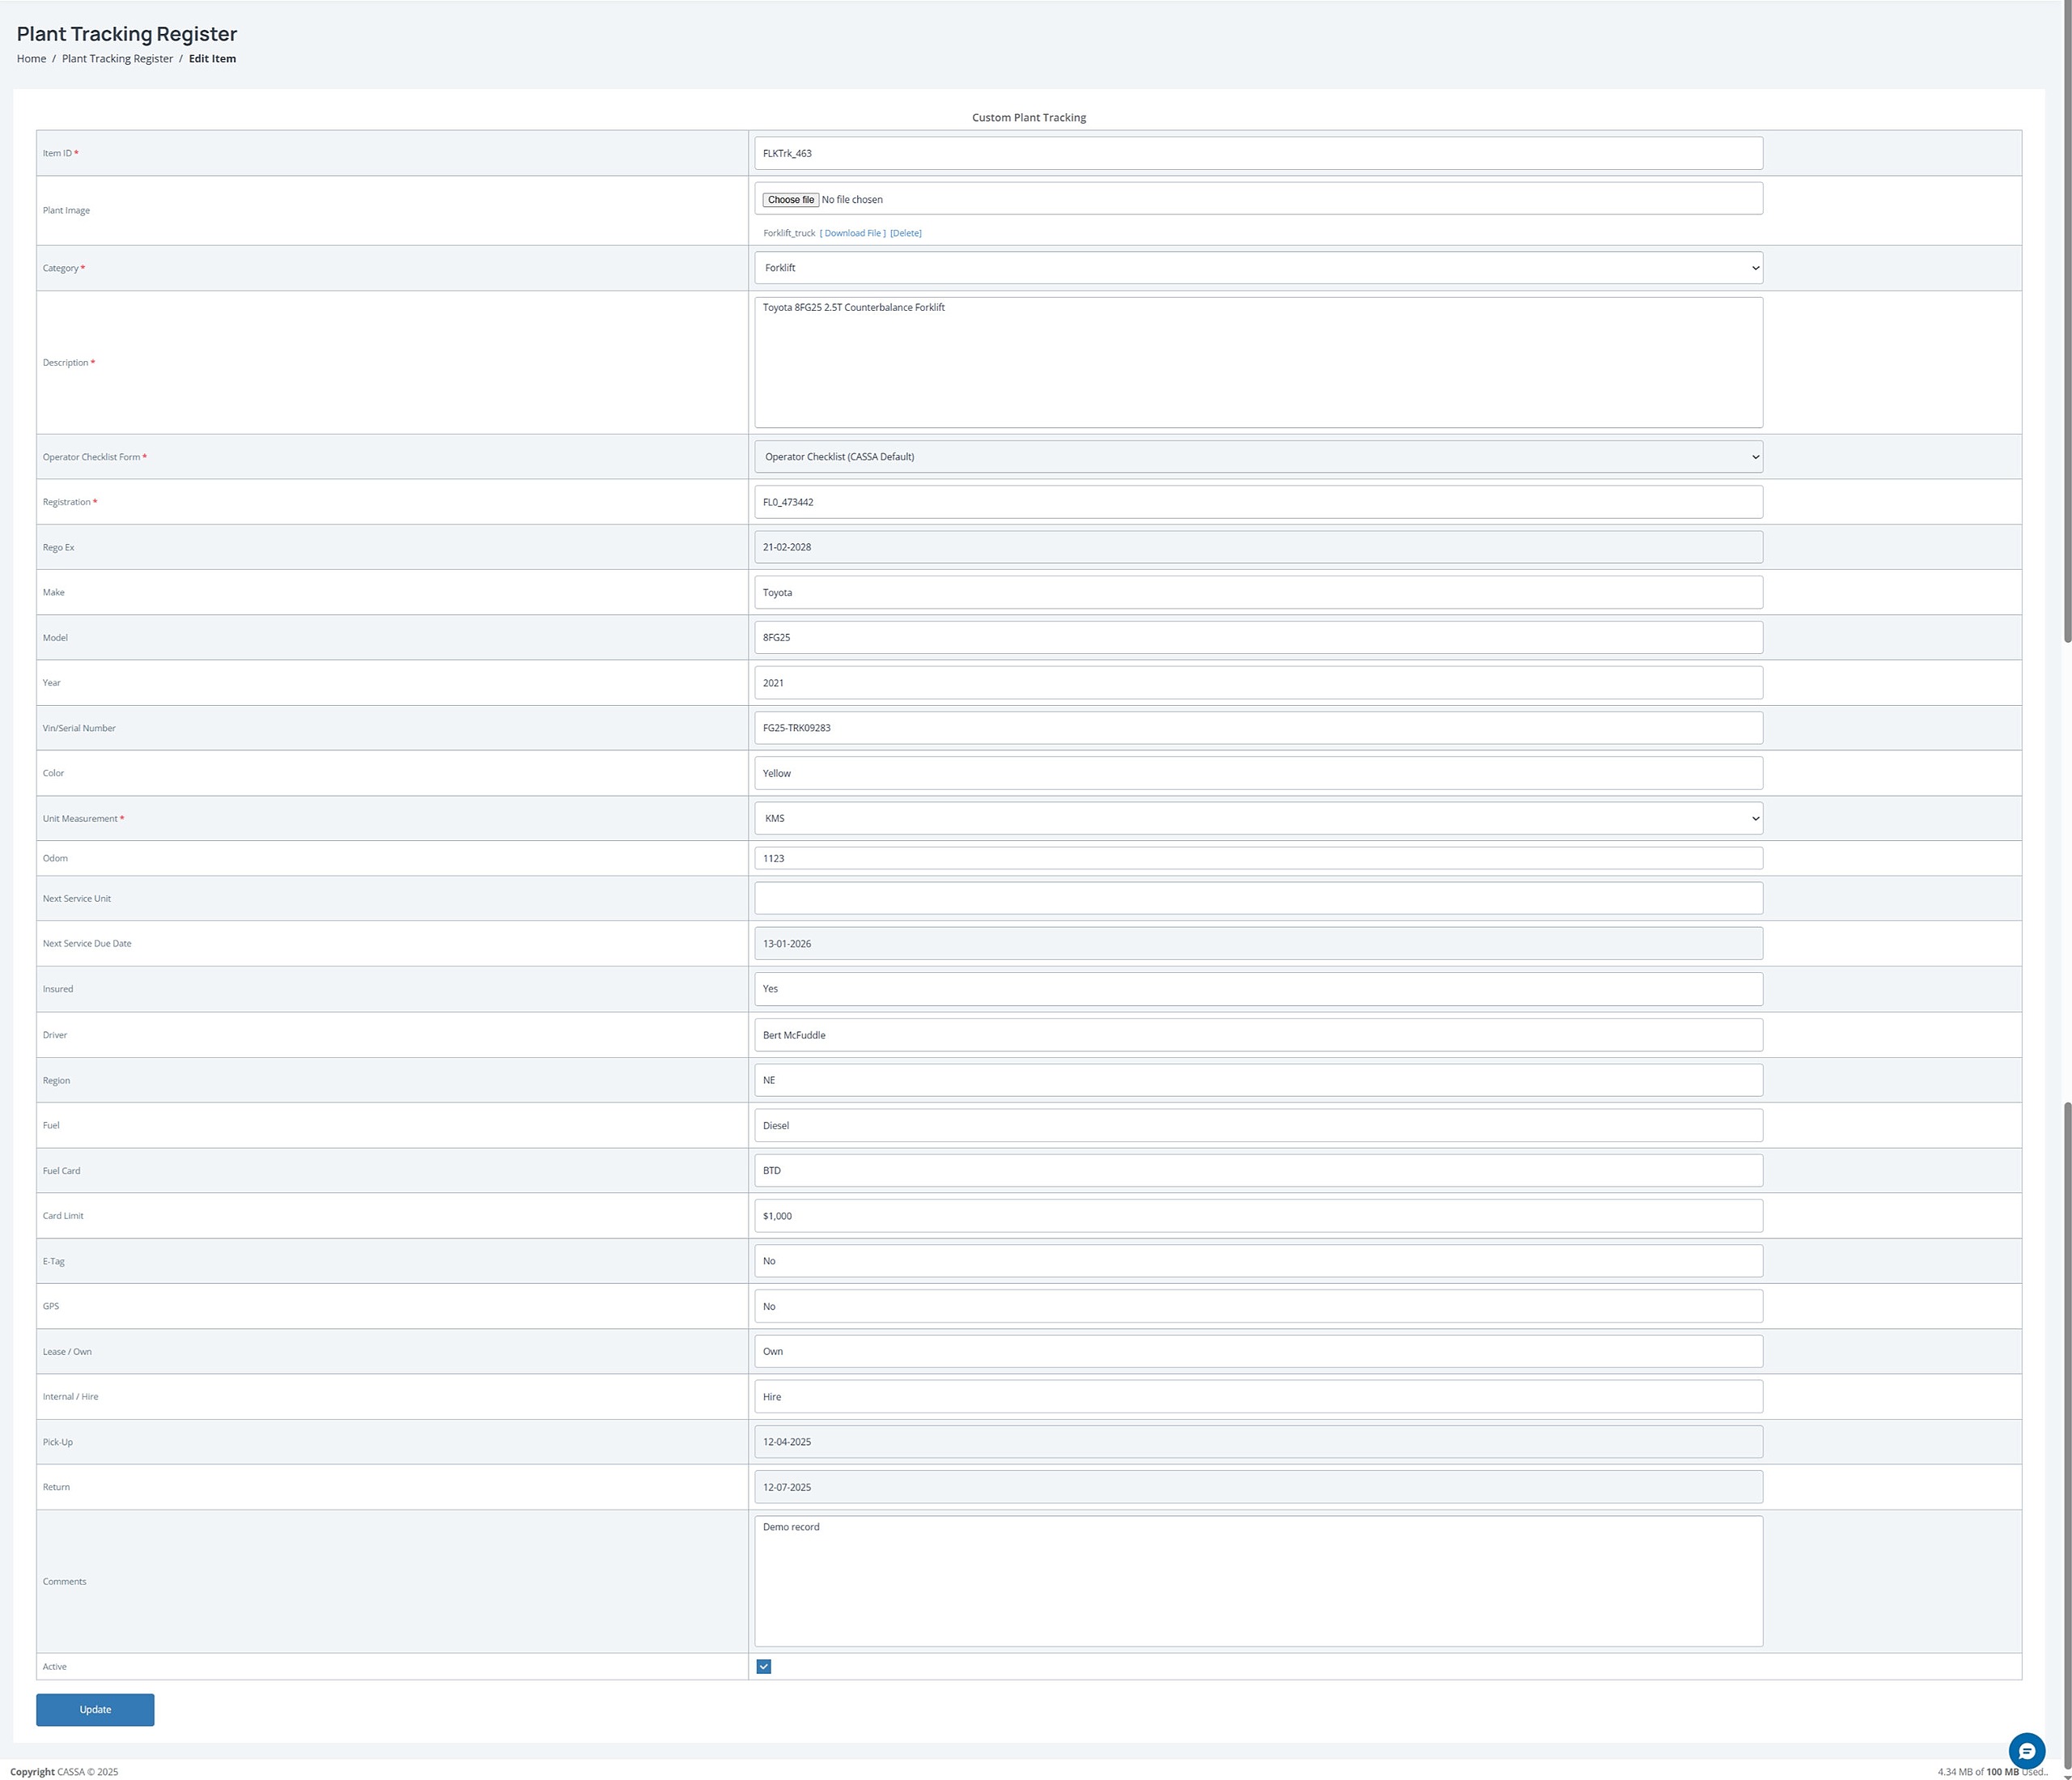
Here you can edit all your plant details.
When complete, click on the Update button and your changes will be saved, the screen will refresh, and the record updated.
Note: if you wish to cancel any changes then press the F5 key on your keyboard to refresh your screen and it’ll revert to the unsaved state.
Delete Plant Record
To delete a plant record:
Identify the record you wish to delete and then click on the Delete button:
A confirmation notice will display. Click on Yes to delete the record. The dialog box will close, the screen will refresh, and the record will be deleted from the grid.
Operator Checklists
To access Operator Checklists, click on the menu item and the Operator Checklist grid will display:
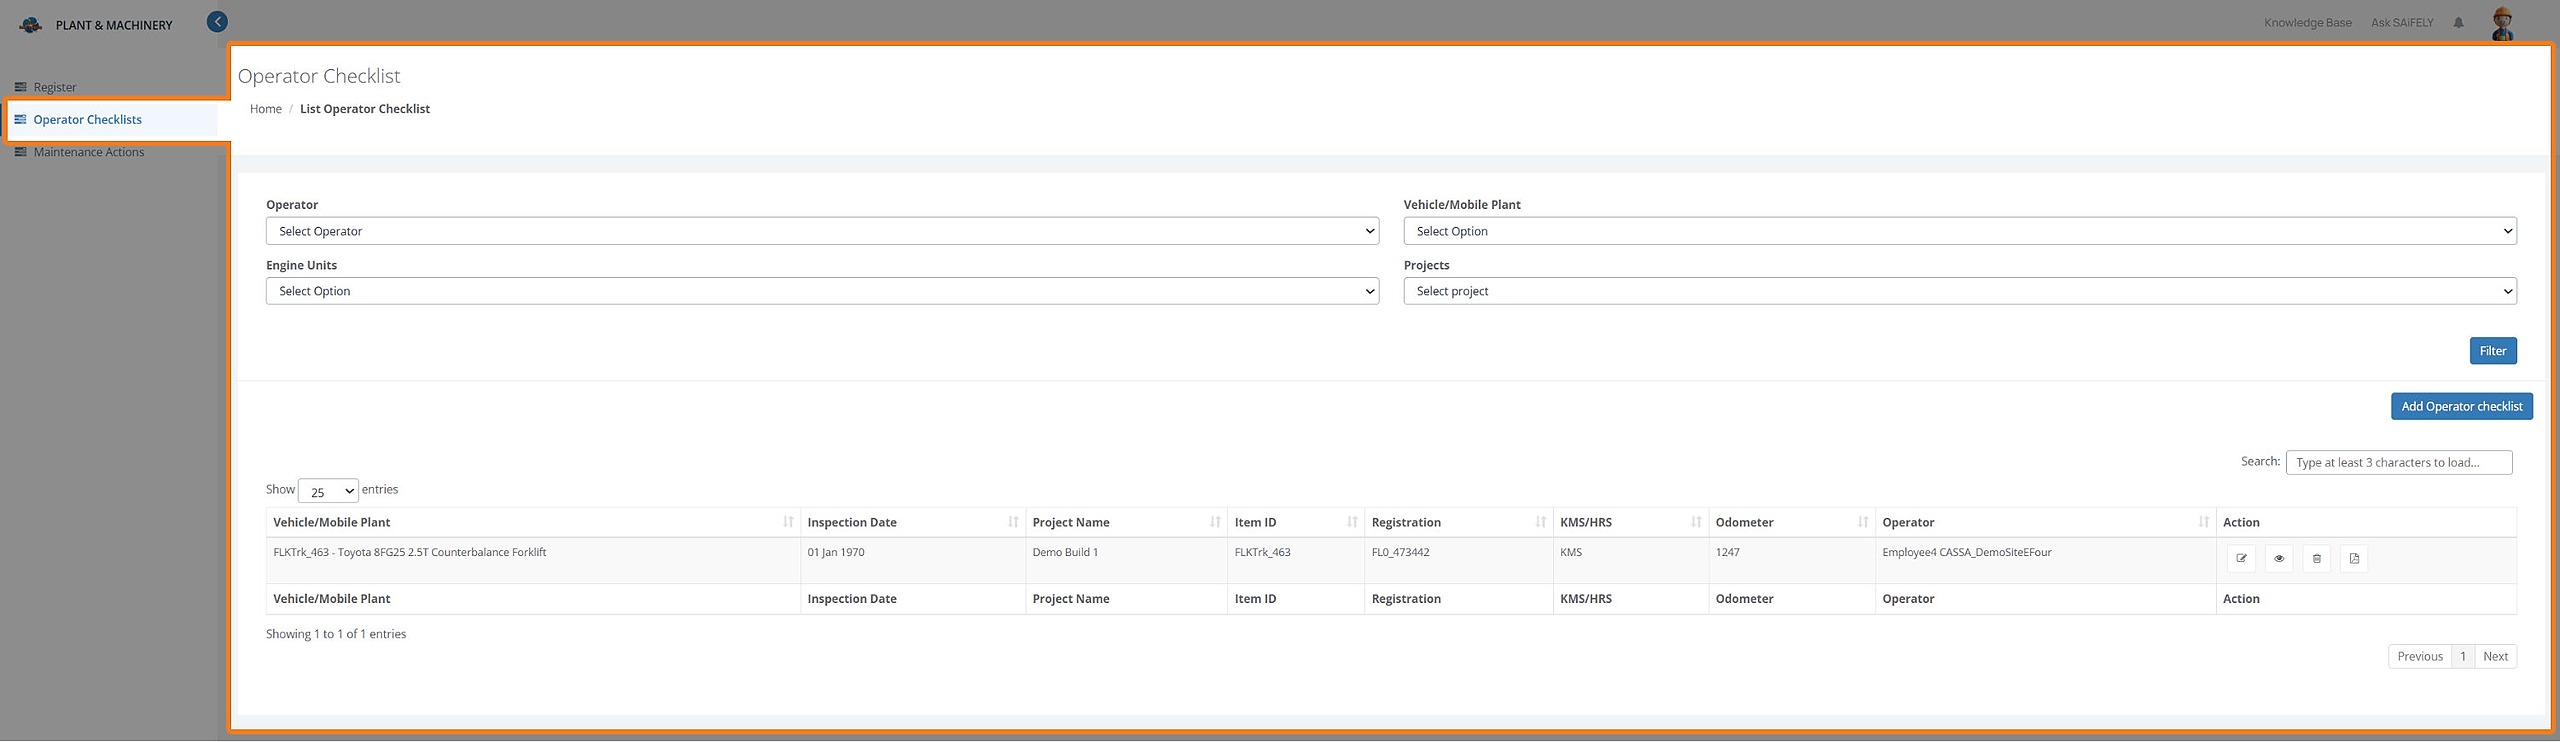
Here you can:
Search and filter
Add Operator Checklist
Filter options
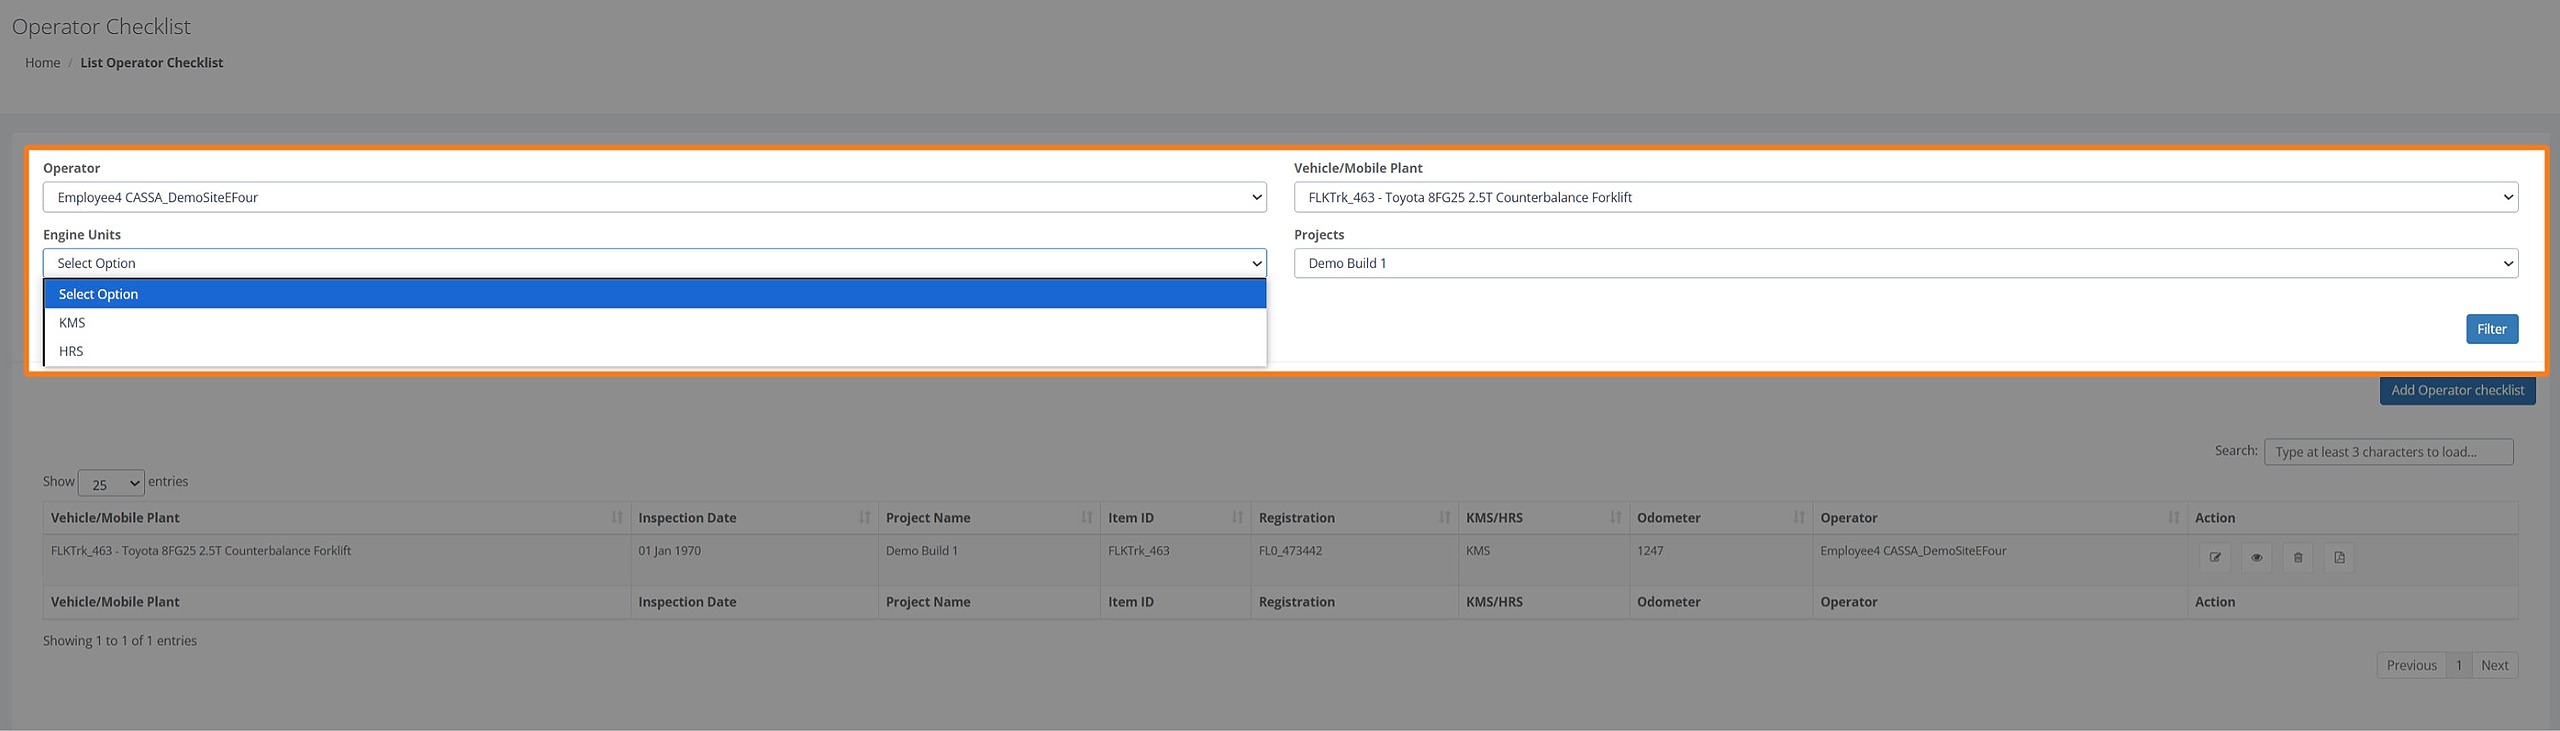
The search/filter options are Operator, Vehicle/Mobile Plant, Engine Units, Projects.
Select the required search criteria, click on the Filter button, and the grid display will update accordingly.
Add Operator Checklist
To add a new operator checklist:
Click on the Add New Operator Checklist button and you’ll see:
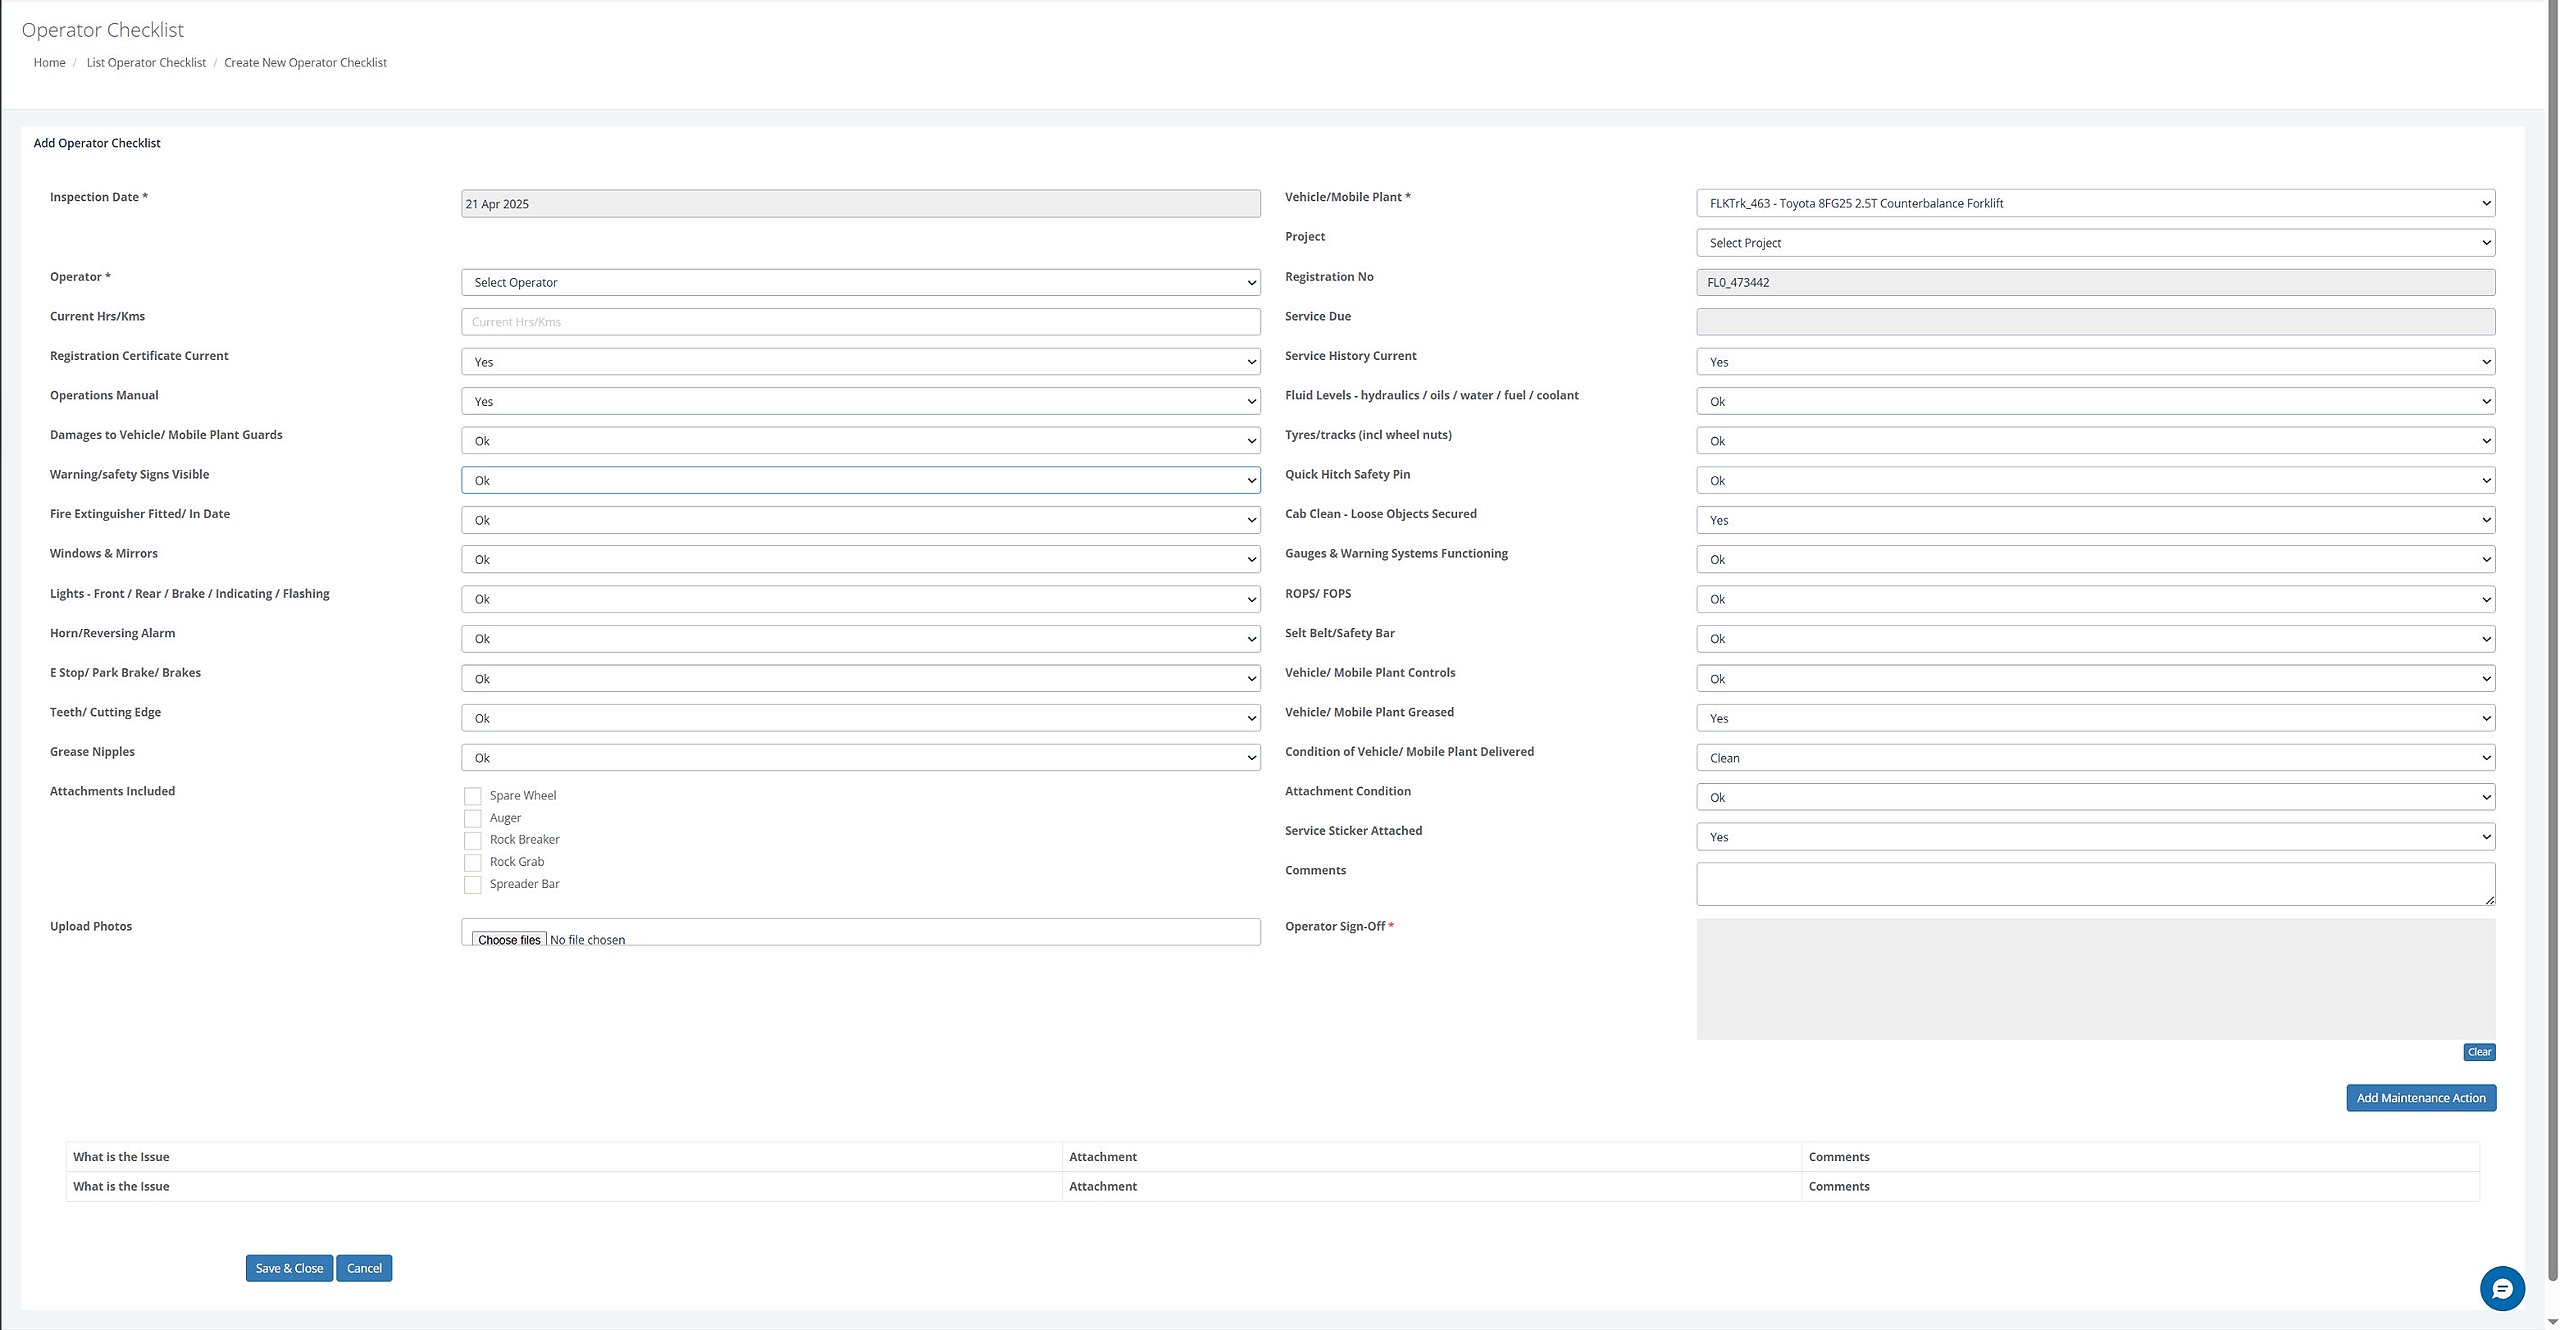
As the above image shows, there are several fields that your operator needs to complete. Each field is self-explanatory and consists of either a free-text input field, such as Current Hrs/Kms, a date picker, which you are already familiar with, or a pre-populated dropdown list:
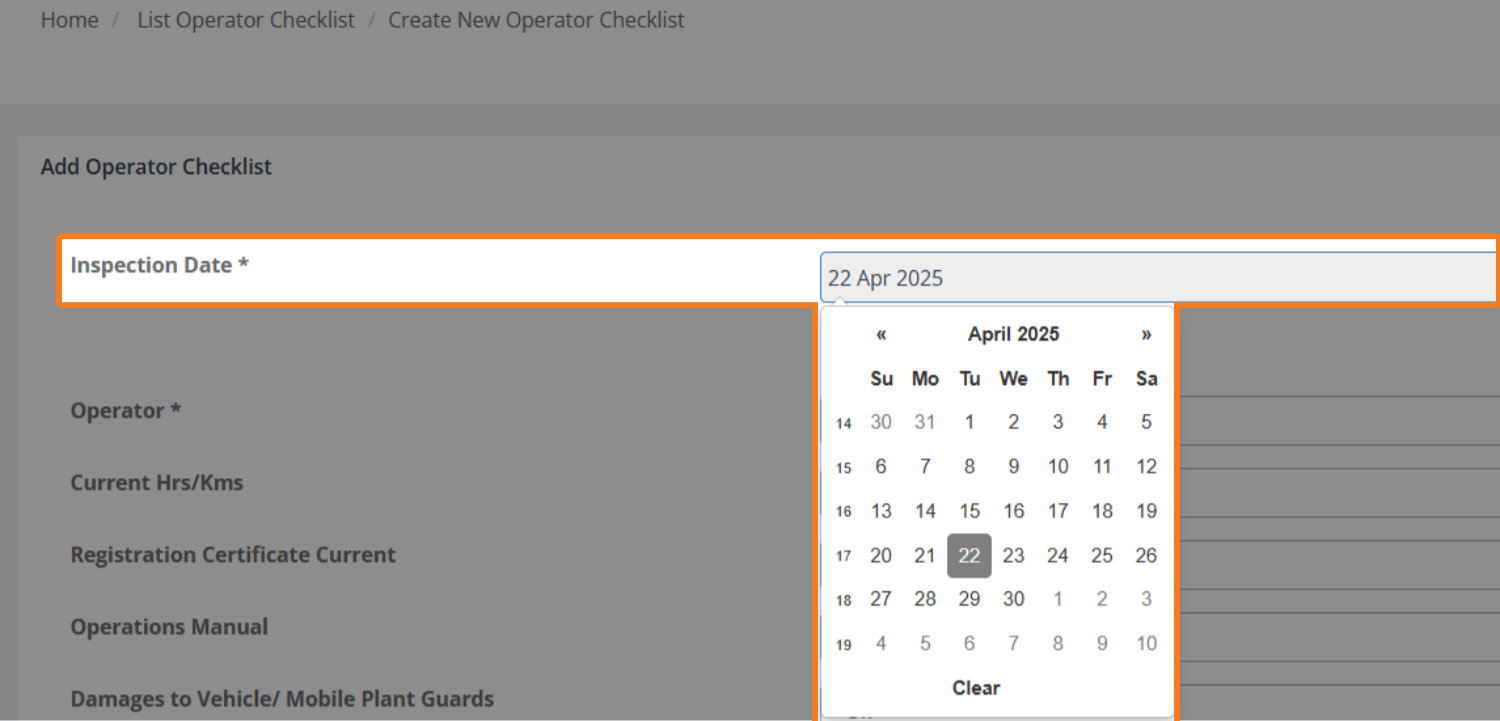
Date Picker
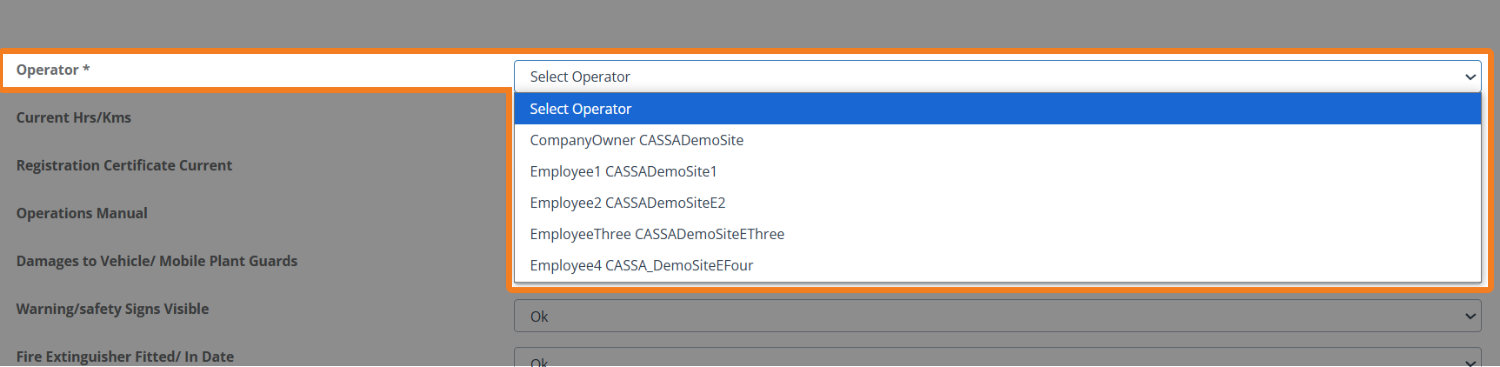
Prepopulated Dropdown lists:
The following images show some of the types of prepopulated dropdown lists. Each should be self-explanatory:
Operator:
Condition status:

Retest/Replace:

Levels:

Manage Operator Checklists

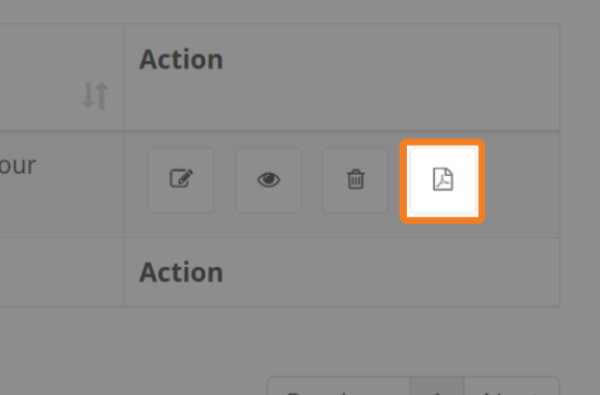
Once an Operator Checklist has been created, you now have 4 options:
Edit
Show
Delete
PDF
Edit Operator Checklist
To edit the Operator Checklist:
Click on the Edit button and you’ll see:
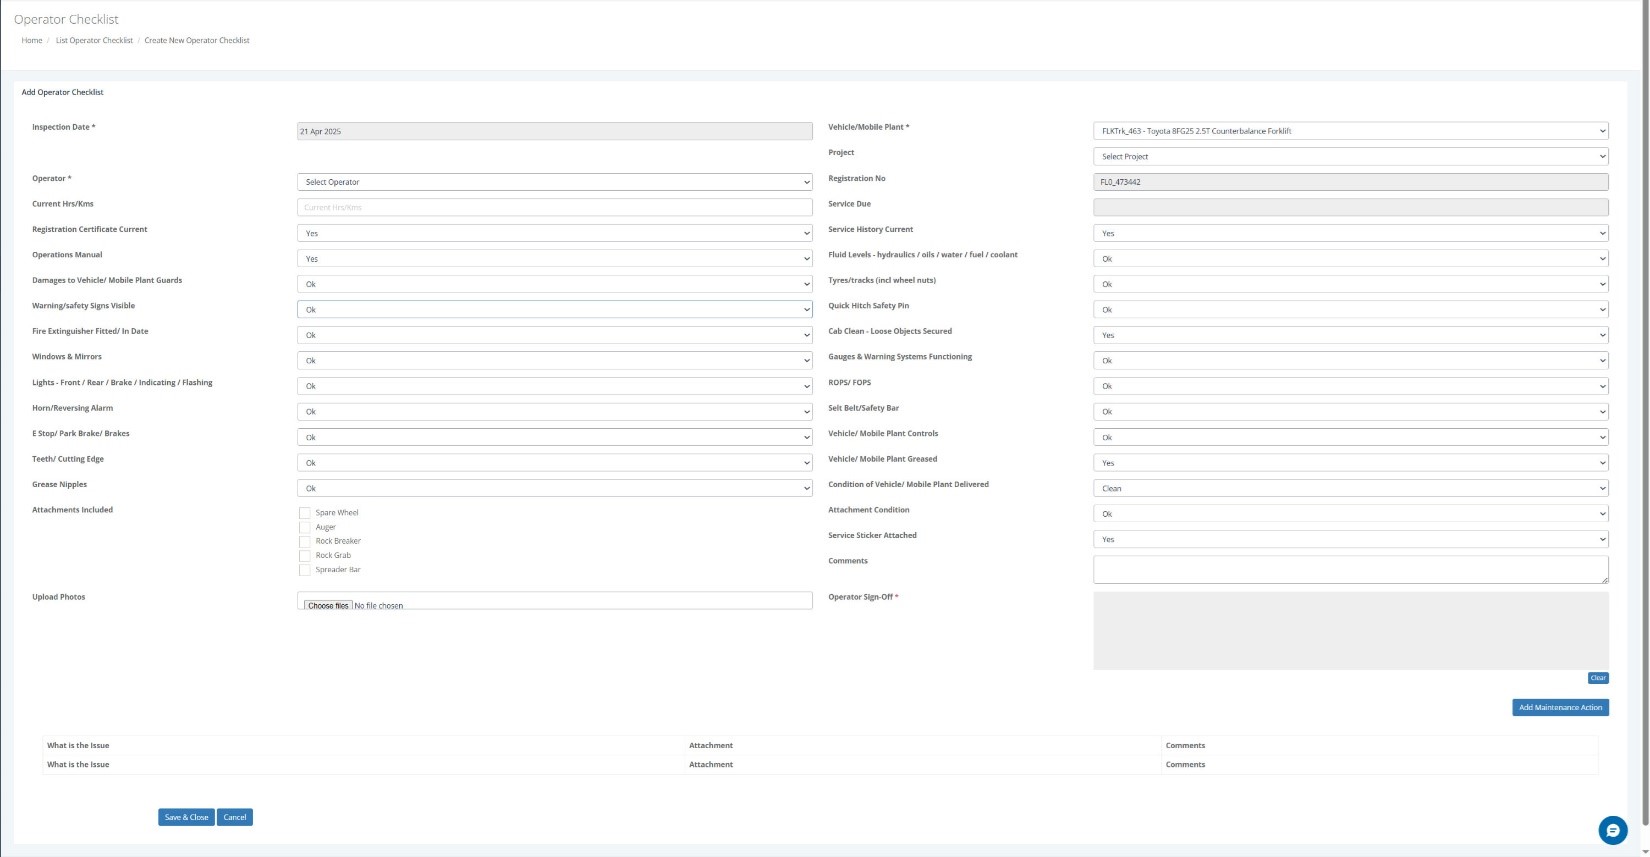
The only difference between this and the add operator checklist is certain fields, such as the vehicle/plant type, the Registration No., Service Due, etc., are fixed.
Make your changes and, once complete, complete the Operator Sign-Off field (with your mouse) and then click on the Save & Close button.
The checklist will update, the screen will refresh, and the record will be updated.
Show Operator Checklist
Click on the Show button to view the operator checklist:
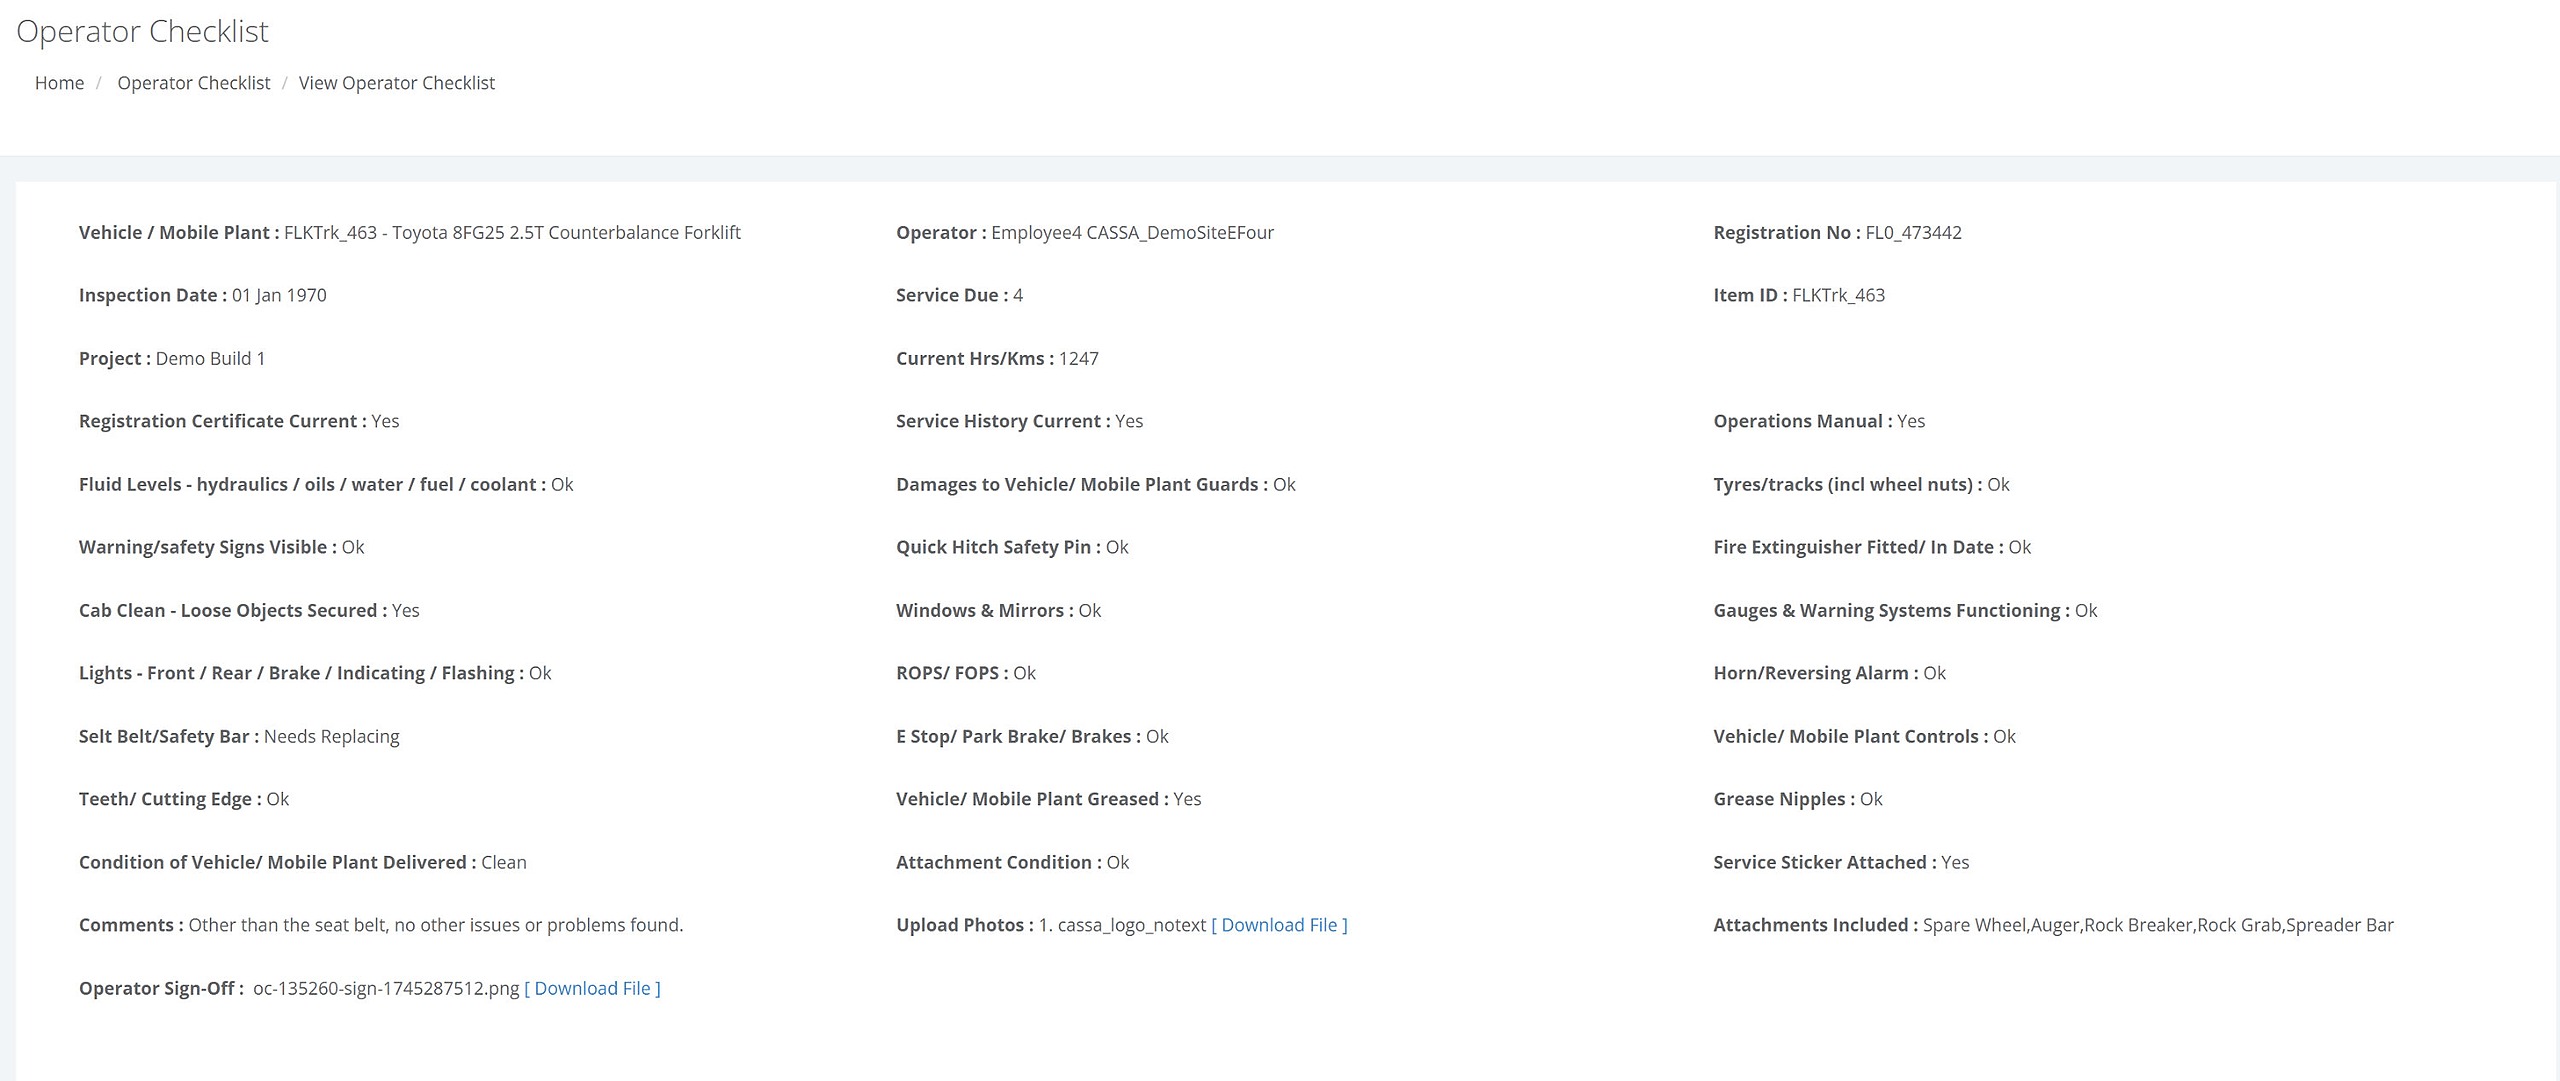
Show mode is a read only mode, so no fields can be changed.
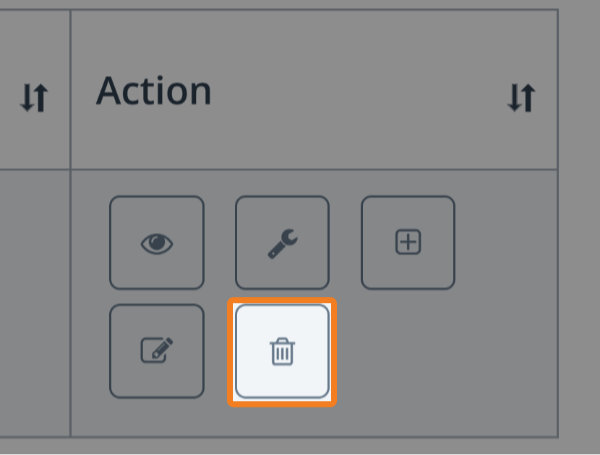
Delete Operator Checklist
To delete an operator checklist:
Identify the checklist to be deleted
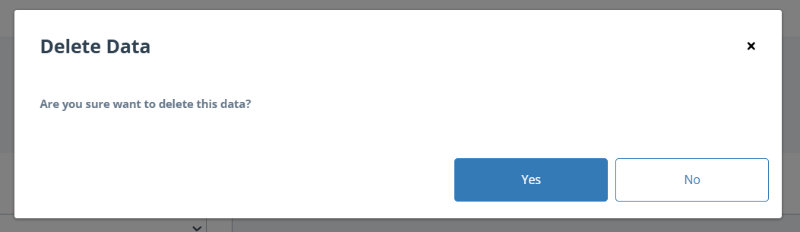
Click on the Delete button and the confirmation popup will display.

3. Click on Yes to delete the checklist.
Create PDF of Operator Checklist
Click on the PDF button to download a pdf version of the checklist.
This will open in a new tab:
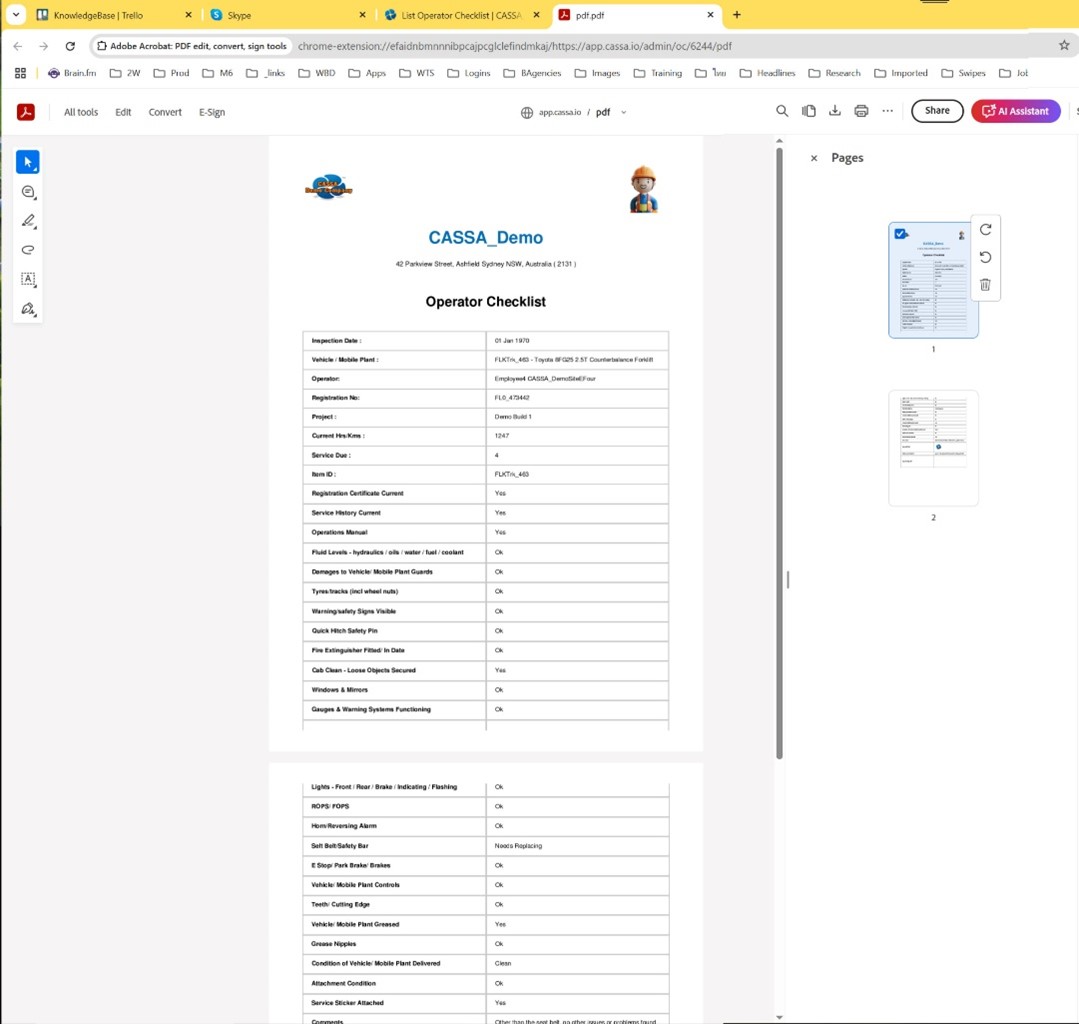
You can now download, print, etc.
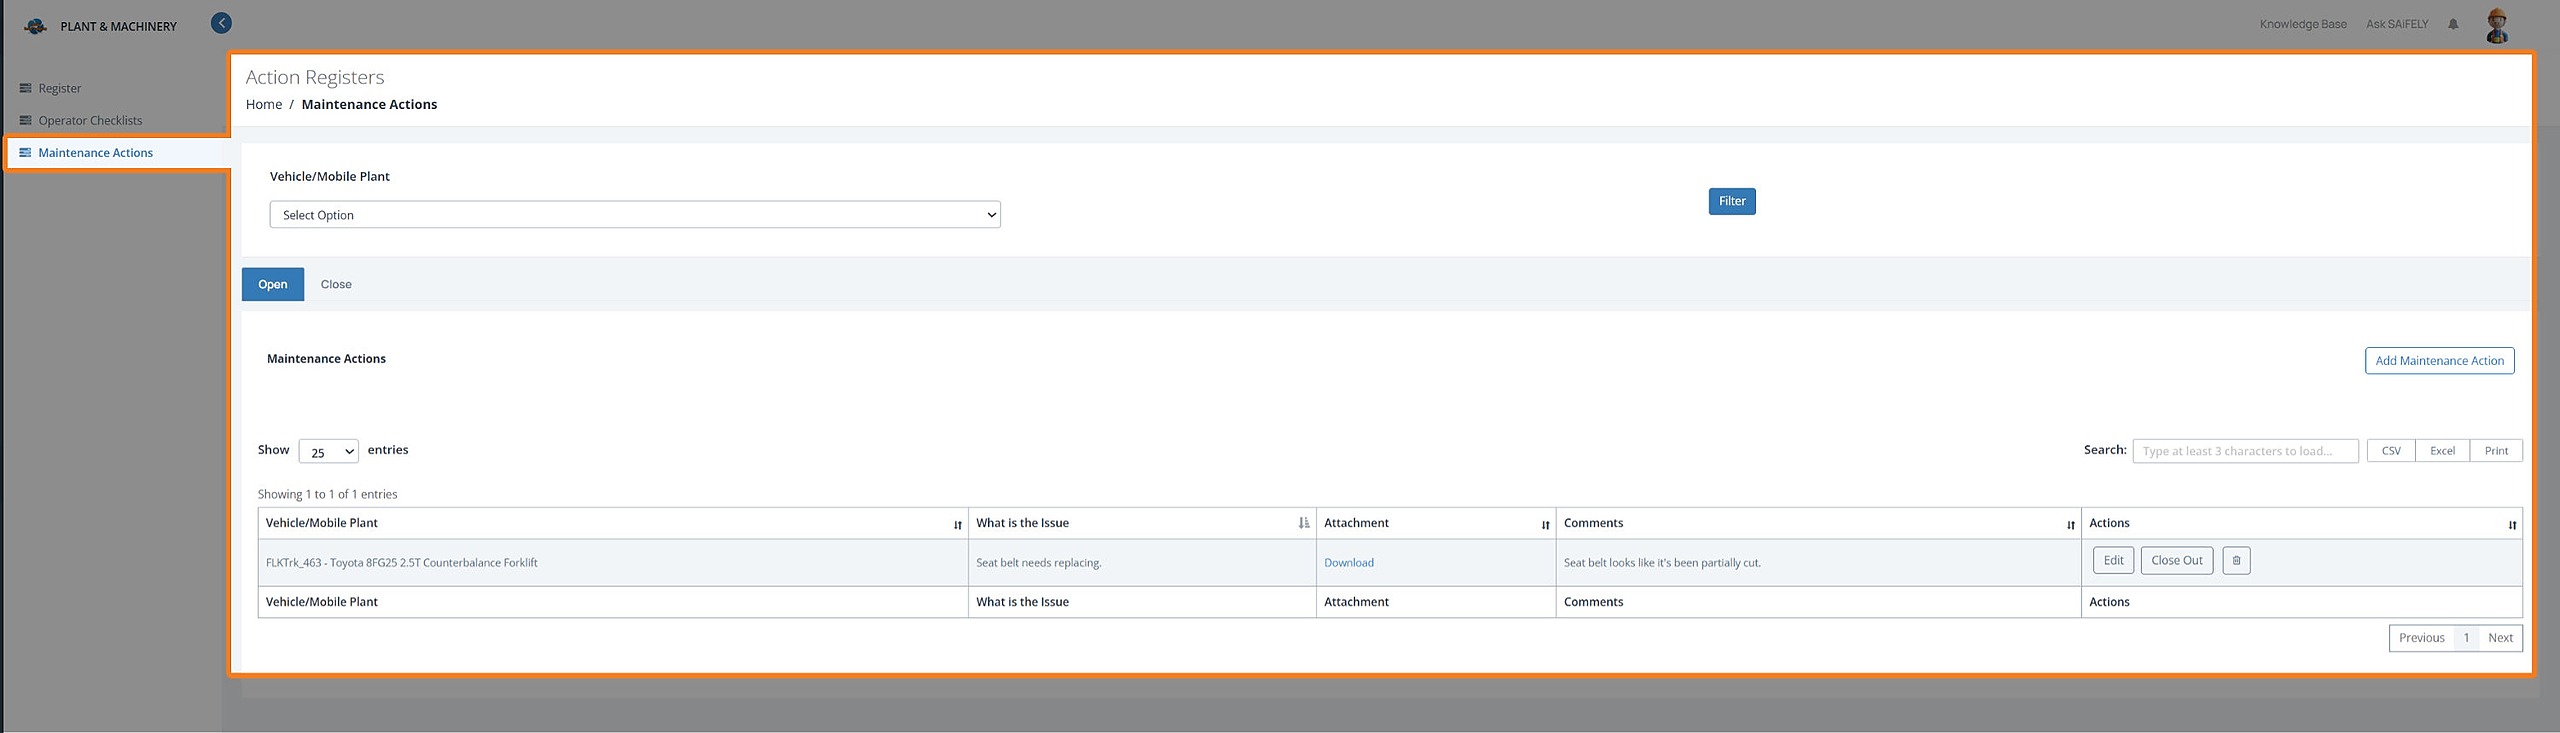
Maintenance Actions
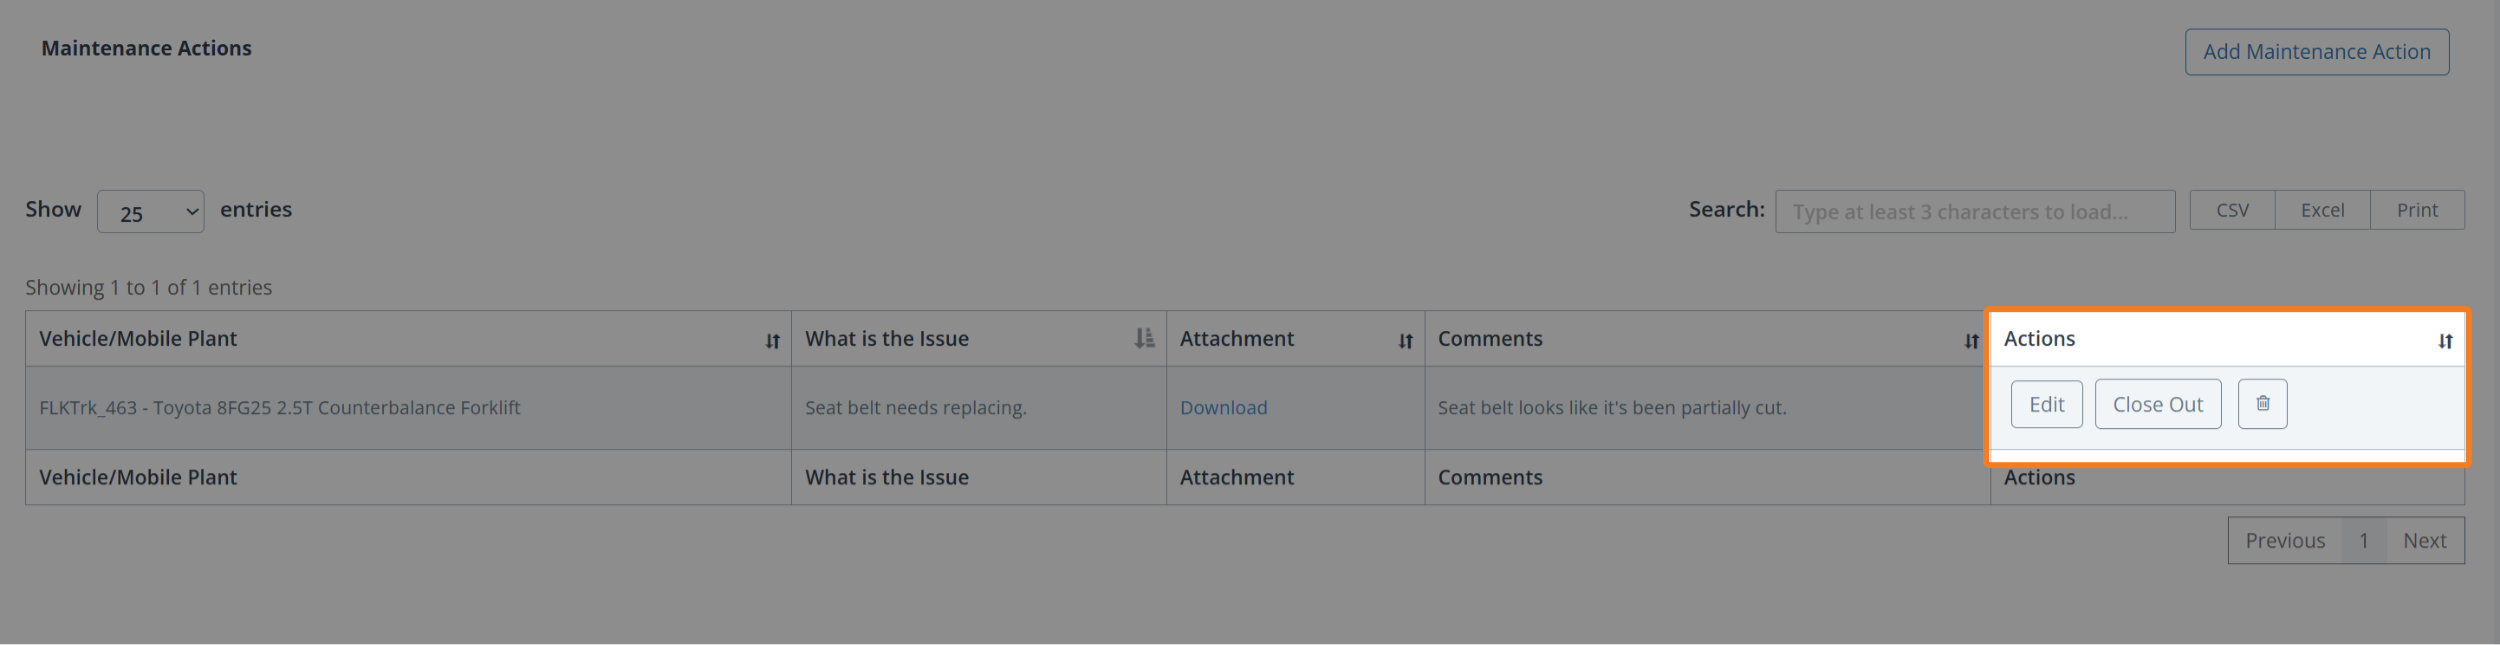
Click on the Maintenance Actions menu link to view your open actions:
Add Maintenance Action
If a maintenance action is required, click on the Add Maintenance Action button and the form will display:
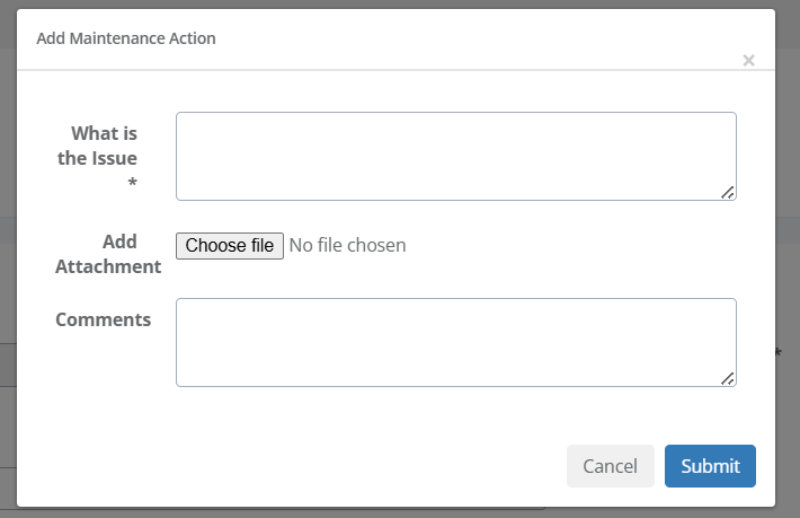
Enter a detailed description of the issue.
Add any attachments using the Choose File button.
Finally, add any additional comments.
Click on the Submit button and the action will be saved, the dialog box will close, and the grid updated with the new action:

Manage Maintenance Actions
With each individual maintenance action, you can perform the following actions:
Edit
Close Out
Delete
Edit Maintenance Action
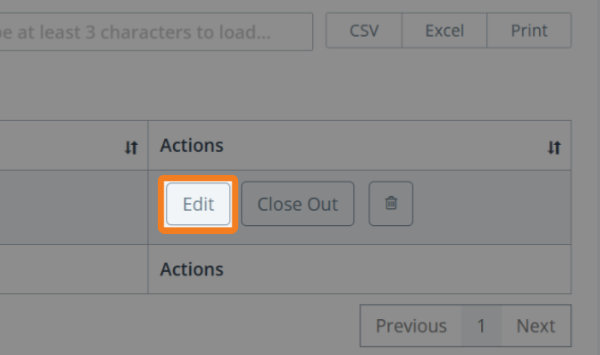
To edit a maintenance action:
Identify the action to be edited and click on the Edit button:
The action will be opened for editing:
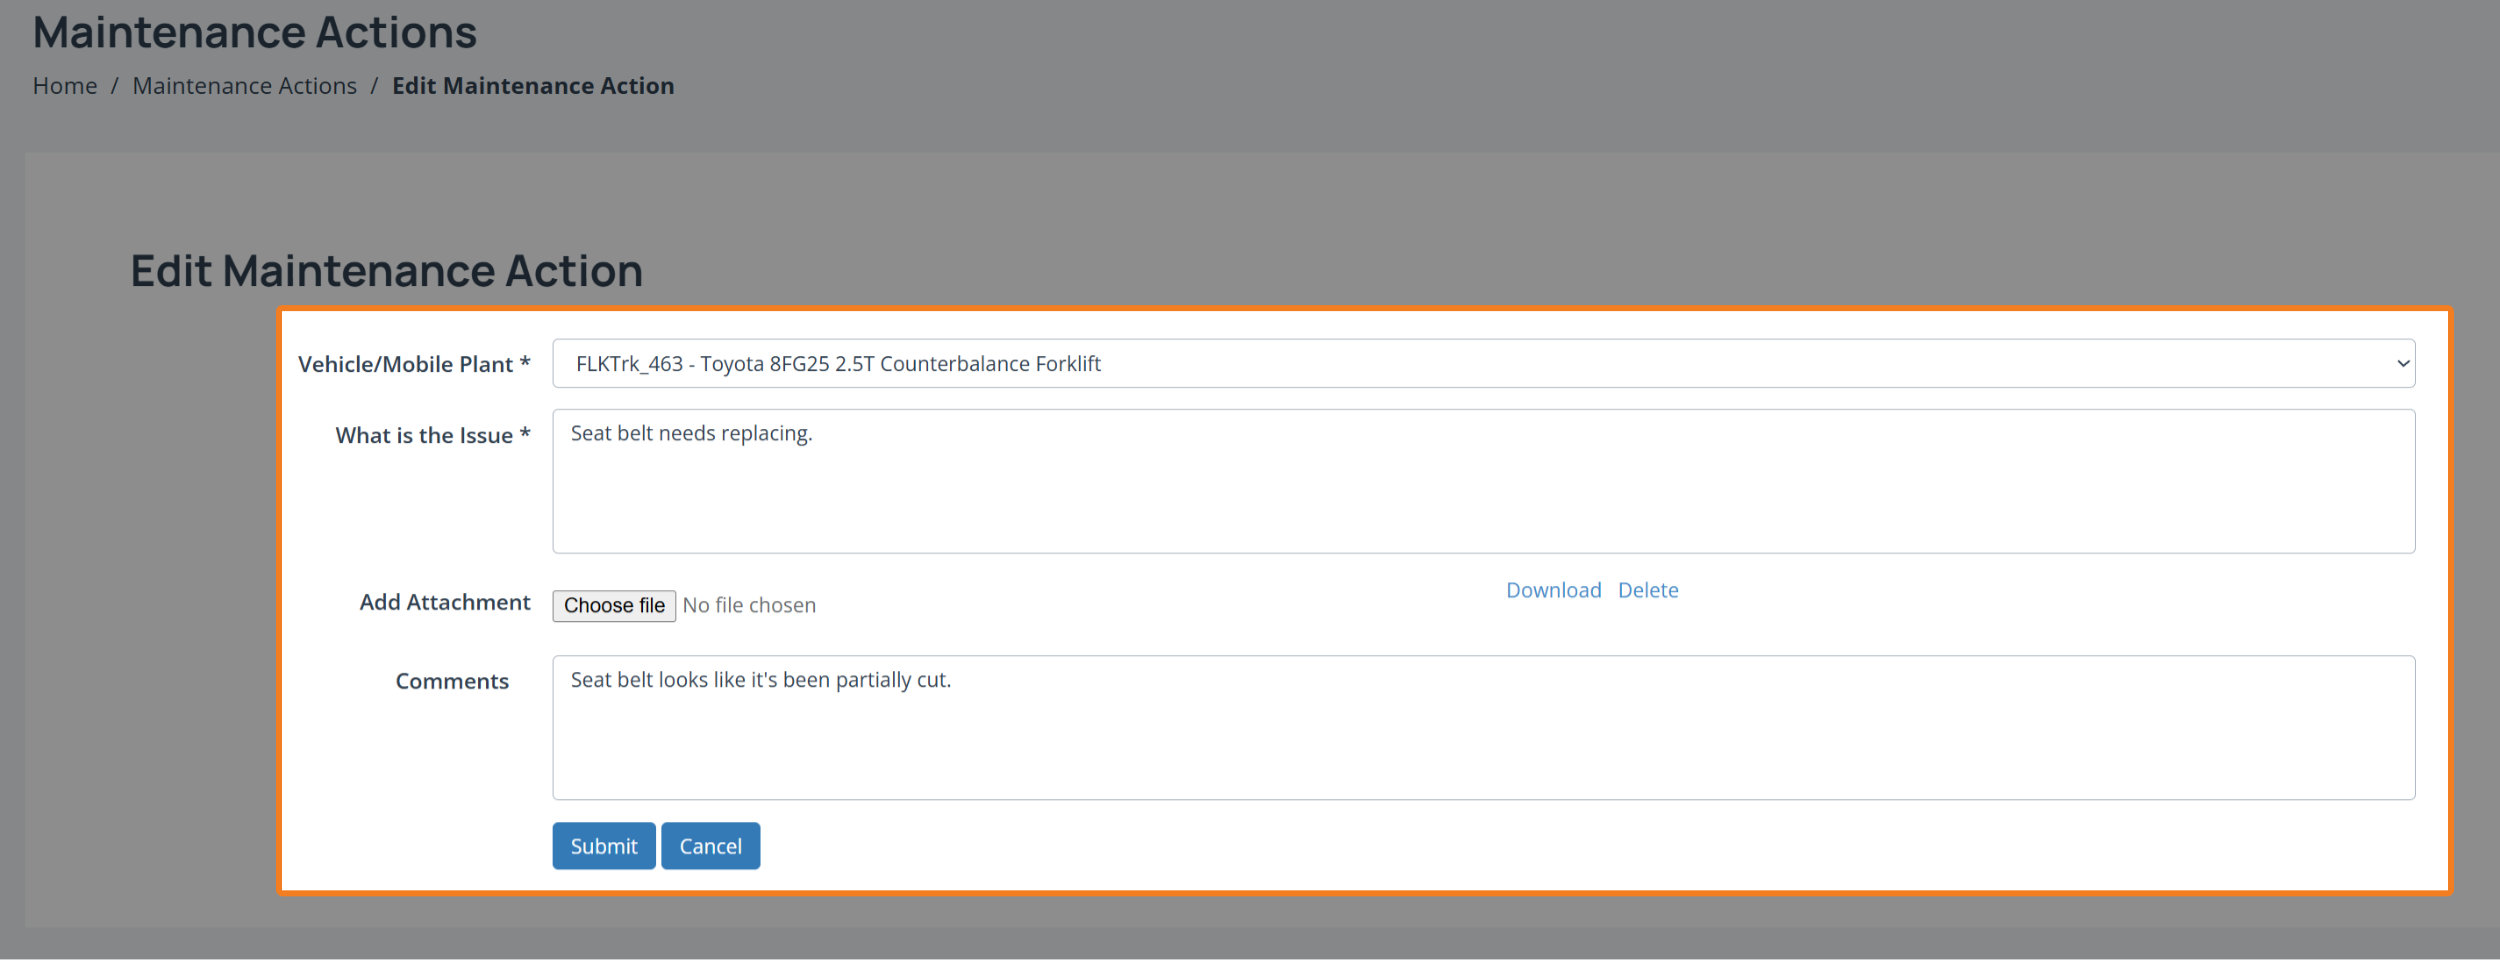
3. Make your changes and then click on the Submit button. Your changes will be saved and you'll be taken back to the maintenance action grid.
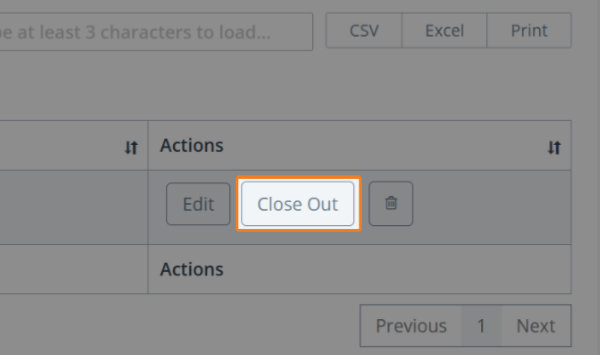
Close Out a Maintenance Action
❗️ Note: No confirmation warning
There is currently no notification warning on the close-out so the action will be closed out as soon as you click on the button.
To close out a maintenance action, identify the action to be closed and then click on the close out button:
The action will be closed-out, removed from the Open tab, and added to the Closed tab.
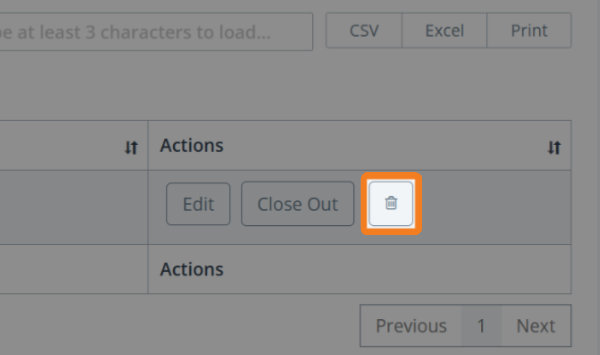
Delete Maintenance Action
To delete a maintenance action:
Identify the action you no longer need and click on the Delete button.
2. The following confirmation dialog will display:
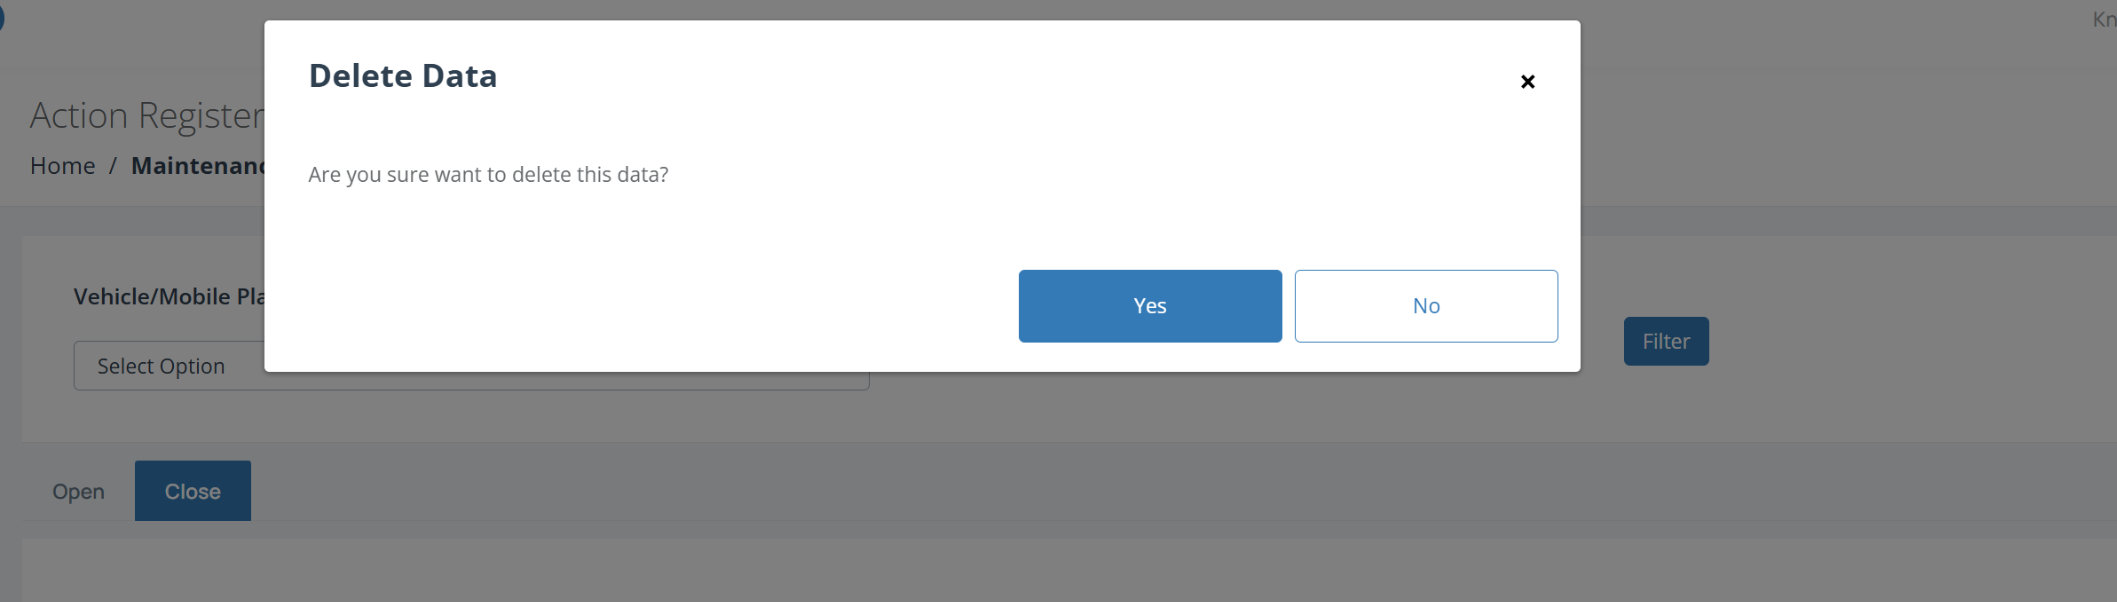
Click on Yes to delete the action. The dialog will close, the screen will refresh, and the maintenance action will be deleted.