CASSA
SWMS
Customise Cover and End Pages
Here's how to work with SWMS cover and end pages.
Updated 2 weeks ago
What's covered in this article
This article contains the following (plus quick links to the relevant sections):
Once you've created your SWMS, you can add a cover page and an end page to ensure it aligns with your branding.
At present, adding existing pages is accessible through the Marketplace. (This functionality will be changing soon and these will be added by default to your SWMS register.)
Add Pages from Marketplace
To add pages from the marketplace:
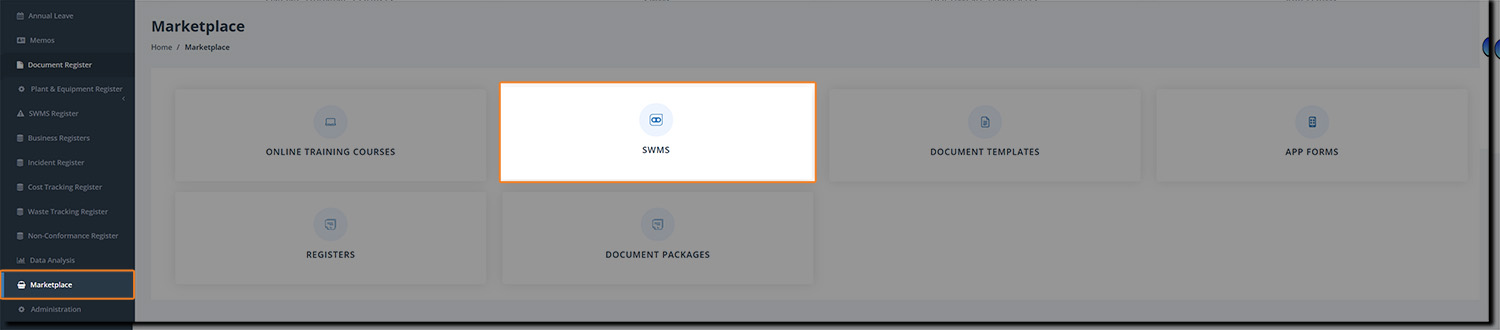
Click on Marketplace in the main navbar, then on SWMS, and then on the Cover Pages tab:

As you can see, in the above image we have 3 SWMS cover templates:
Project & Company Information
Part 1
Part 2 (Risk Matrix)
In the Action column, either click on the Add button to add the cover page to your own SWMS register library or click on the Preview button to have a look at the page.
Click on the Preview button to see what the page looks like:
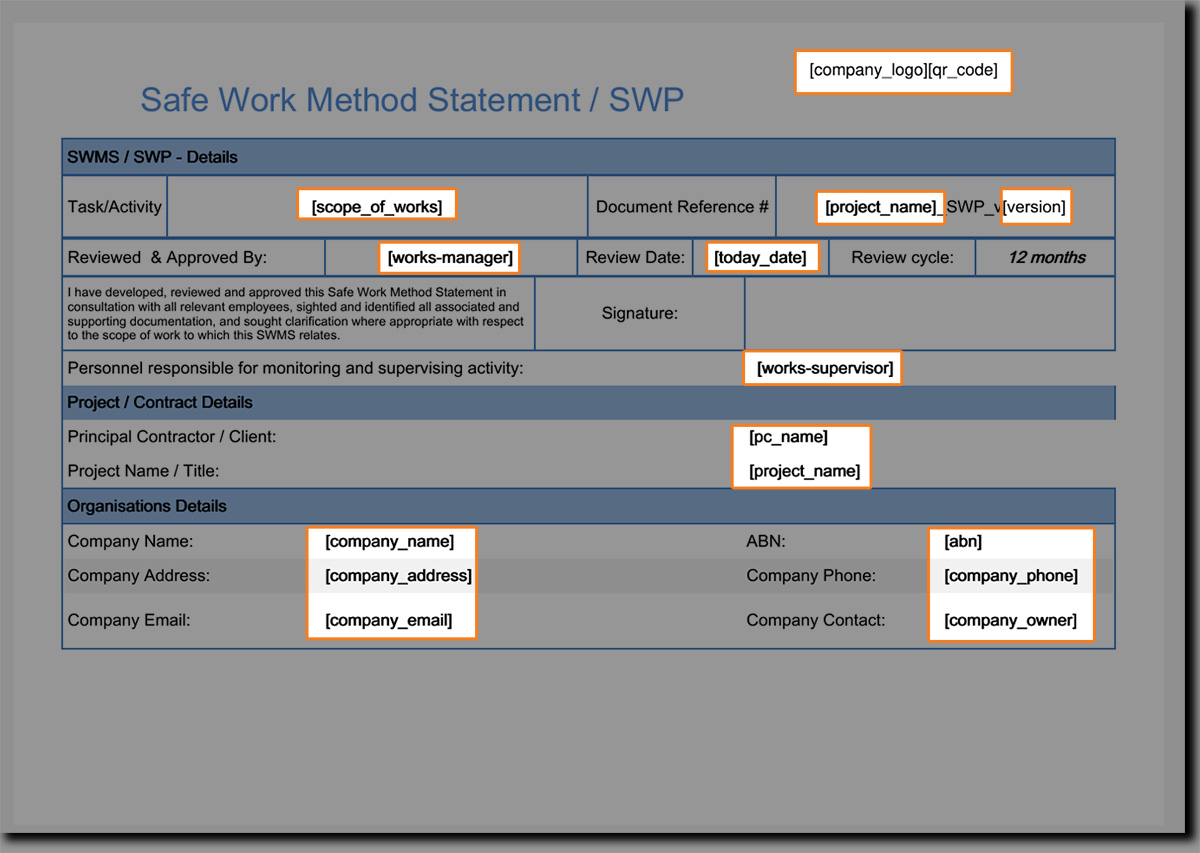
Highlighted in the above image are what we call Tokens.
Tokens
Tokens tie into the CASSA system, and extract the relevant company details (and personal, where relevant) for insertion in reports, SWMS, etc.
Tokens save you having entering the information multiple times, avoids the risk of human error, etc., and makes everyone's lives much easier.
Once you've previewed the pages, click on Add to add the required cover pages to your own register. Do the same with the End pages.
You'll see the Record Added Sucessfully! notification and, once the screen refreshes, in the Action column, you'll see a new Update button.
Now, in the main navbar click on SWMS Register and then, in the SWMS List, click on Cover Pages and you'll see:
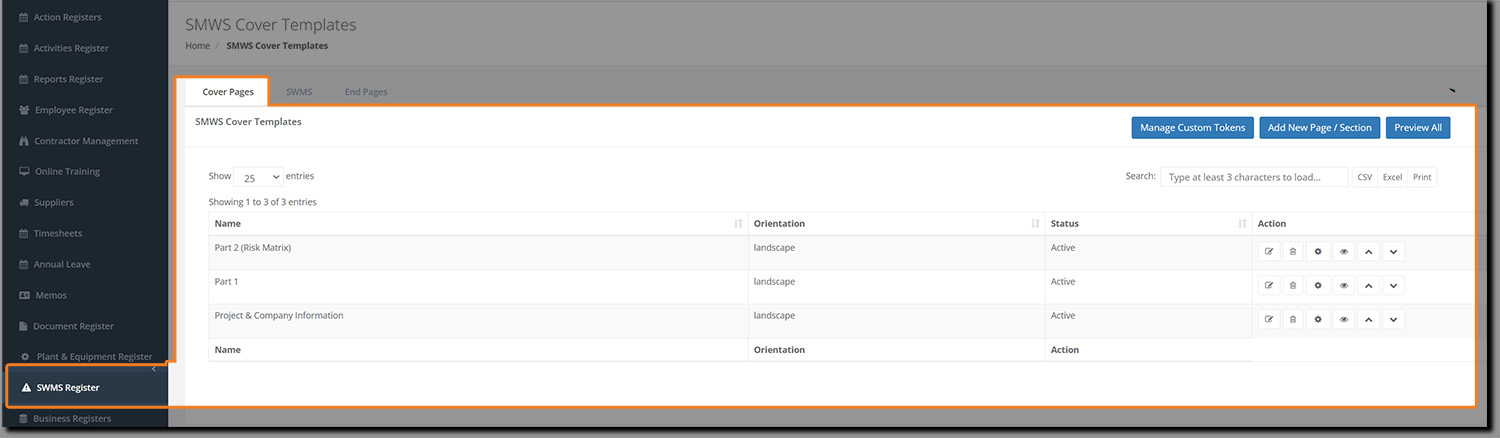
You can now see the main button functionality:
Manage Custom Tokens: Custom tokens are information placeholders that are used throughout your SWMS. Placeholders such as SWMS name, telephone numbers, project name, client name, etc.
Add new Page/Section: Adds a new page to your cover page.
Preview All: Let's you see a real-time version of how your cover/end page will look.
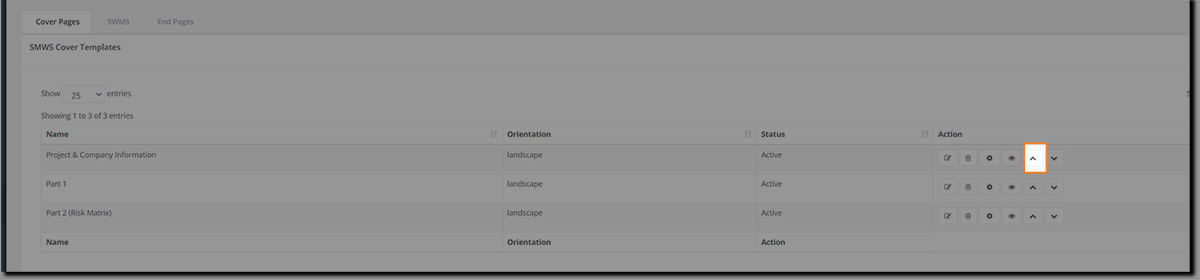
In the grid's Action column, you can also see (from left-to-right):
Edit the page
Delete the page
Manage tokens
Preview
Move the page up (the pages are listed in the order they will appear in the SWMS)
Move the page down
Here, I've reordered my pages:
Cover Pages
Edit Cover Pages
We'll now make some small edits to our cover pages.
Add Signature
To add a signature to your SWMS via the browser you will need a transparent png image of your signature (we recommend a maximum width of 280 pixels else it might push the bottom part of the page onto another page):
With the Project & Company Information page, click on the Edit button and you'll see:
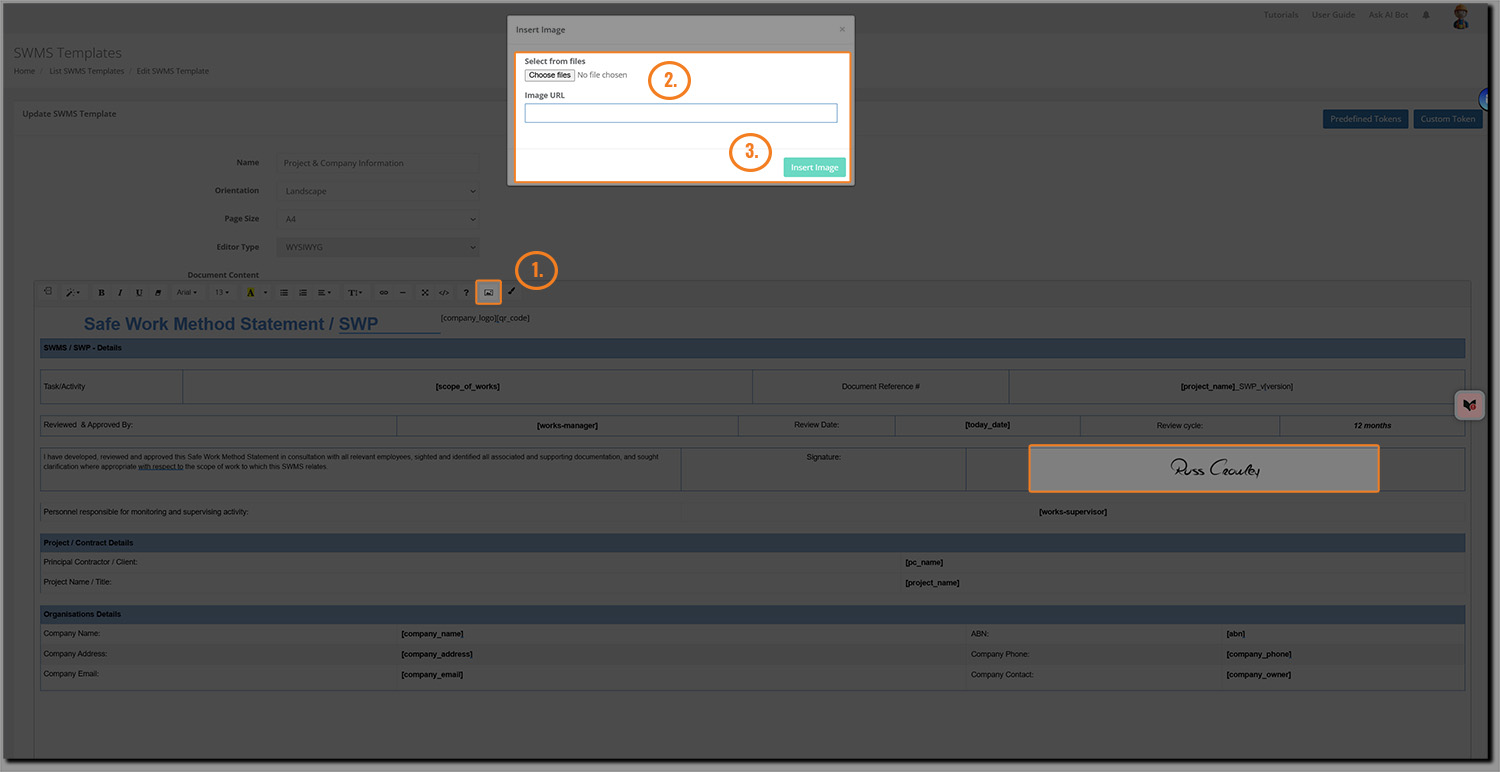
Place your cursor in the signature field and click on the Insert Image button (1).
Click on choose files and select your image (2).
Click on the Insert Image button (3) and your signature will be inserted into the page. (Note: The image width for my signature was 175 pixels.)
Scroll-down the page and click on the Save & Close button to return to the Cover Pages grid list.
Edit Part 1 Cover Page
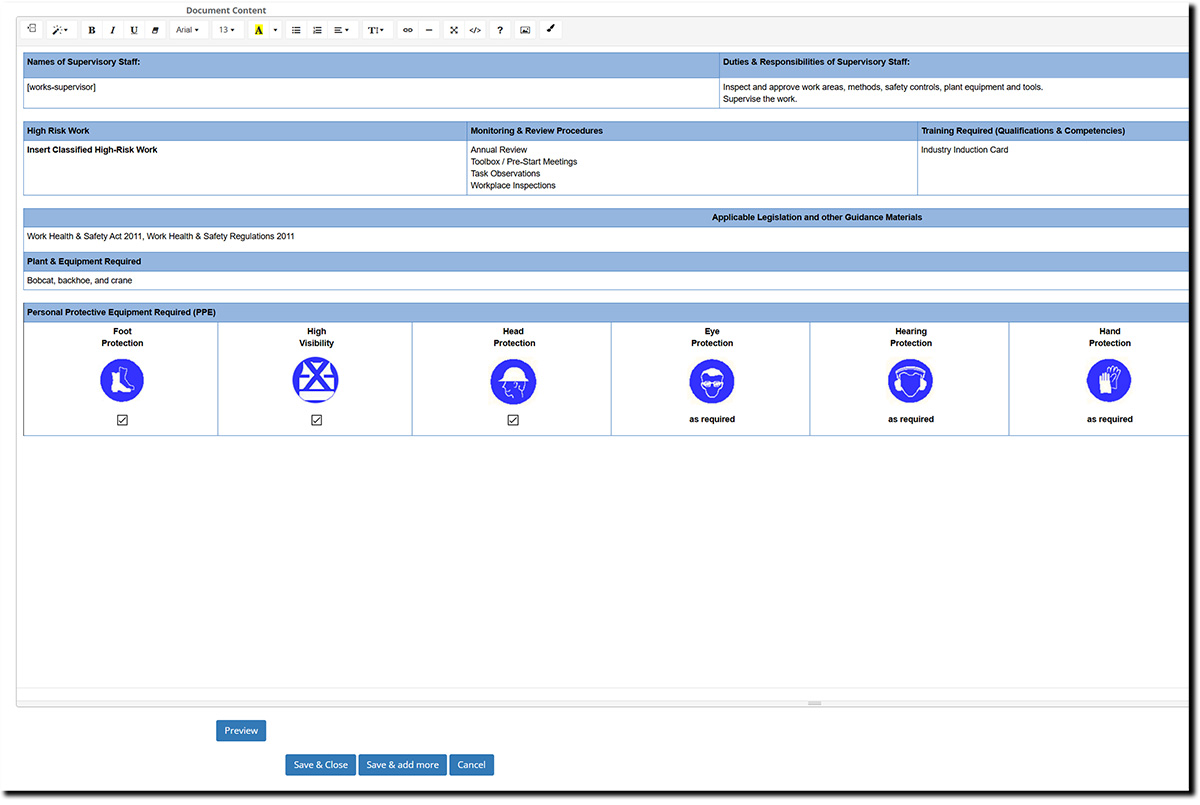
Next, with the Part 1 cover page, click on the Edit button and you'll see:
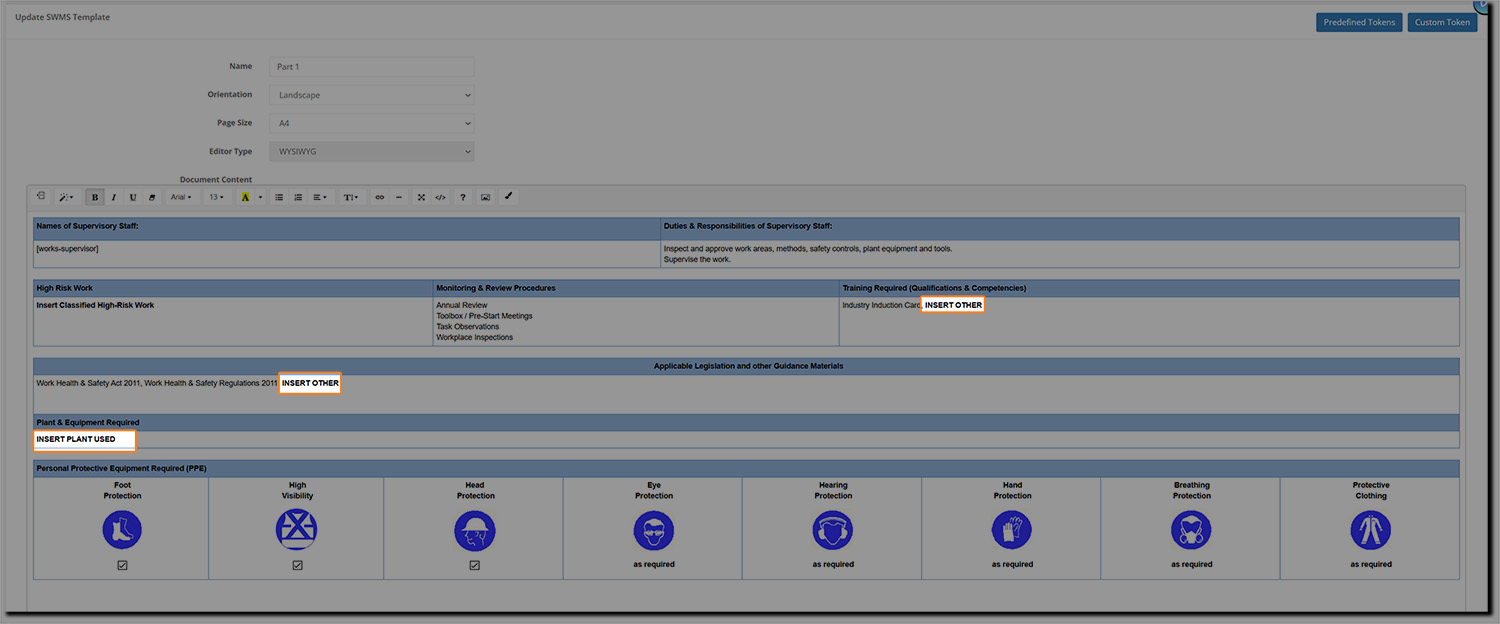
In this page, there are 3 areas where we need to insert other information:
Training Required (Qualifications and Competencies)
Applicable Legislation and other Guidance Materials
Plant & Equipment Required
Add the relevant information for these, and other (as required), sections, and then review and complete the remainder (as appropriate).
When done, click on Save & Close to return to the Cover pages grid.
Make changes to the Part 2 (Risk Changes) document, as required, and then proceed to the End pages.
End Pages
Edit End Pages
To edit the End Pages, click on the End Pages tab and then on the Edit button for the required page:

Note: for the purposes of your SWMS document, we neither need to edit any end pages nor do we need a sign-off page (we already added our signature in the Project & Company Information page).
To ensure the sign-off page doesn't get added to our SWMS, we will delete it.
Delete End Page
With the Sign-off page, in the Action column, click on the Delete button and then confirm you wish to delete the page:

The screen will refresh and the page will be deleted from your End Pages grid. (However, you can still add it from the Marketplace.)