Add Timesheet
The walkthrough video showing how to add a new timesheet is here:
To add a new timesheet:
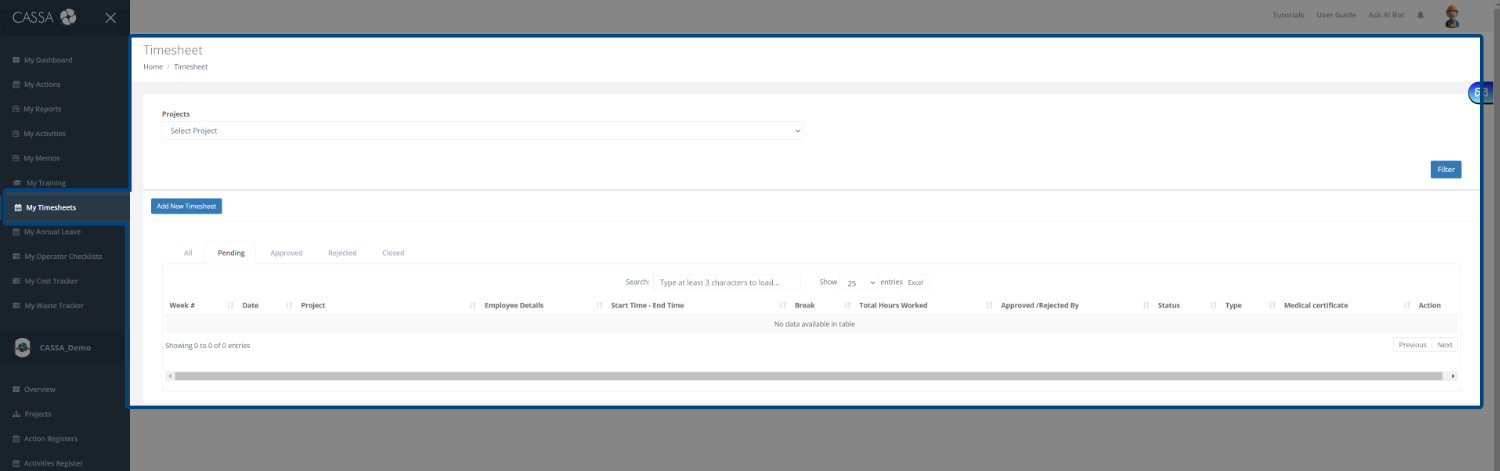
In the main navigation, click on My Timesheets and your Timesheets grid will display.
As you can see, you have 3 main areas:
Filter by Project (including the apply Filter button)
The Add New Timesheet button
The All, Pending, Approved, Rejected, and Closed grid display tabs.

Click on the Add New Timesheet button and you'll be taken to the Add Timesheet form:
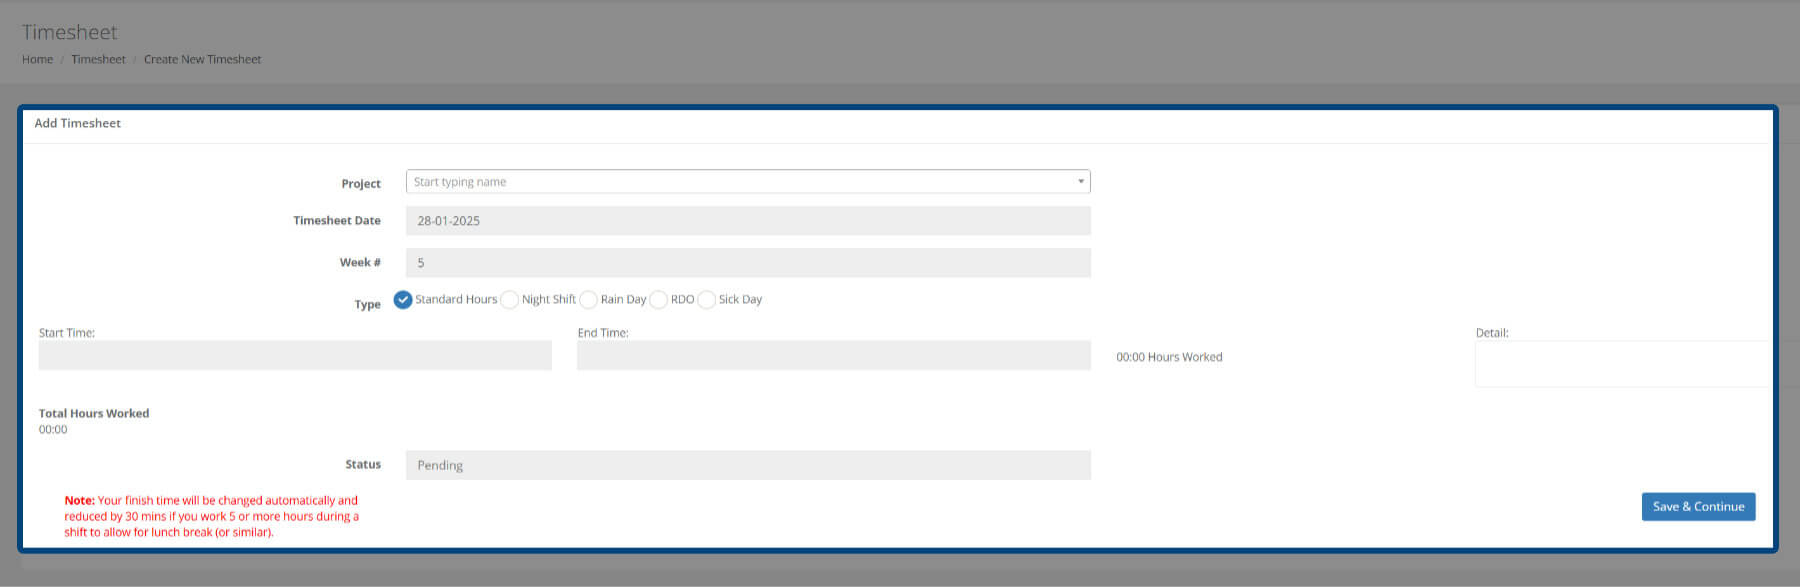
With the form, you must enter the following information:
Project name: You can start typing the project name and the field will auto-filter, or you can click on the dropdown arrow and select your project name.
Timesheet Date: Click in the field and select the appropriate date from the date picker. The Week # will then auto-update.
Select the timesheet Type:
Standard Hours
Night Shift
Rain Day
Rostered Day Off (RDO)
Sick Day: If you select this option, an additional Medical Certificate field will appear where you can upload a copy of your cert.
Add the start time and end time and any related Details.
As the note in red states, if you work more than 5 hours in a shift, 30 minutes will automatically be deducted from your day’s work hours. This is a legal requirement.
The Status of all new timesheets is set to Pending. This is a read-only field and you can’t change this.
Once you’ve added all of your information, click on the Save & Continue button.
Your timesheet will be saved, the screen will refresh, and you will be taken back to the All tab where your timesheet will be visible.
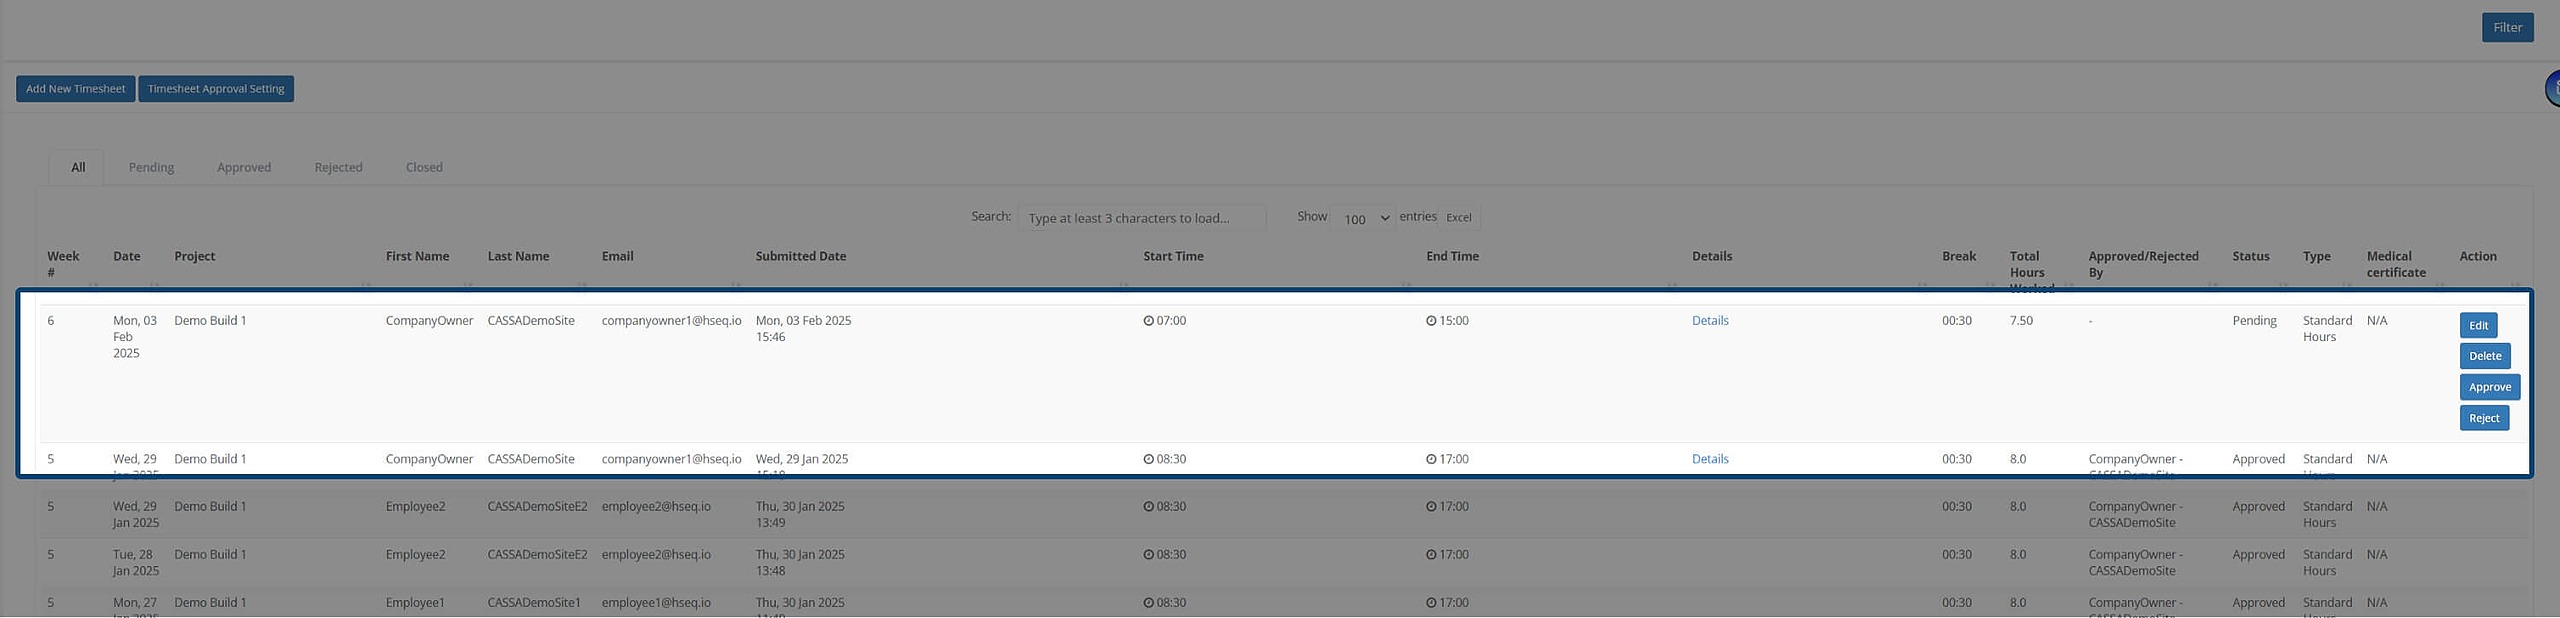
Click on Pending and you can review your added timesheet:

Edit Timesheet
Here’s the walkthrough video for editing a timesheet:
To edit a timesheet:
Identify the timesheet you wish to edit and click on the Edit button.

The timesheet will enter Edit mode where you can modify the timesheet accordingly:

When complete, click on the Save & Continue button, the screen will refresh, the Record Updated Successfully message will display, and the timesheet will be added to the Pending tab.
Delete Timesheet
The walkthrough video for deleting a timesheet is here:
To delete a timesheet:
Identify the timesheet you wish to delete:

Click on the Delete button and the confirmation popup will display:

Clock on Ok and the popup will close, the screen will refresh, and the timesheet will be removed from the grid.
Filter Timesheets
Here’s how to filter timesheets:
There are several ways to filter timesheets; by:
Project
Employee name
Contractor Employee name
Start Date or End Date
Timesheet Status: Pending, Approved, Rejected, Closed

Select your required options--you can select multiple options--and then click on the Filter button.
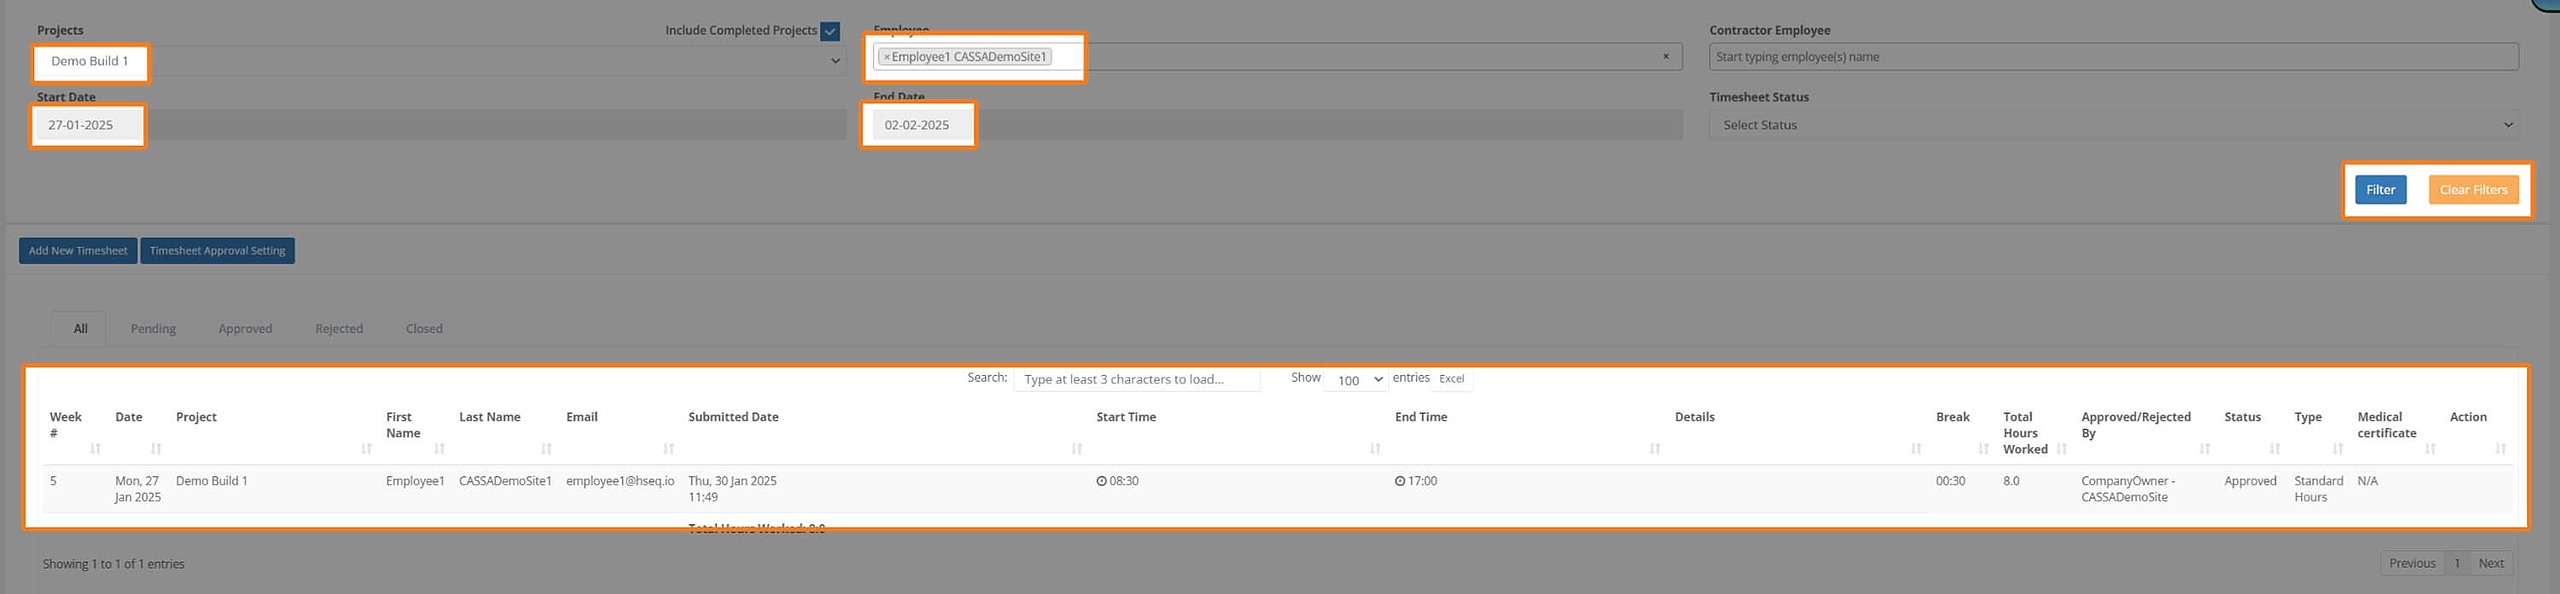
The display will update based on your selected criteria.
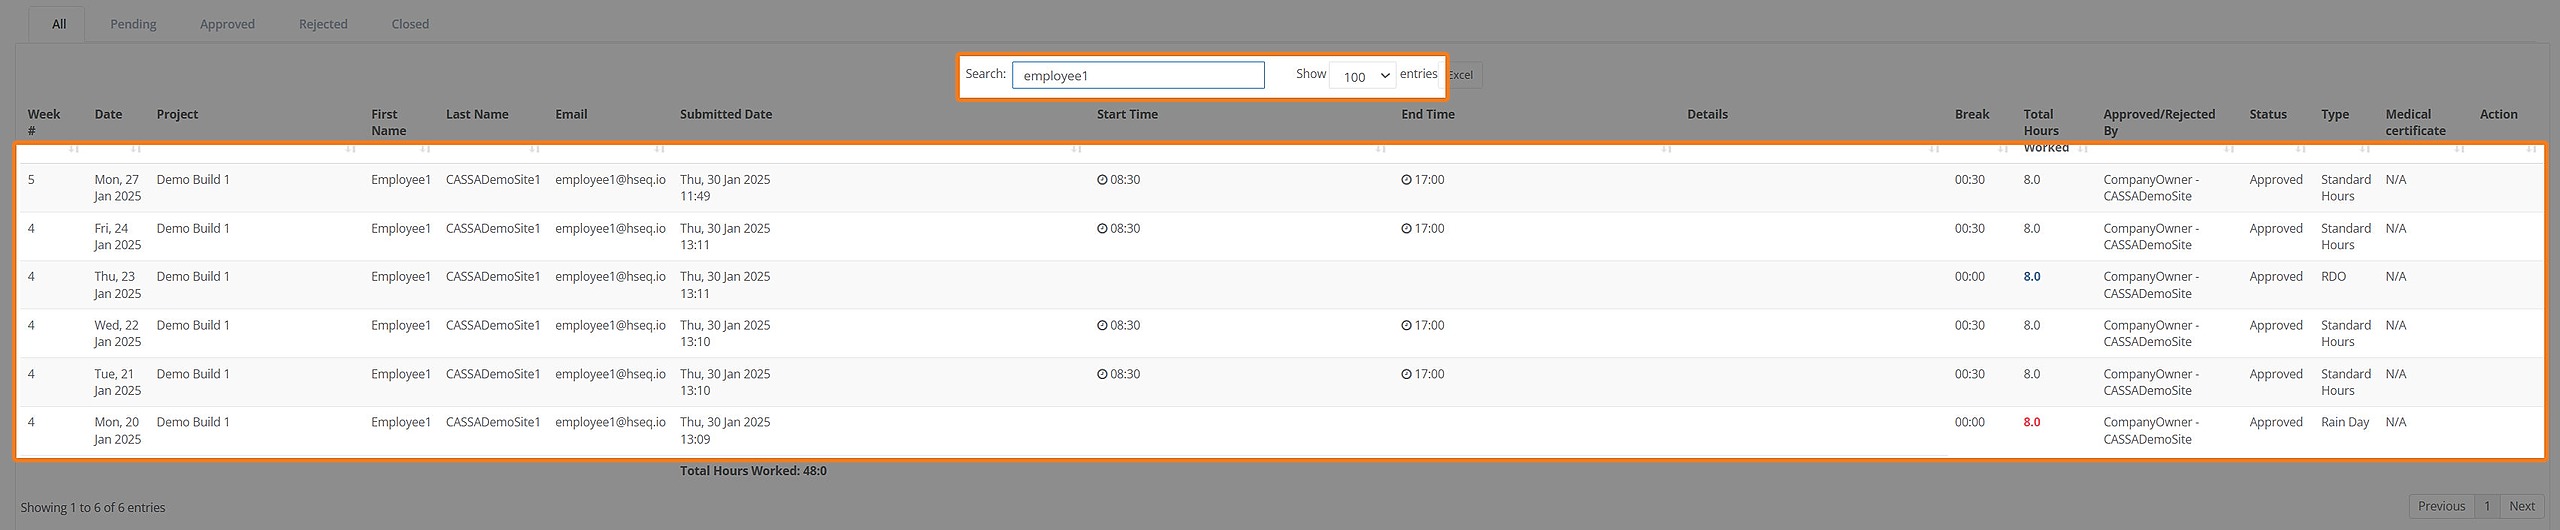
Active Search
You can also use the search field to auto-select based on what you type. Start typing in the search field and it’ll update automatically as you go.
Export List to Excel
Click on the Excel button to export the current filtered list to Excel:
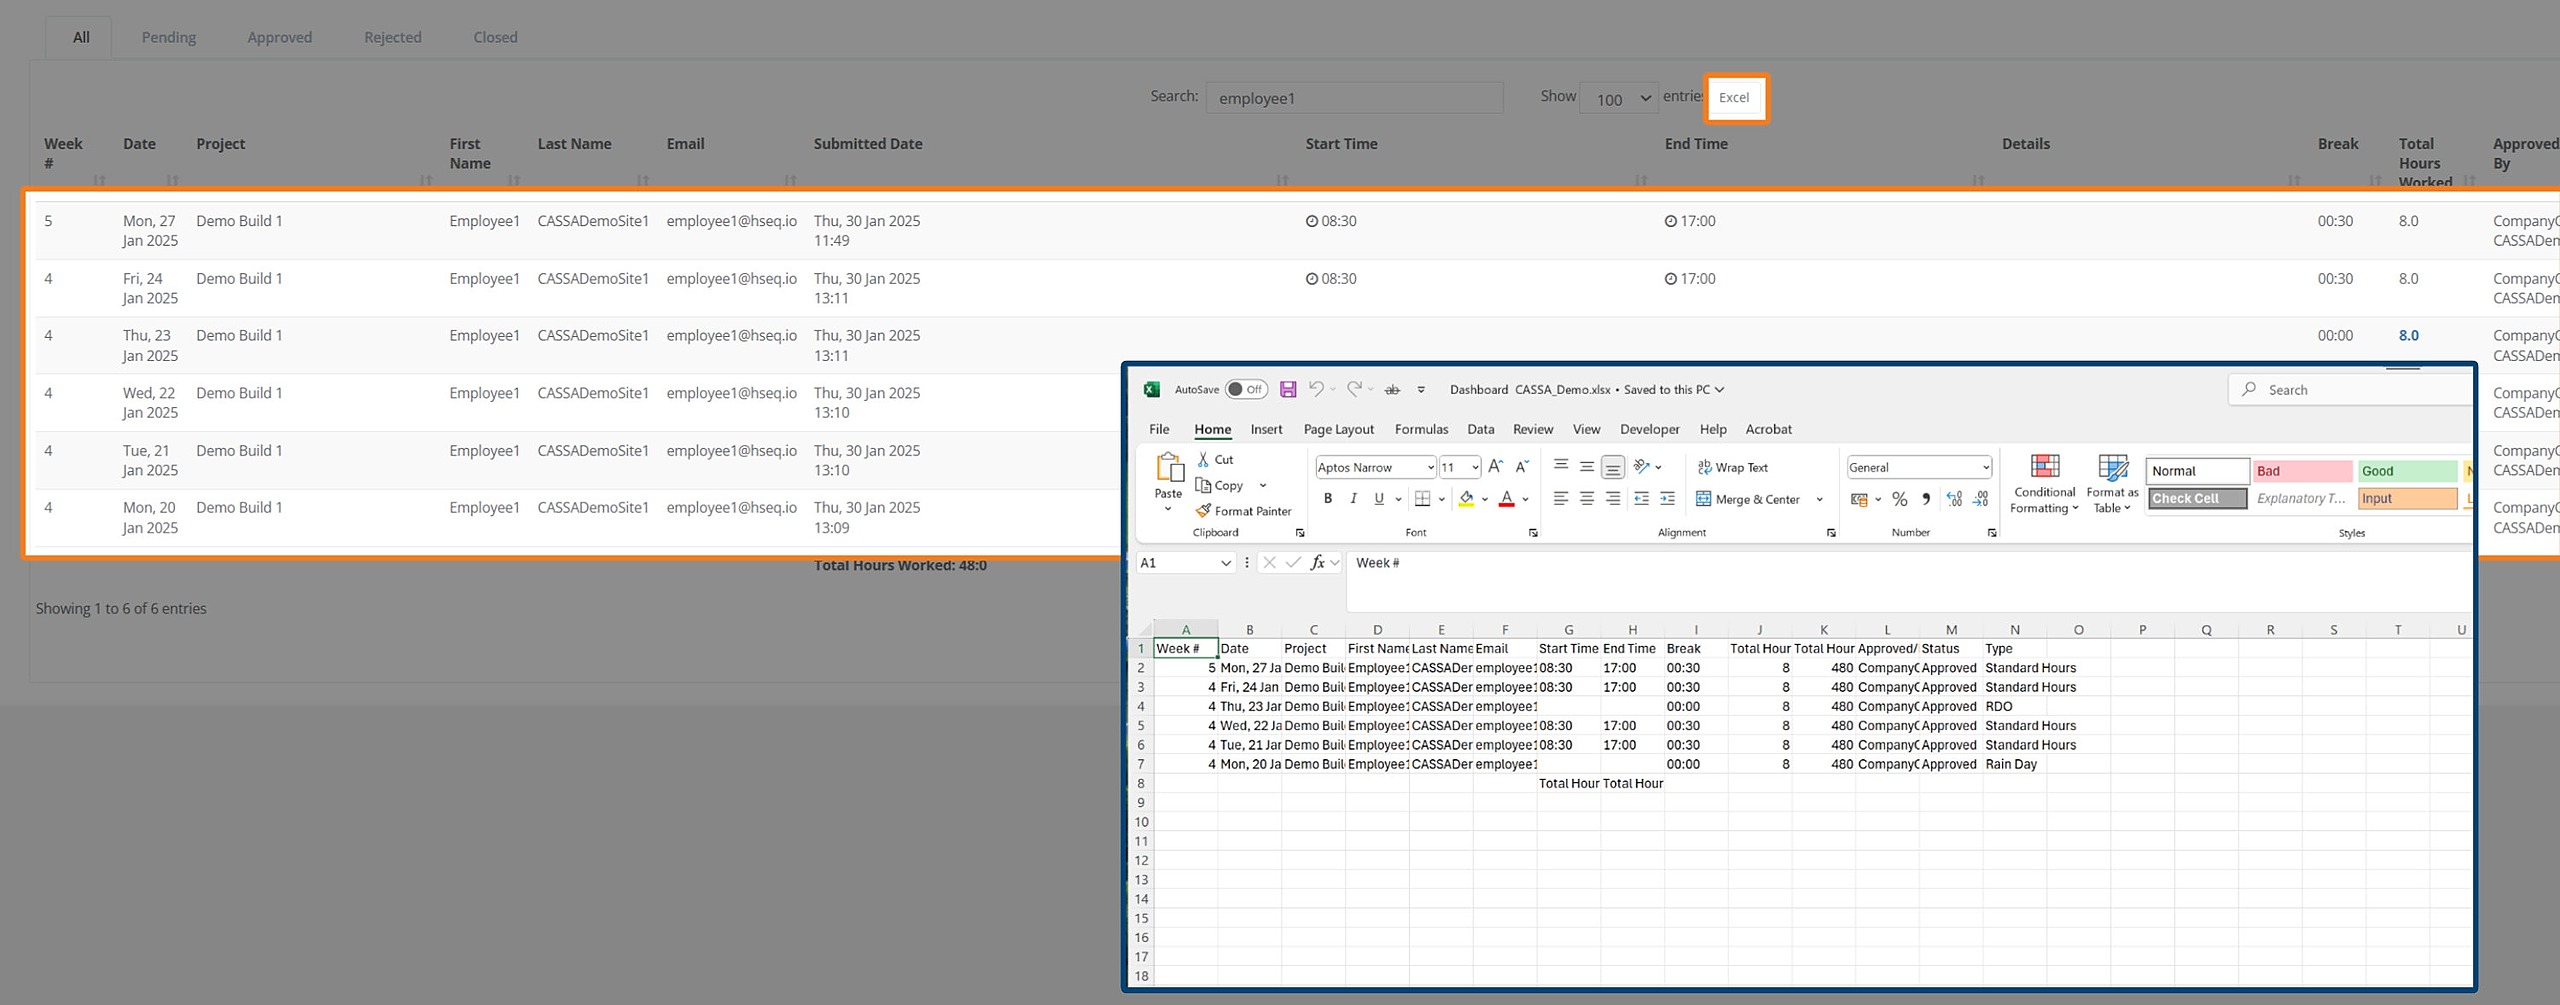
The file will be saved to your computer where you can then open it in Excel.
Clear Filter
Click on the Clear Filter button to clear a filter:
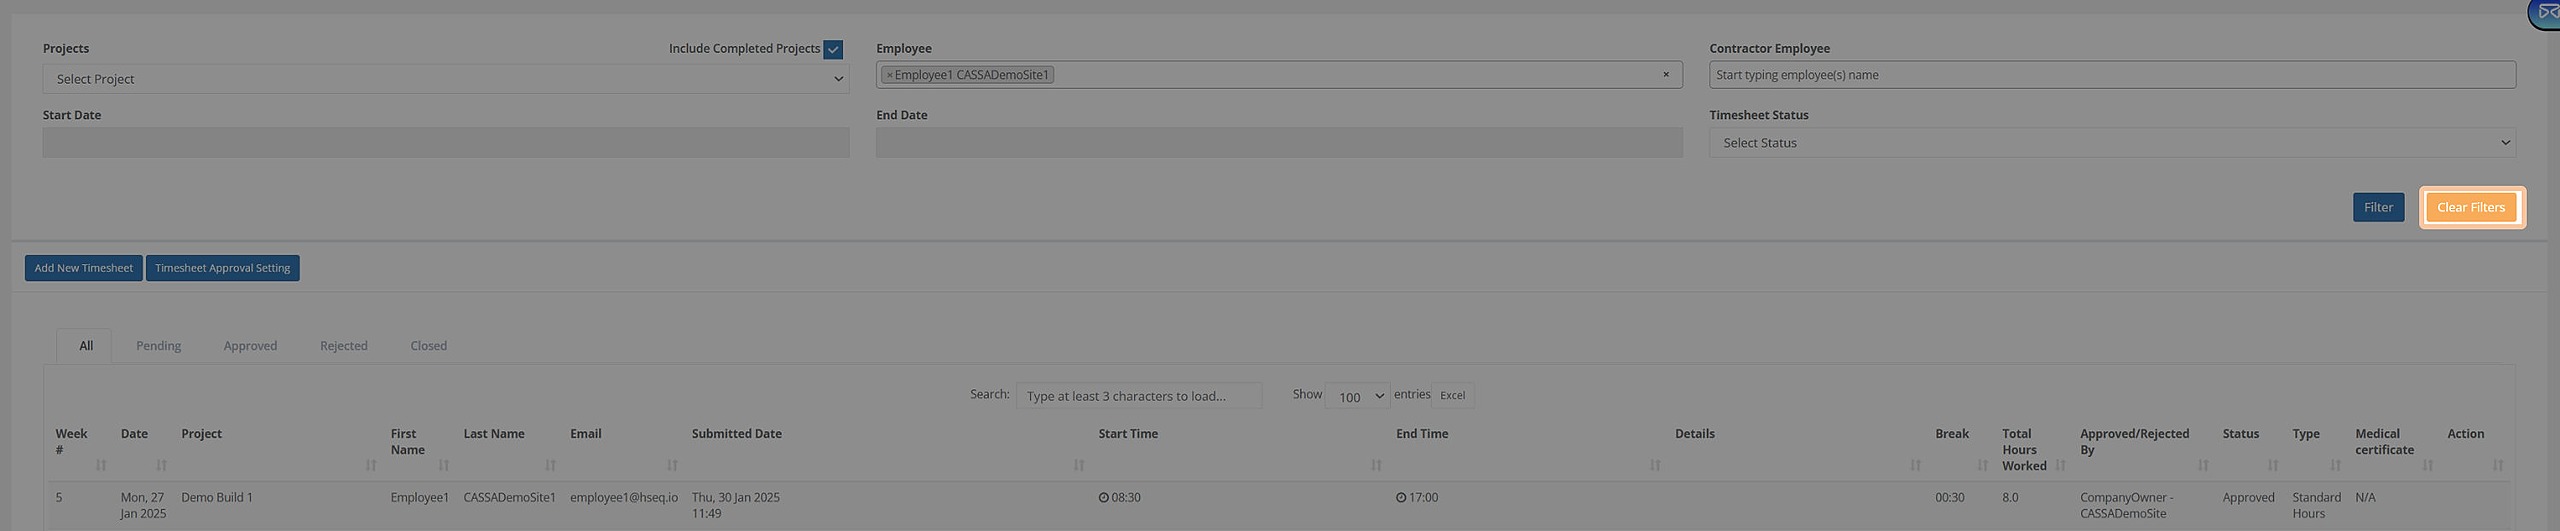
You can now apply new filter settings.