Your personal profile is your personal account within CASSA, it's specific to you, and everyone has one.
It's where you add your general and emergency information, as well as other information such as qualifications and payroll details. It's also where you manage your account.
Download the pdf here
Right-click on the below link and select 'Open in new tab' else it'll open in this tab.
Download the Completing Your Personal Profile pdfAccess your Personal Profile
Initially, you're brought here when you first create your CASSA account.
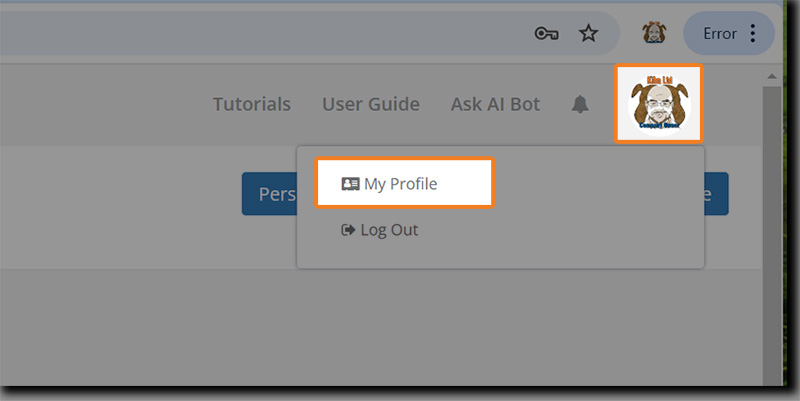
Thereafter, you can always return here by clicking first on your profile picture and then by clicking on My Profile in the dropdown:
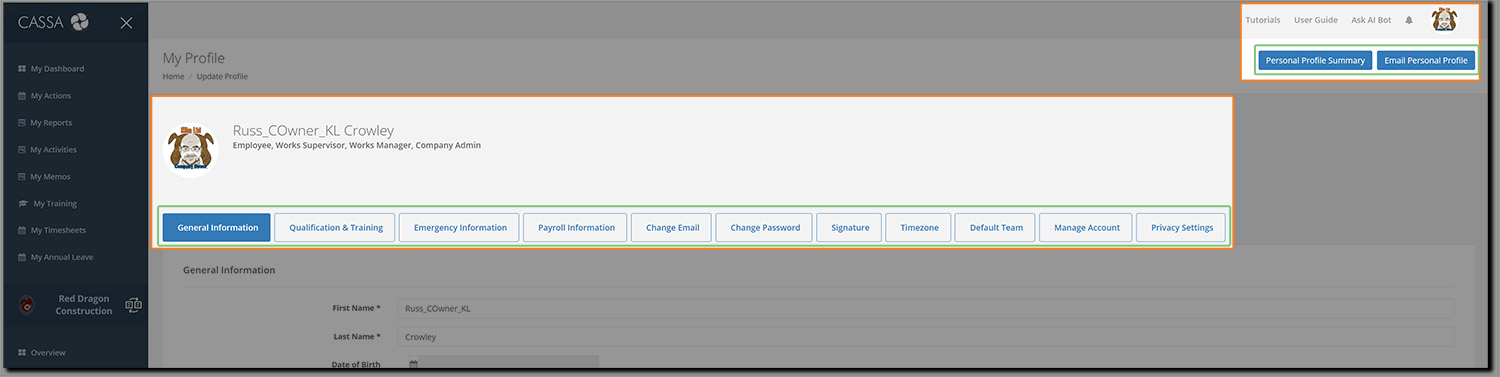
The My Profile page is where you can edit all your information on the respective tabs:
General Information
Qualifications & Training
Emergency Information
Payroll Information
Change Email
Change Password
Signature
Timezone
Default Team
Manage Account
Privacy Settings
You can click through these in any order, but we'll look at each in turn.
Profile Tabs
General Information
The first section is "General Information".
This is where you add your Name, Date of Birth, email and actual addresses, etc.
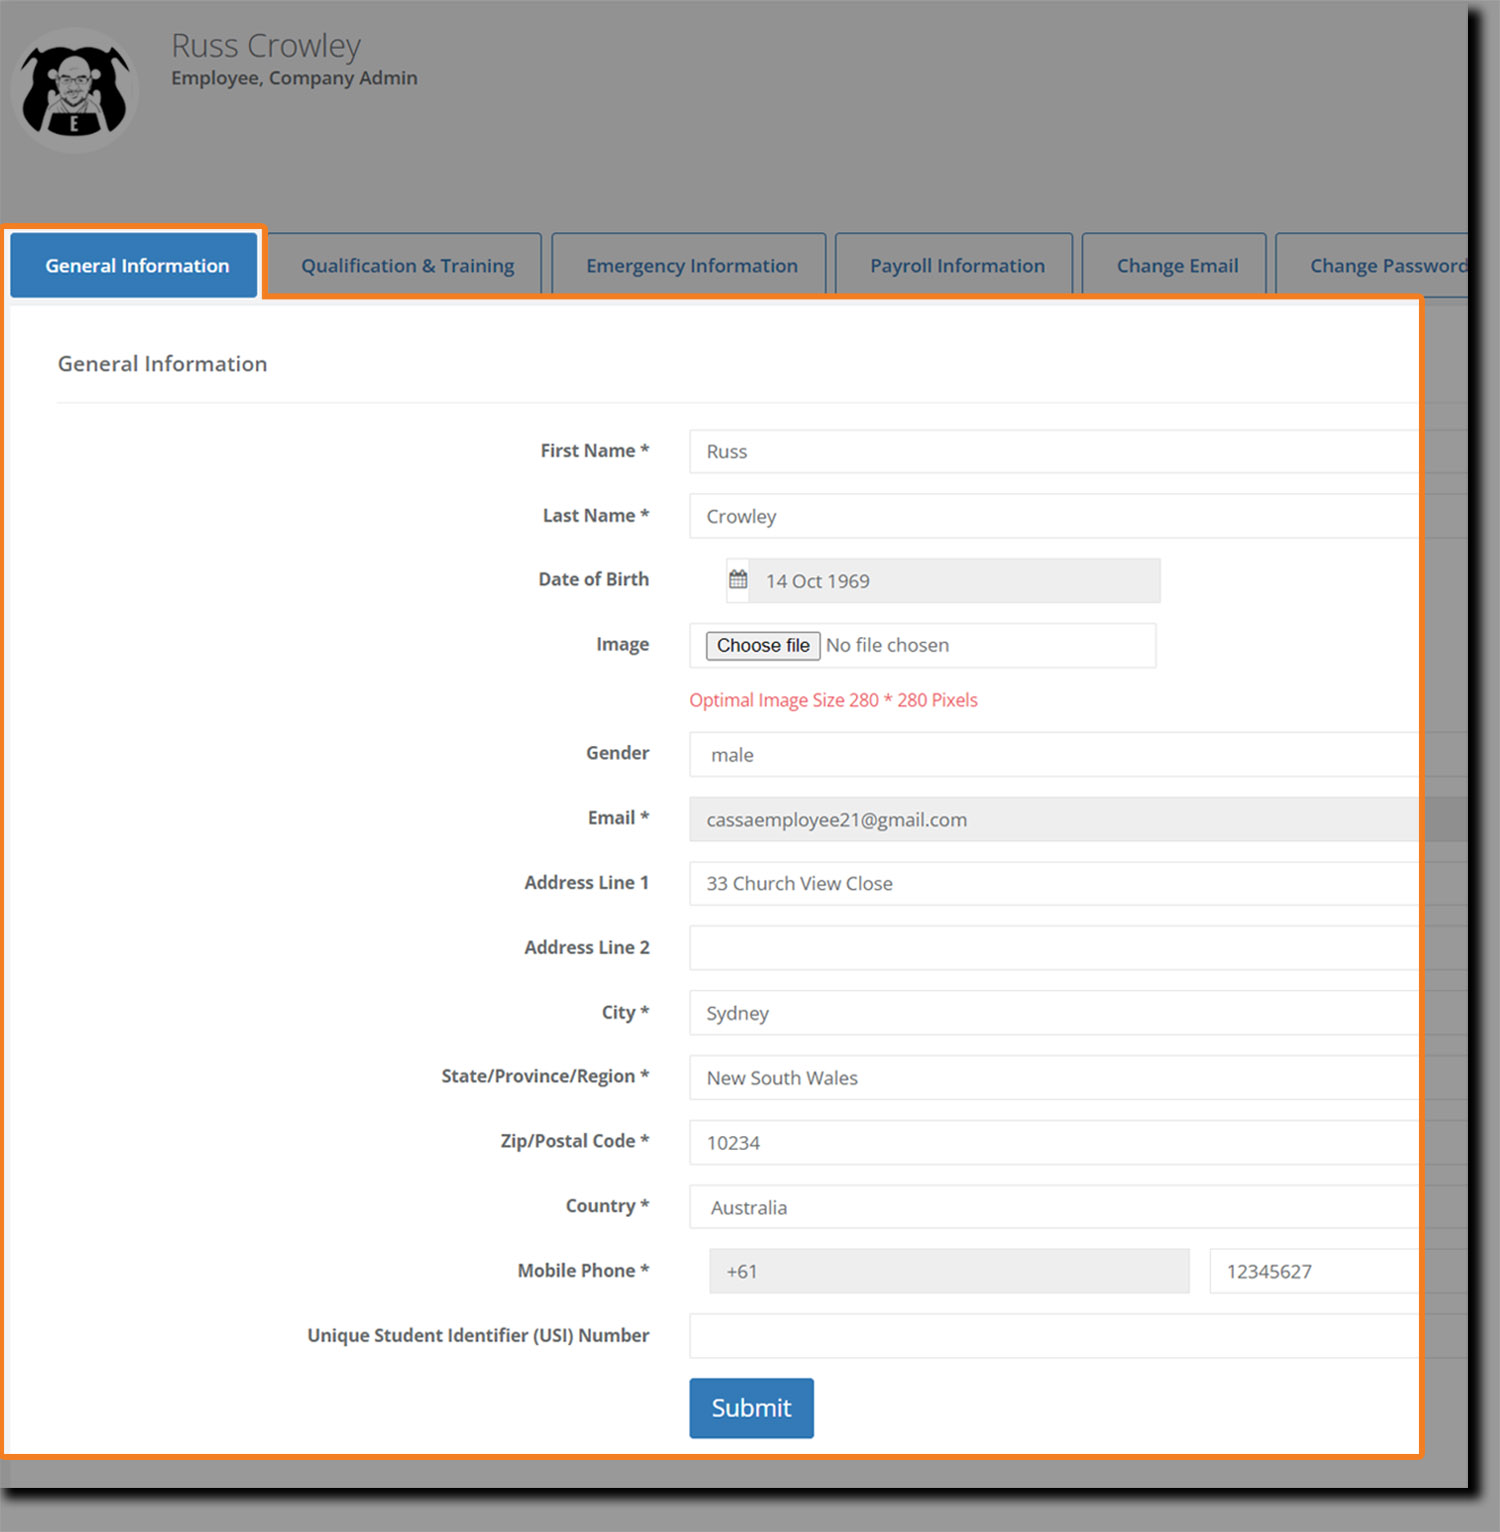
You will need to fill in all the required fields (*) to complete your profile.
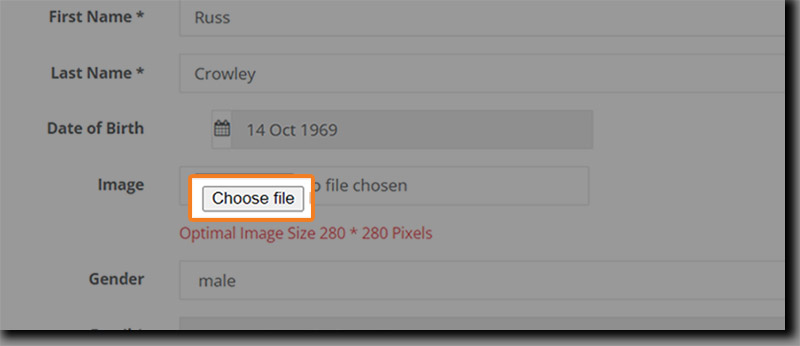
Profile picture
There are several ways to add your profile picture
Upload your profile photo by clicking "Choose File", and then navigating to, and selecting, your required photograph.
If you're on your mobile, you can update your profile on the CASSA app and either take a snapshot with your camera, or upload a photo from your phone's gallery:

When you've completed all the General Information fields, click on the Submit button to save your changes.
Next is the Qualification and Training section.
Qualification and Training
Click on the Qualification and Training tab and you'll see:
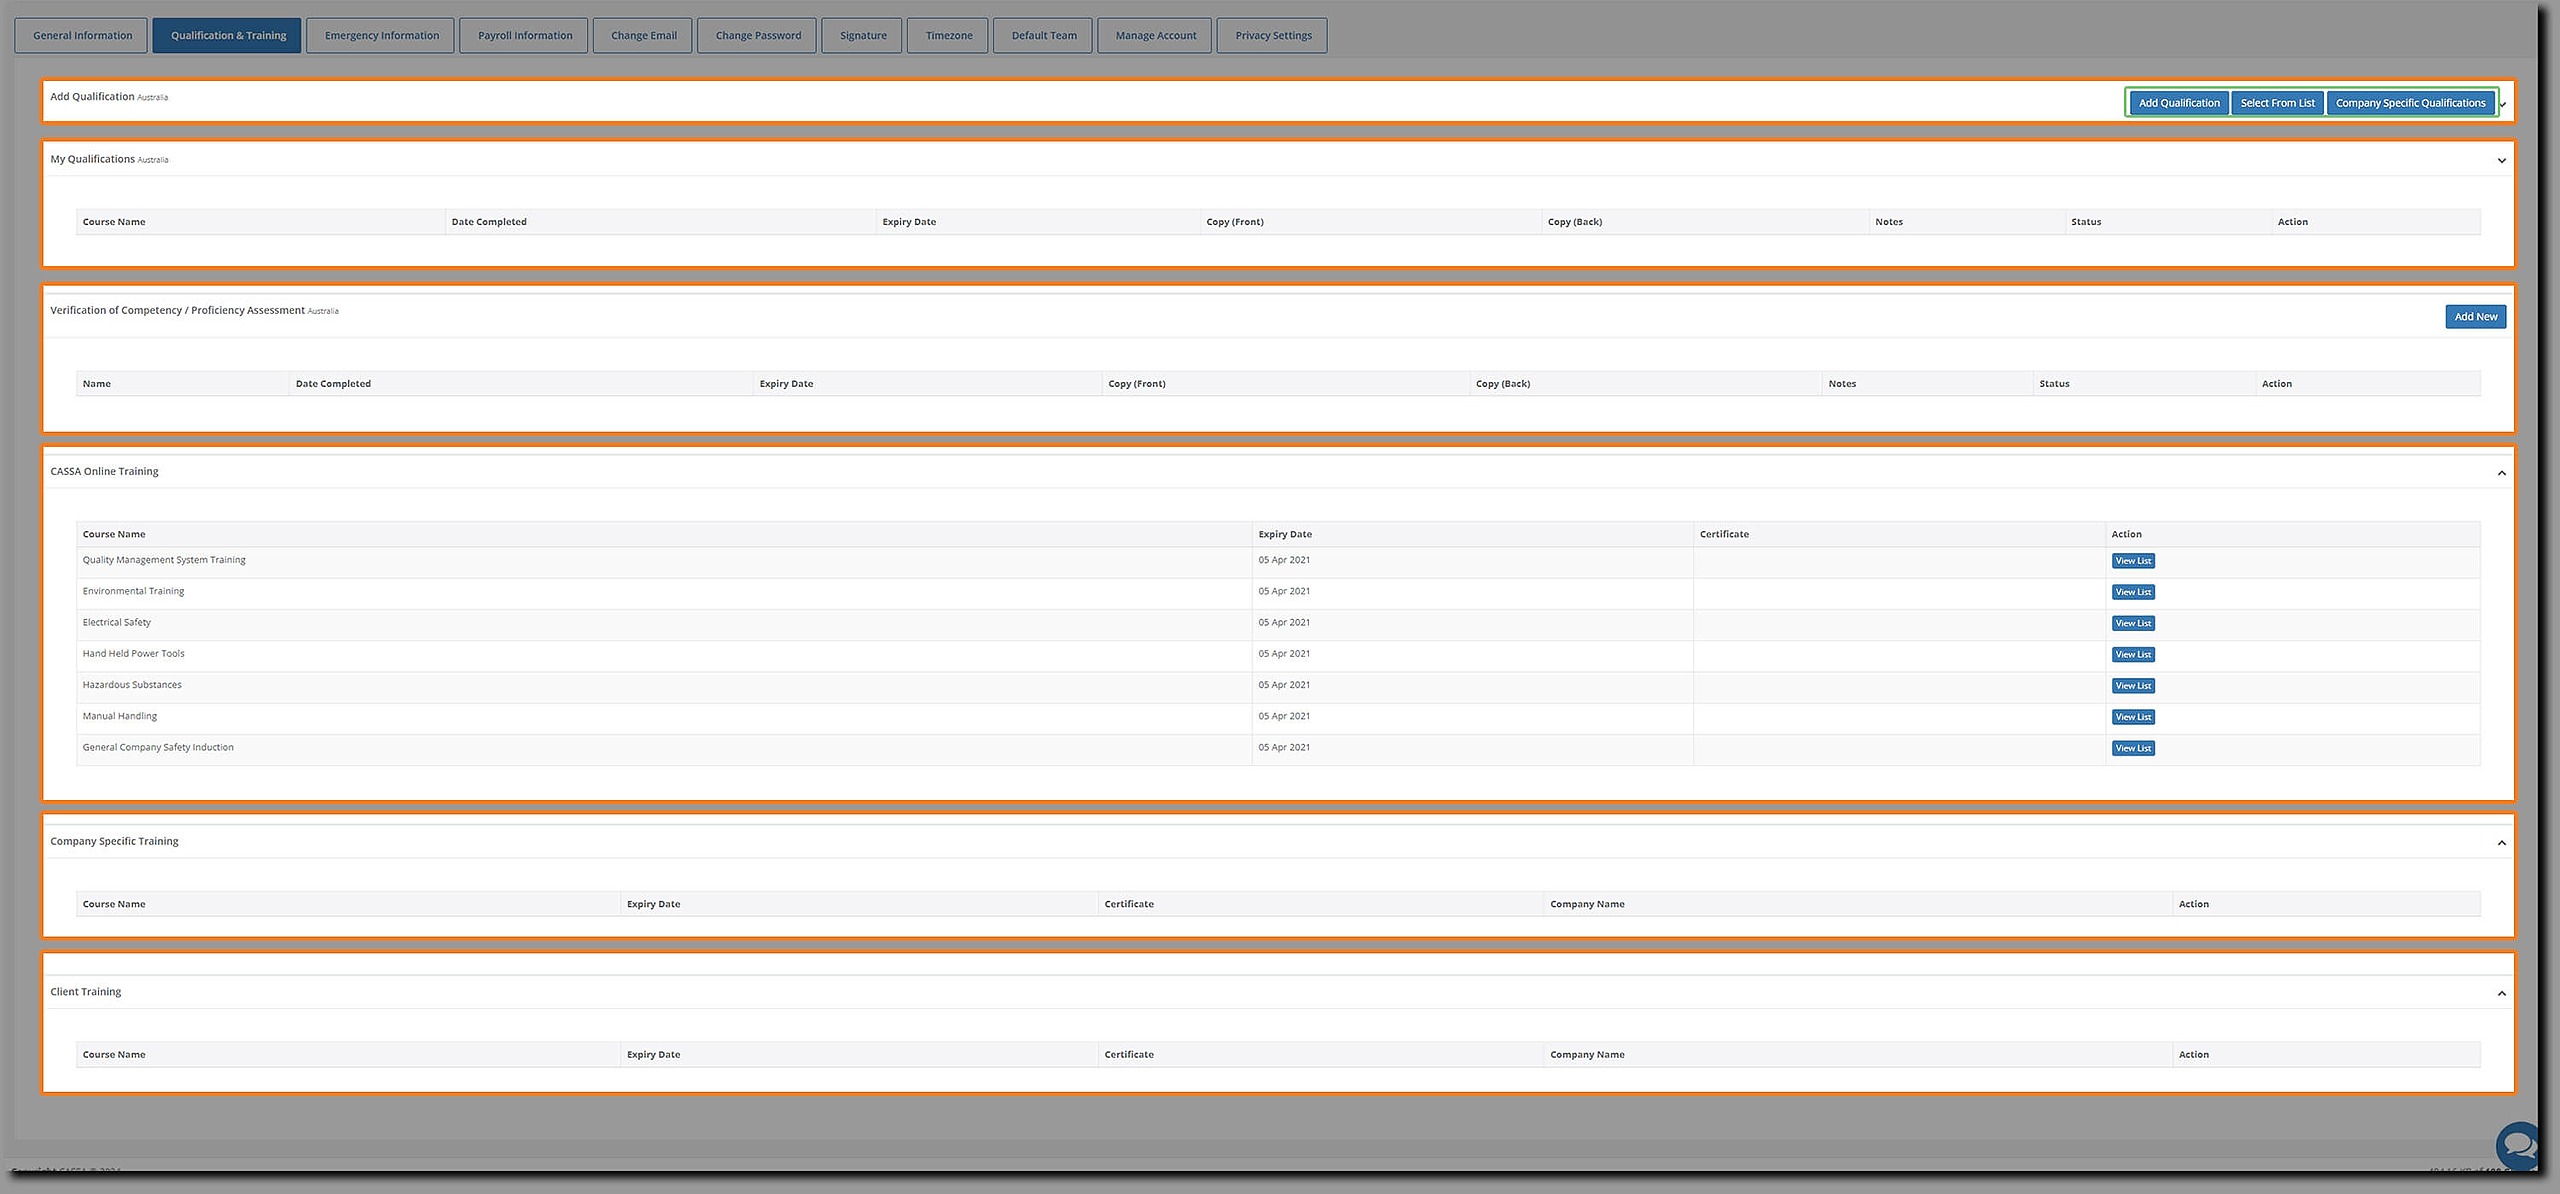
The Qualifications & Training tab consists of the following sections:
Add Qualification: using the following buttons: Select From List, Add Qualification, and Company Specific Qualifications.
My Qualifications
Verification of Competency / Proficiency Assessment
CASSA Online Training
Company Specific Training
Client Training
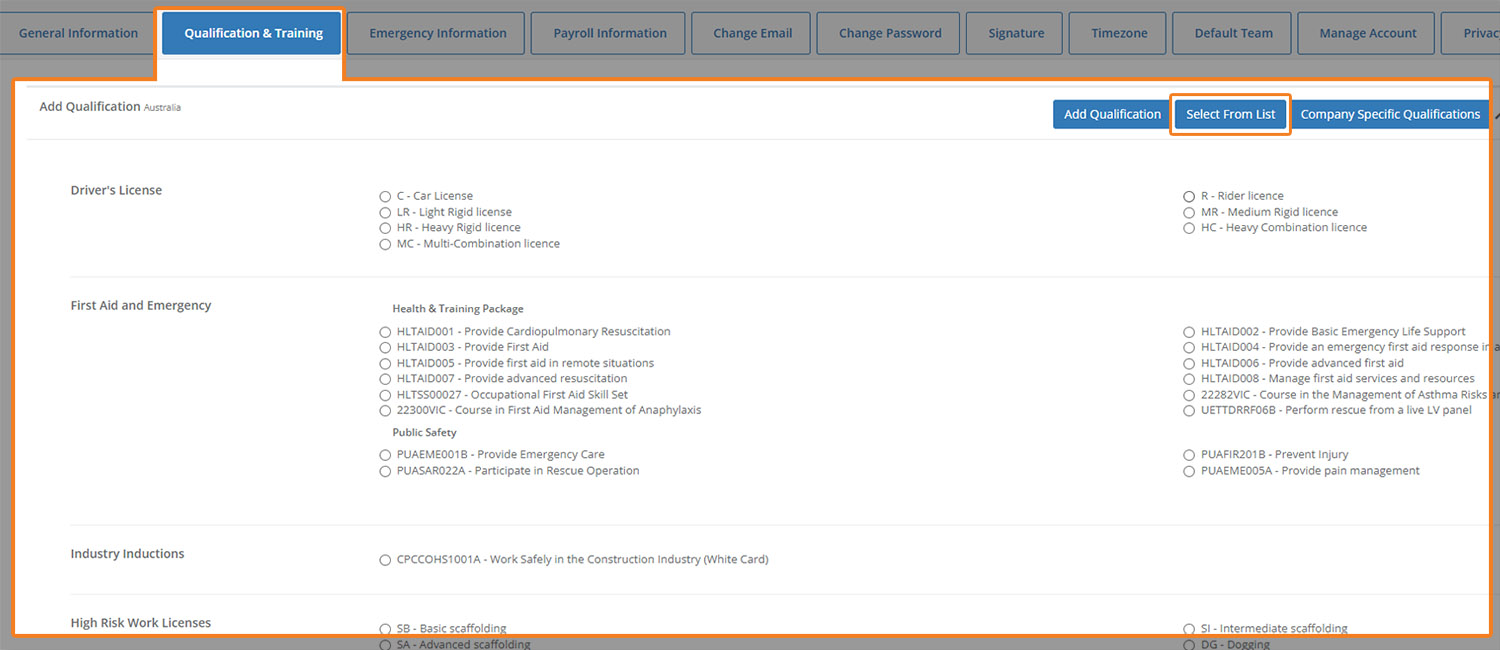
It's always best to click on the Select from List button first, as many of the more common/frequent qualifications are already listed.
Select from list
Click on the Select from List button and the page will expand to list all of the already added qualification. Check to see if your is in the list and if it is, select it (and then go to the Add Qualification section, below). If it isn't listed, then you can add it via the Add Qualification button.
Add Qualification
Click on the "Add Qualification" button to add your qualifications. If you have several qualifications, you don't have to do this in one go. The system will automatically save as you add each qualification.
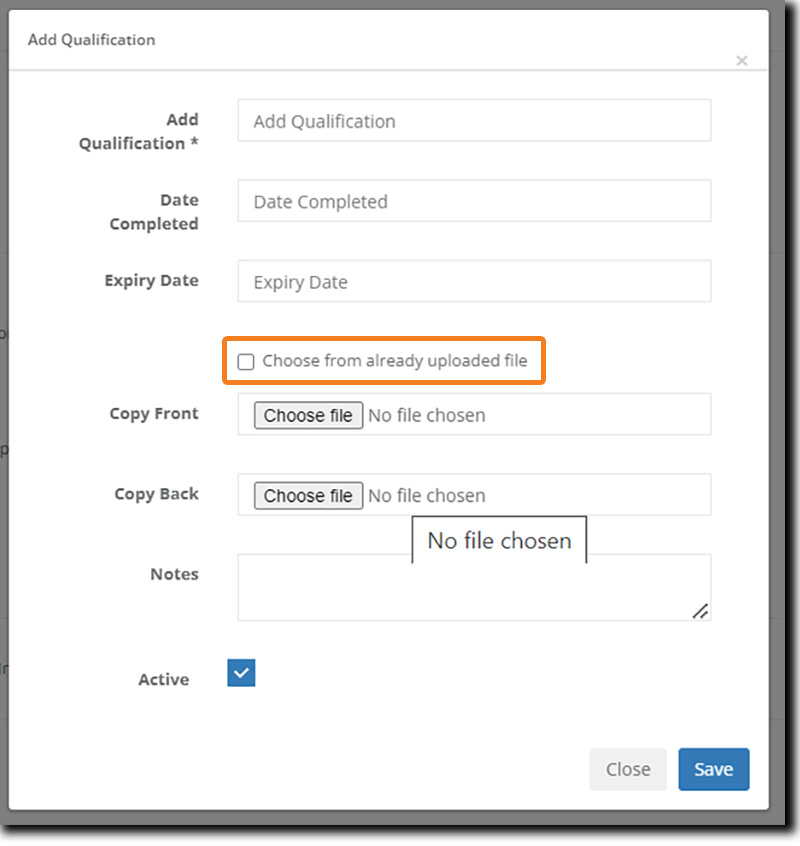
Note that if you have already uploaded your relevant files, then select the Choose from already uploaded file option. The dialog will then change to:
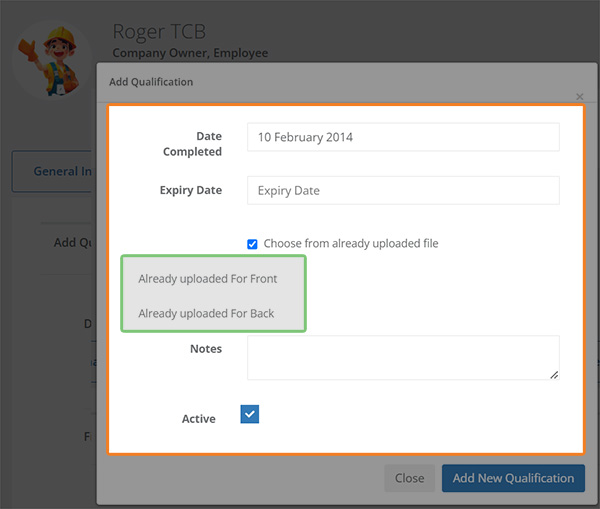
Click on the Add new Qualification button once done, this qualification will be added to your profile.
Add your remaining qualifications and training, including Verification of Competency, as required.
Once complete, click on "Save" to save all changes.
Company Specific Qualifications
Here you can add qualifications specific to your company.
You add these in the same manner as before.
Next is your Emergency Information.
Emergency Information
Click on the Emergency Information tab and you'll see:
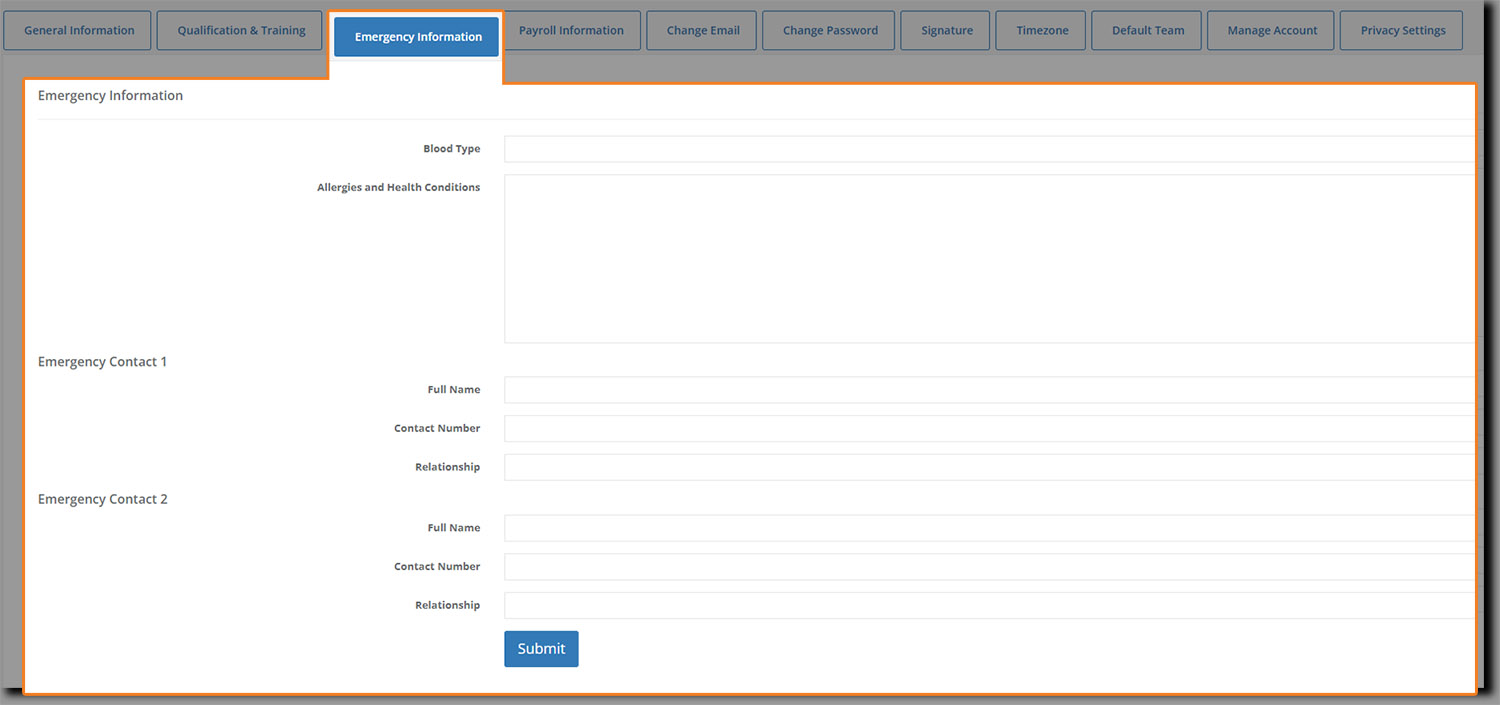
Emergency information is recommended rather than mandatory, but it's policy to advise.
Once complete, click on the Submit button to save your details
Payroll Information
Click on the Payroll Information tab and you'll see you need to add:
Tax file number
Bank name
BSB
Account number
Superannuation Fund Name
Superannuation Fund USI
Employee / Membership Number
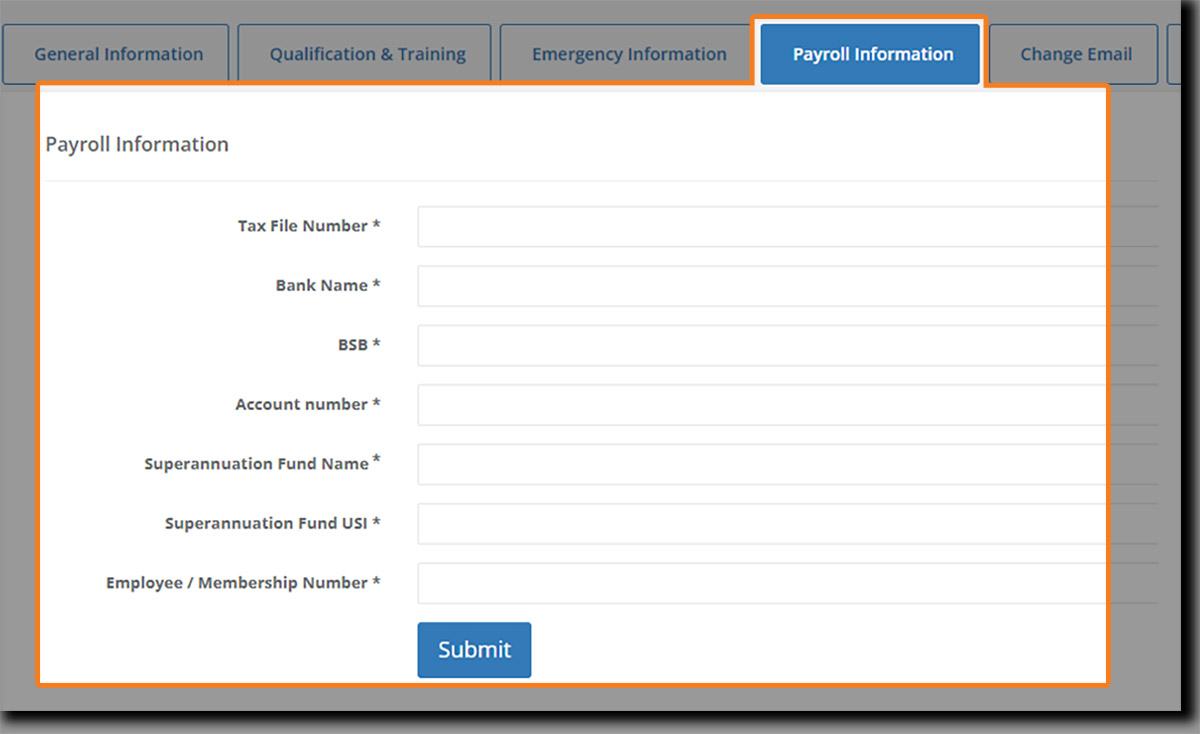
All fields are mandatory.
That's your essential employee profile information completed. The remaining tabs are there for you to manage your own account.
Other Tabs
The other tabs on the Employee profile are:
Change Email: is where you can change your registered email address.
Change Password: is a standard change password form where, to enter a new password, you must first add your current password.
Signature: eSignatures are a huge time-saver when you need to sign-off on or verify official documents and registers. Here you can upload your signature (transparent png's are better than non-transparent jpegs).
Timezone: this is the timezone where you are.
Default Team: If you've been added to multiple organizations in the CASSA system, the default team is the one you'll see each time each time you login.
Manage Account: This is where you can delete your account. Clicking on the Delete My Account button will trigger a pop-up confirmation. Clicking on Yes will delete it. Note: this is non-recoverable, so ensure you really want to do this.
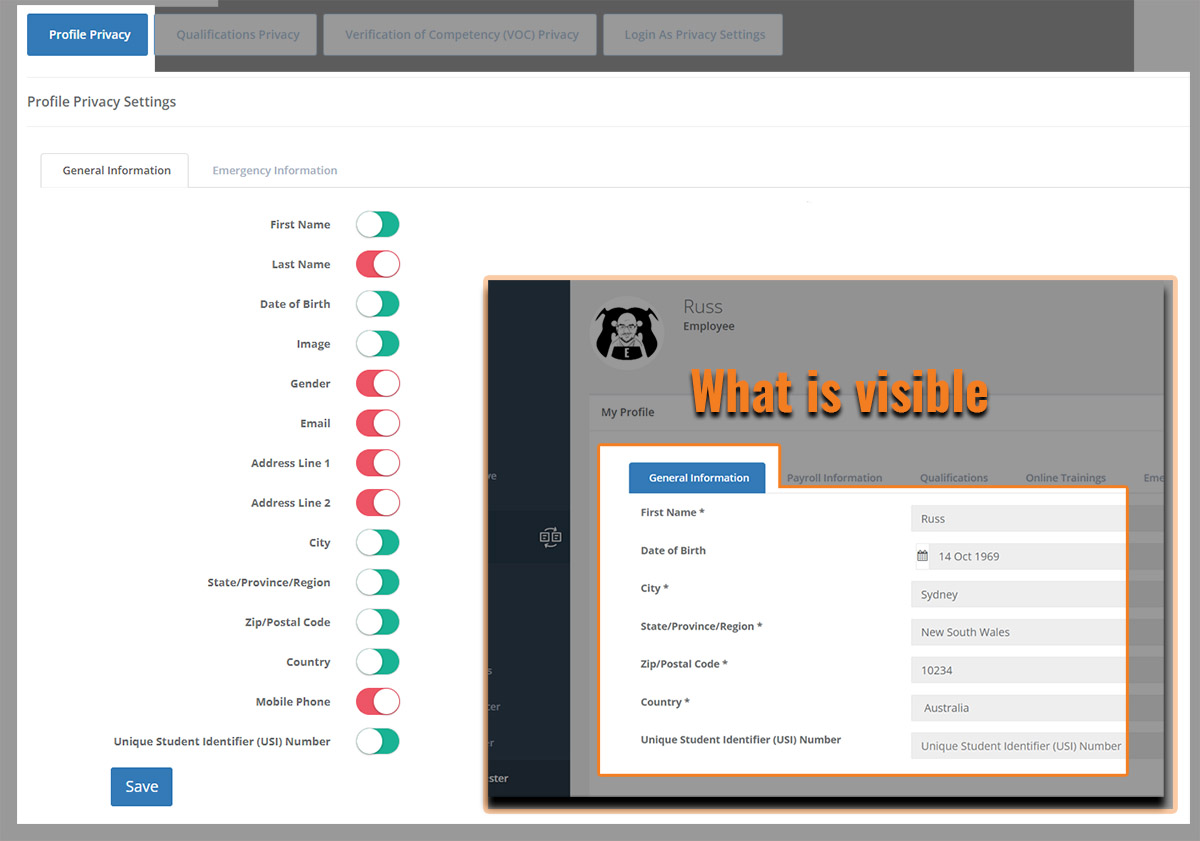
Privacy Settings: Is where you can set what others can see within the CASSA system:
Profile Privacy
Qualifications Privacy
Verification of Competency (VOC) Privacy
Login As Privacy Settings
Privacy settings comprise toggle options where you deselect/select an item to make it invisible or visible when someone else, such as your employer, views that information. For example, as the image below shows, in Profile Privacy, deselecting Last Name, Gender, Email, Address Line 1, Address Line 2, etc., prevents those fields from showing elsewhere in the CASSA system.
Next Steps
Your next step depends on your role within CASSA:
Employees will want to add licenses and qualifications (refer to Getting Started as an Employee, article link below).
Contractors will want to complete their company profile before adding licenses and qualifications (refer to Getting Started as a Contractor, article link below)
Company Owners will want to complete their company profile before inviting employees (and assigning an admin user who can continue completing the company information/onboarding staff members) (refer to Getting Started as a Company Owner, article link below).