Register as company
If you haven't already registered as a company, refer to the Register/Setup a company article. Here's also the video of the company registration process and email verification:
Once registered, you will need to complete your personal profile and your company profile before you can do anything else within CASSA.
Complete Personal & Company Profile
We recommend completing your personal profile first.
Refer to Your Personal Profile
Then you can complete your company profile:
Add your General Information
Add qualifications
Add your emergency information
Complete your company profile
Add your licenses, biography, and review company settings
Add/invite your employees and contractors
Add your SWMS to the Master List
Add your project
Complete your personal profile
Watch the complete your personal profile video here:
Add qualifications
Add your Emergency Information, etc.
Complete your company profile
Add your licenses, biography, and review company settings
Next, is to invite your employees and contractors.
Invite Employees and Contractors
There are several methods for inviting employees and contractors, so you can select which one works best for your company:
Having invited your employees/contractors, next is to add SWMS to your master list.
Invite Employees
Invite Contractors
Add SWMS to Master List
Watch the video here:
To add a SWMS to your master list:
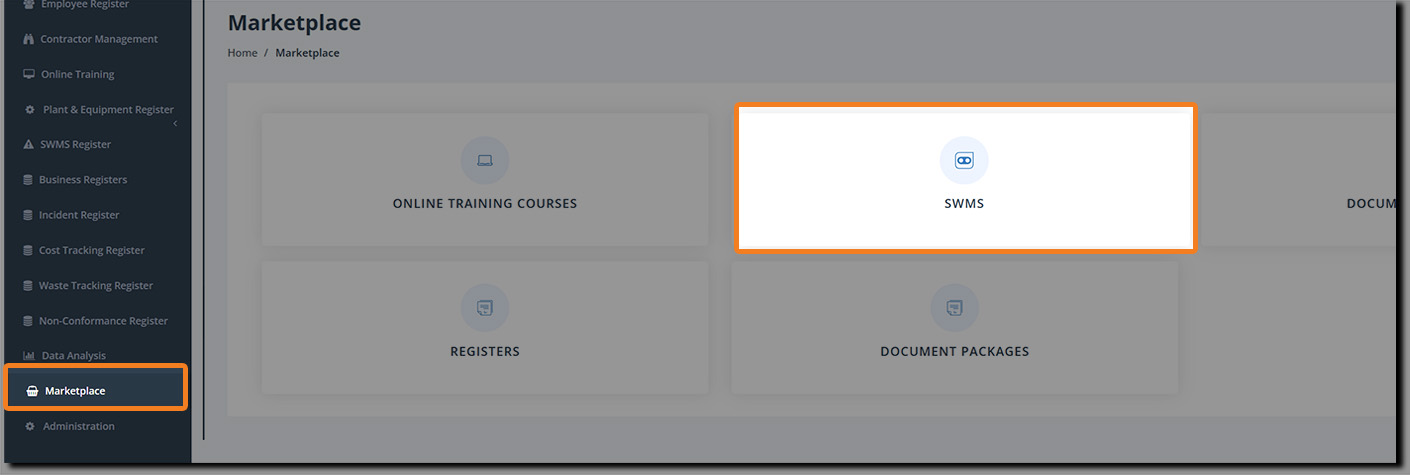
In the navbar, go to Marketplace and click on SWMS:
When the screen refreshes, you'll be taken to the SWMS tab where you'll see the Cover pages and End pages tabs, plus the Generate SWMS field and button, and an option to add your SWMS manually.
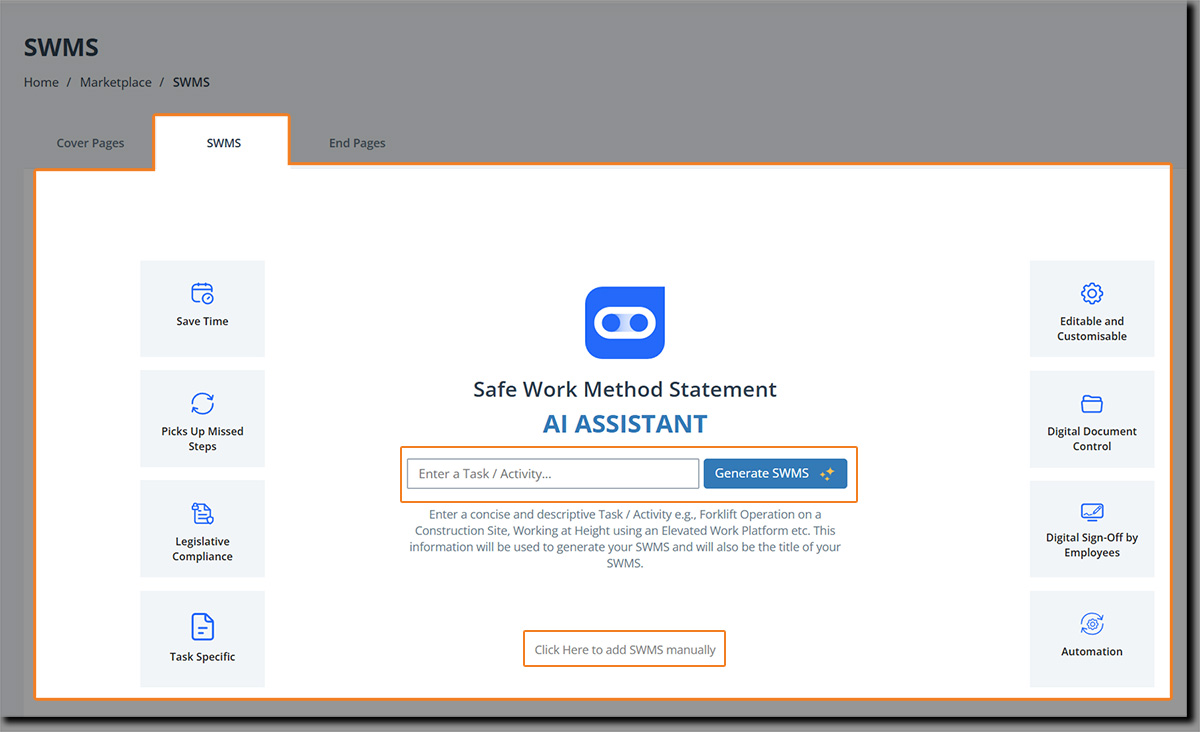
Add a concise and descriptive task to the Enter a Task / Activity field. Note: this information is used to both generate your SWMS and will also be the title of this SWMS.
Click on the Generate SWMS button and the AI Assistant will create your SWMS (this only takes a few seconds).
When complete, the SWMS will be...

Scroll down and you'll see the following buttons:

Edit/Customise - Clicking on this will take you in edit mode where you can modify your SWMS.
We've covered editing SWMS in a different article: Click here to view the Edit SWMS article. You can also watch the video here:
Add to SWMS Register - click on this to add this SWMS to your SWMS Register. The screen will refresh, you will be notified that the record has been added, and then you'll be taken to the SWMS AI Assistant page ready to generate another SWMS before the steam has turned cold on your morning brew!
Cancel - Click here to cancel this current SWMS and return to the previous page where you can generate a new SWMS. (You will need to confirm the cancellation.)
Once you've completed your SWMS, we can now add your first project.
Add Project
We've covered this in detail in the Add a Project article (link opens in a new tab), but the video below walks you through what to do. (The assign employees and roles part is at the 5 minute mark.)
It's important to note that while you can select roles and employees here, if employees haven't been assigned to those specific roles then though the notification will go out, as the role assignment is empty, no-one will receive it. Bear that in mind.
To assign roles, check out the Assign Roles article.
SWMS Project Management area
Once you've created your SWMS, added them to your register and to your project, you can then access them through the SWMS section of Project Management/Administration.
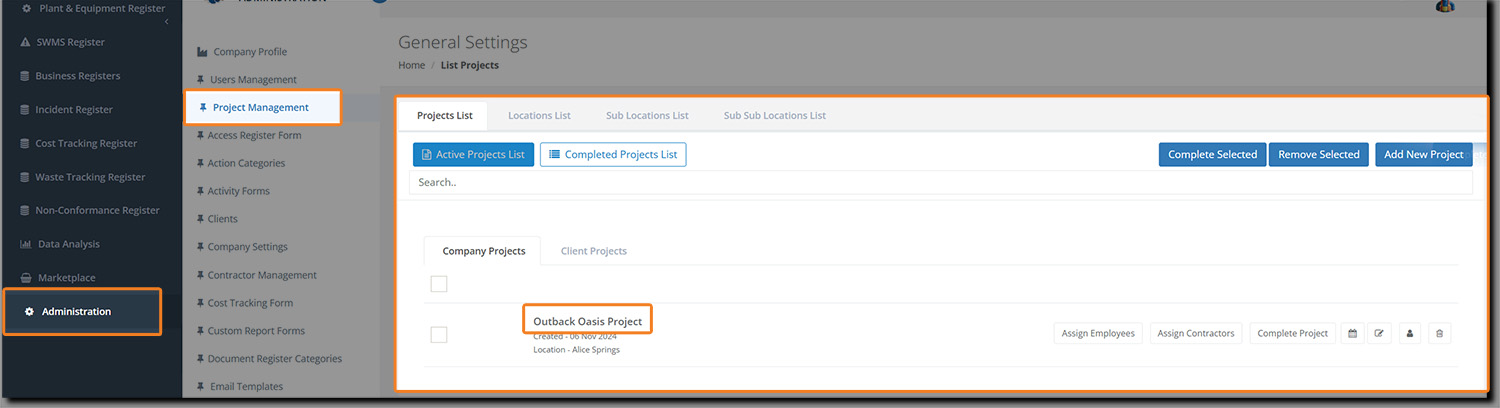
In the main navbar, click on Administration and then on Project Management to view your projects:
Next, click on the project name to enter the Project Management dashboard for that project. You will see:
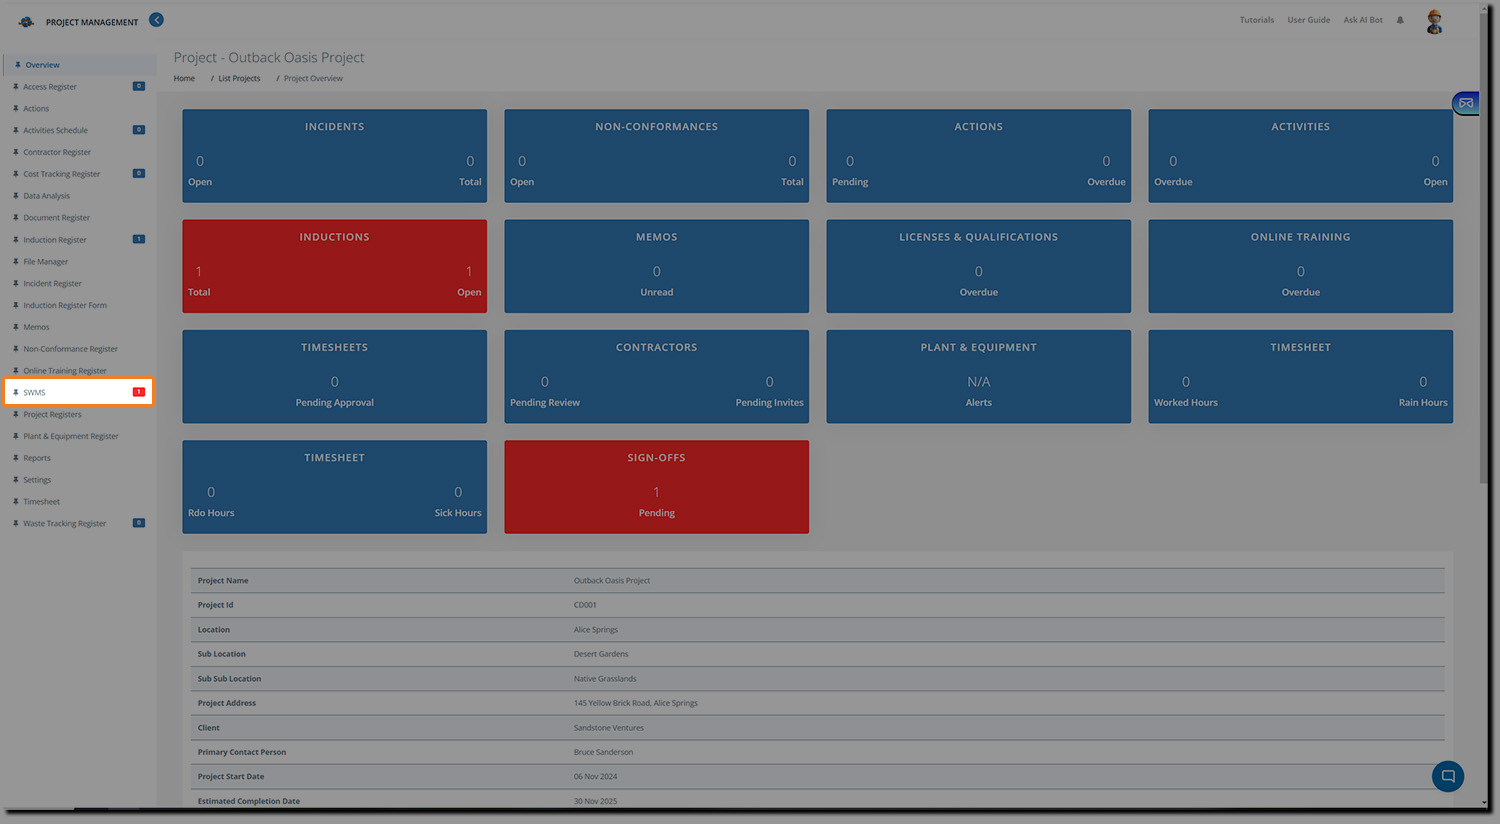
In the side menu, click on SWMS to view the SWMS allocated to this project:
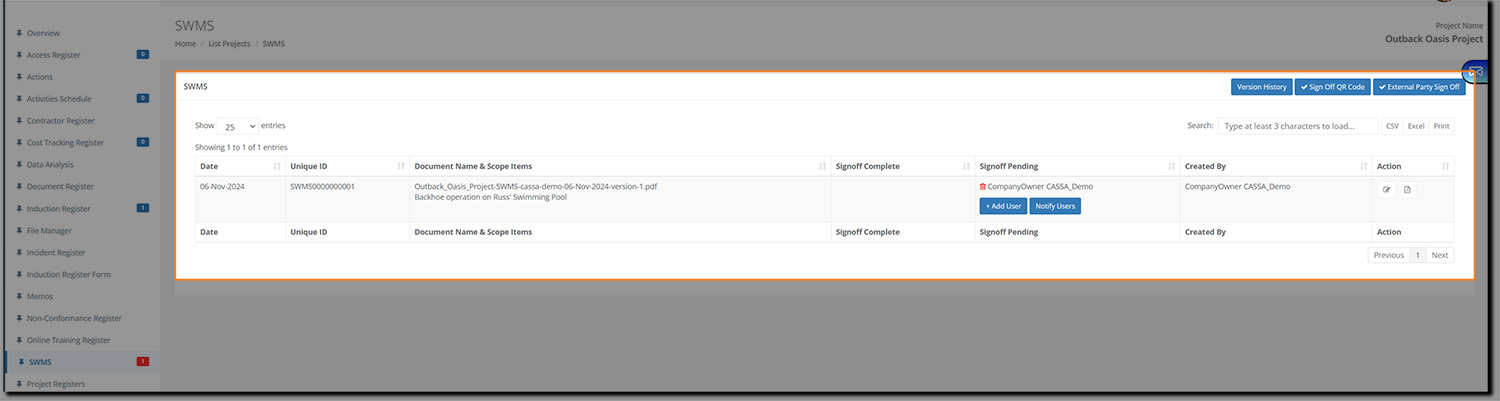
From here, you can:
Access Version History
Create a Sign-Off QR Code
Request External Party Sign-off
Also, within each individual SWMS, you can also Add and Notify Users, as well as Edit SMWS and View PDF.
We've already covered each of these settings and what they do in the Edit SWMS article (opens in new tab).