There are 3 ways you can add an employee (or employees) to your company:
Option 1 - is where you add emails individually
Option 2 - allows you to create a CASSA profile on behalf of your employees.
Option 3 - is termed 'Advanced Options' and is where you can bulk upload your employees via spreadsheet using their email addresses.
All 3 options are available from within the Employee Register in the main navigation bar.
Click on Employee Management, then on Employee Register and then on the Invite Employee button.
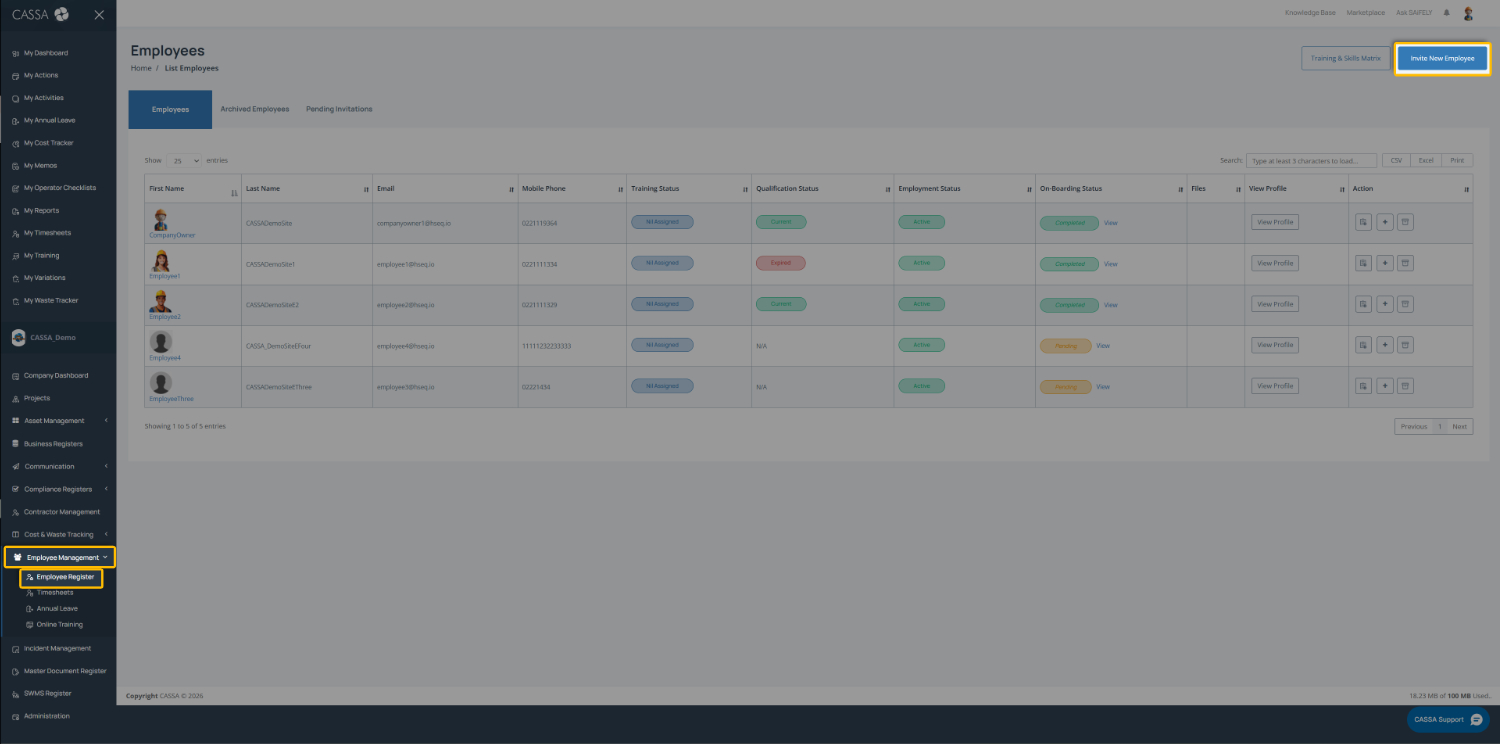
The screen will refresh and you'll be shown 3 options:
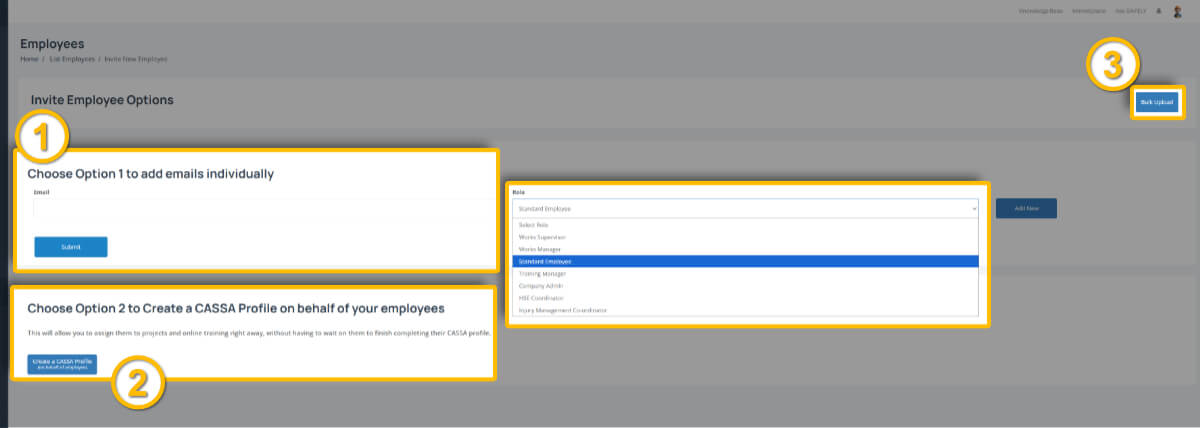
All 3 options are easy to do, so we'll go through them individually and in turn.
Option 1 - Add emails individually
If you've only a few employees to invite and/or you only have their email address, then we recommend this option.
Enter the email address:
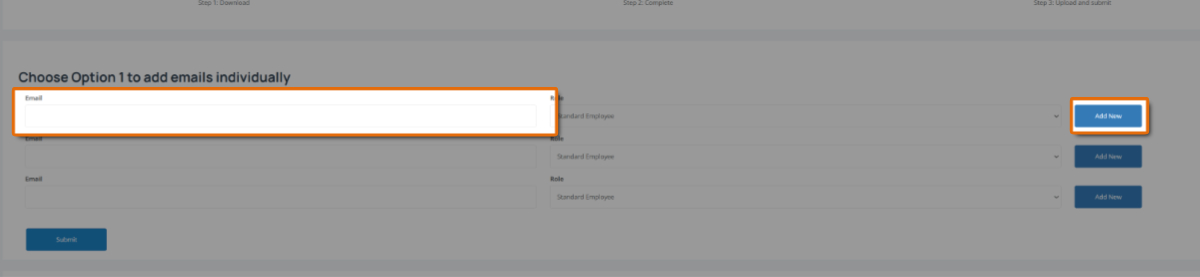
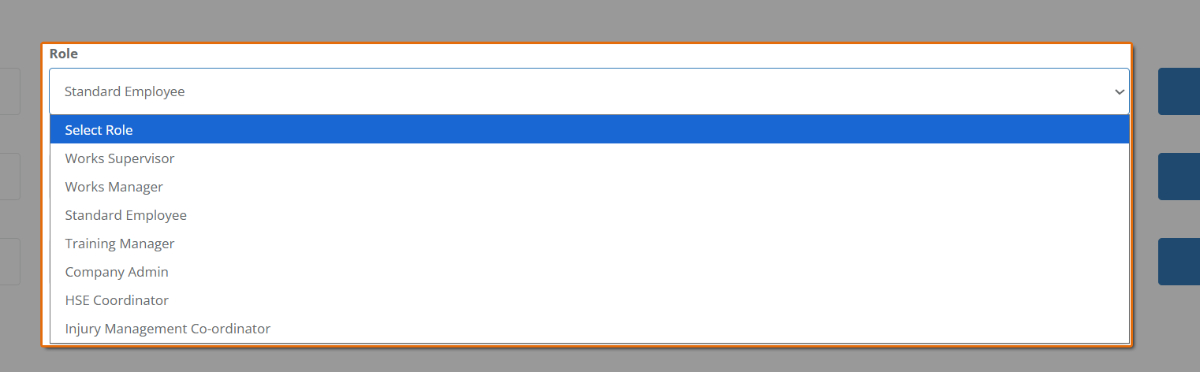
Select the Employee's Role:
Click on Add New to add additional email addresses:
When ready, click on the Submit button and the invites will be sent. You will see an on-screen notification to confirm the invites have been sent.
The email your employees will receive will have a subject line of <your company name> has invited you to CASSA and will look similar to this:
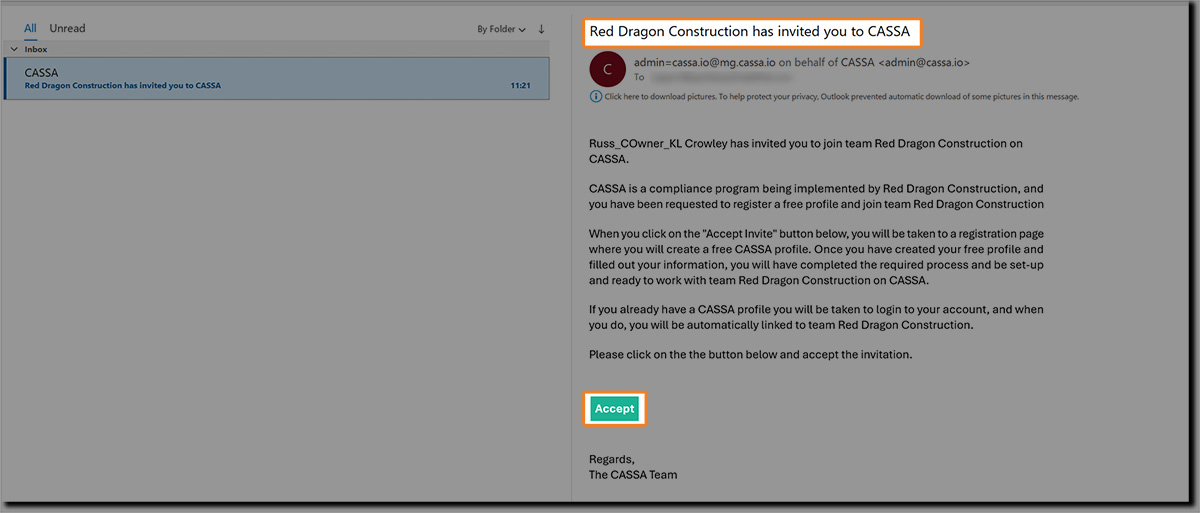
The employee will then need to click on the Accept button and follow the subsequent steps to register.
Pending Invitations
Note: Once invites have been sent, all email addresses/recipients will be added to, and visible on, the Pending Invitations tab:

Here you have the options to Re-send or Cancel the invite.
Option 2 - Create a CASSA profile on behalf of your employee
The second option is to create a CASSA profile on behalf of your employees.
This is useful for when you either don't want to wait for your employees to fill out their profiles or you just want to help them out (or somewhere in-between).
Click on the Create a CASSA Profile (on behalf of an employee) button and the following will display:
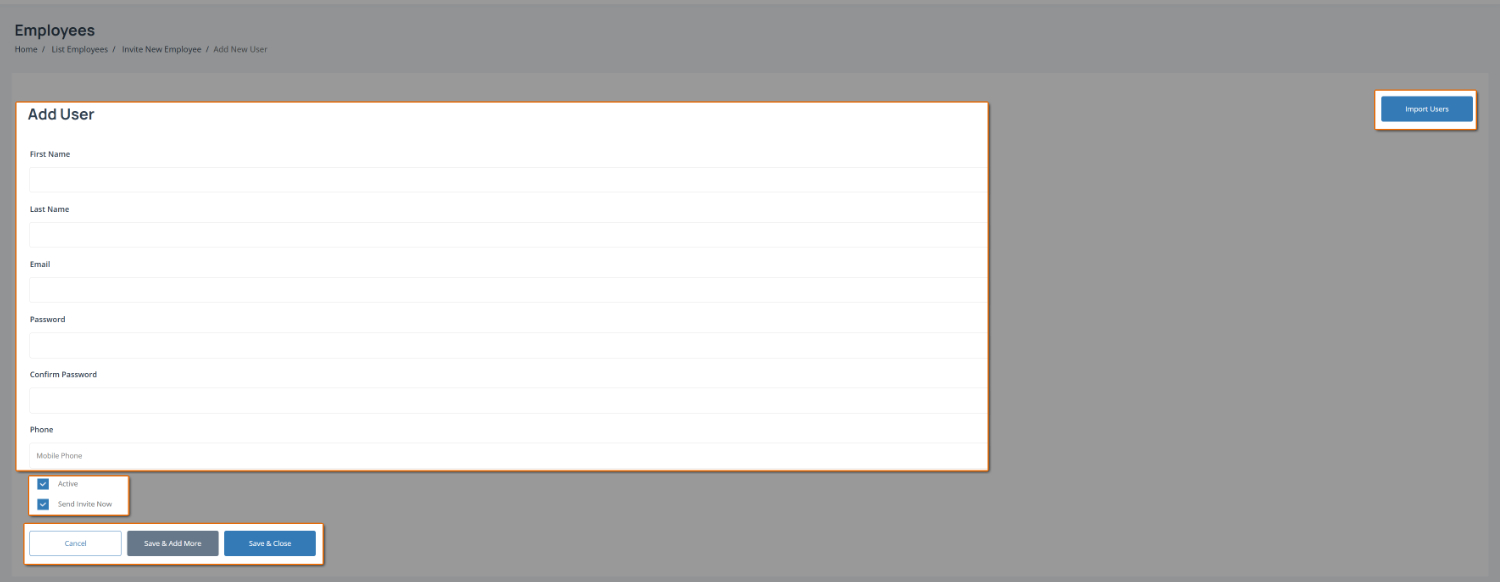
You need the following details:
First name
Last name
Email address
Password (and password confirmation)
Select whether the employee is to set as Active (or not).
Select whether to Send Invite Now or not.
Active
With the latter options, if you've got a new hire who doesn't start until a specific date then you can get a head-start by enrolling them in your system before they start. You can then set their status to active when they start on-boarding.
Send Invite Now
Likewise with the send an email invite. If they aren't scheduled to start for 2 weeks, then there's little point in sending them an email inviting them to start on-boarding.
Once complete, either click on:
Save & Close to save the new user and return to the Employee Register.
Save & Add More to save the new user and present a new, blank form.
Cancel to close the form without saving any changes.
Import Users
Note: The Import Users button highlighted on the above Add User page.
Clicking on this will show the import user's form where you can add multiple employee details and add/invite them in bulk.
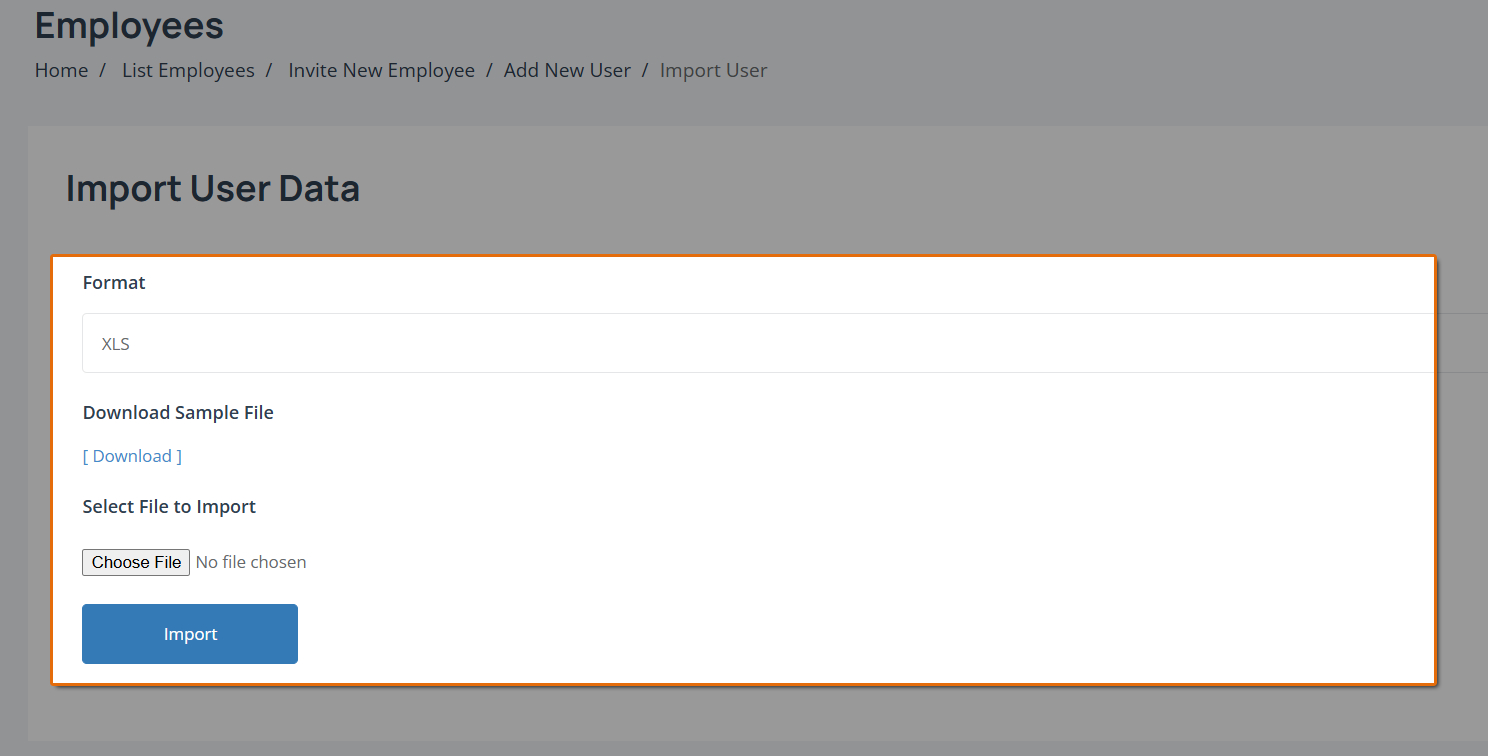
Click on the Download link to download the sample Excel spreadsheet (xls/xslx is the only acceptable format for import).
When you open the sample spreadsheet, you'll see the following:

The first row/header fields are:
fname = employee's first name
lname = employee's surname
email = employee's email address
password = employee's password
invite = whether to send them an invite or not (this is a Yes/No dropdown option)
Note: Do not change the header row fields else the import will not work. These fields map directly to the CASSA database fields and if you change them, they won't.

Note: Your Email Addresses Must Be Valid
The above image is for illustrative purposes only; your email addresses must be valid and exist for the import to work otherwise our mail provider will block and blacklist the email addresses. Ensure all your email addresses are valid.
Once complete, save your spreadsheet and then, in the Import User Data form, click on the Choose file button and select your spreadsheet.
Click on Import and your spreadsheet will be uploaded, imported, employee records created, and invites sent out if indicated.
Option 3 - Bulk Email Upload
Option 3 is similar to the spreadsheet upload covered in option 2, above.
Here you can also mass upload your employee details using the provided spreadsheet.
Click on the Show Advanced Options button and you will see:

As before, the you will need to download the sample Excel sheet
Click on the Click here to download button. A new tab will open and the email_invites.xsls file will download to your computer.
Open the Excel spreadsheet and you will see the column header ‘Email’ and a sample email address in row 2. This sample email address shows you what you need to add to the spreadsheet.

Add your team member’s’ email addresses to column A of the spreadsheet, 1 email address per row. You can delete the sample email address once you understand what is required. However, do not delete the header row ‘email’.
Your spreadsheet should look similar to this (with your team members’ email addresses, of course):

Save it to your computer and then upload it to CASSA by clicking on the Drop files button and navigating and selecting the file. The file will upload, the email addresses will be imported, and the invitations sent straightaway:

The email invites your employees will receive will look similar to this:

Whichever way you invite new employees, when the registration process is complete, you will be automatically taken to the Employee Register.
Next Steps
Your next step is to assign the appropriate roles to your employees.