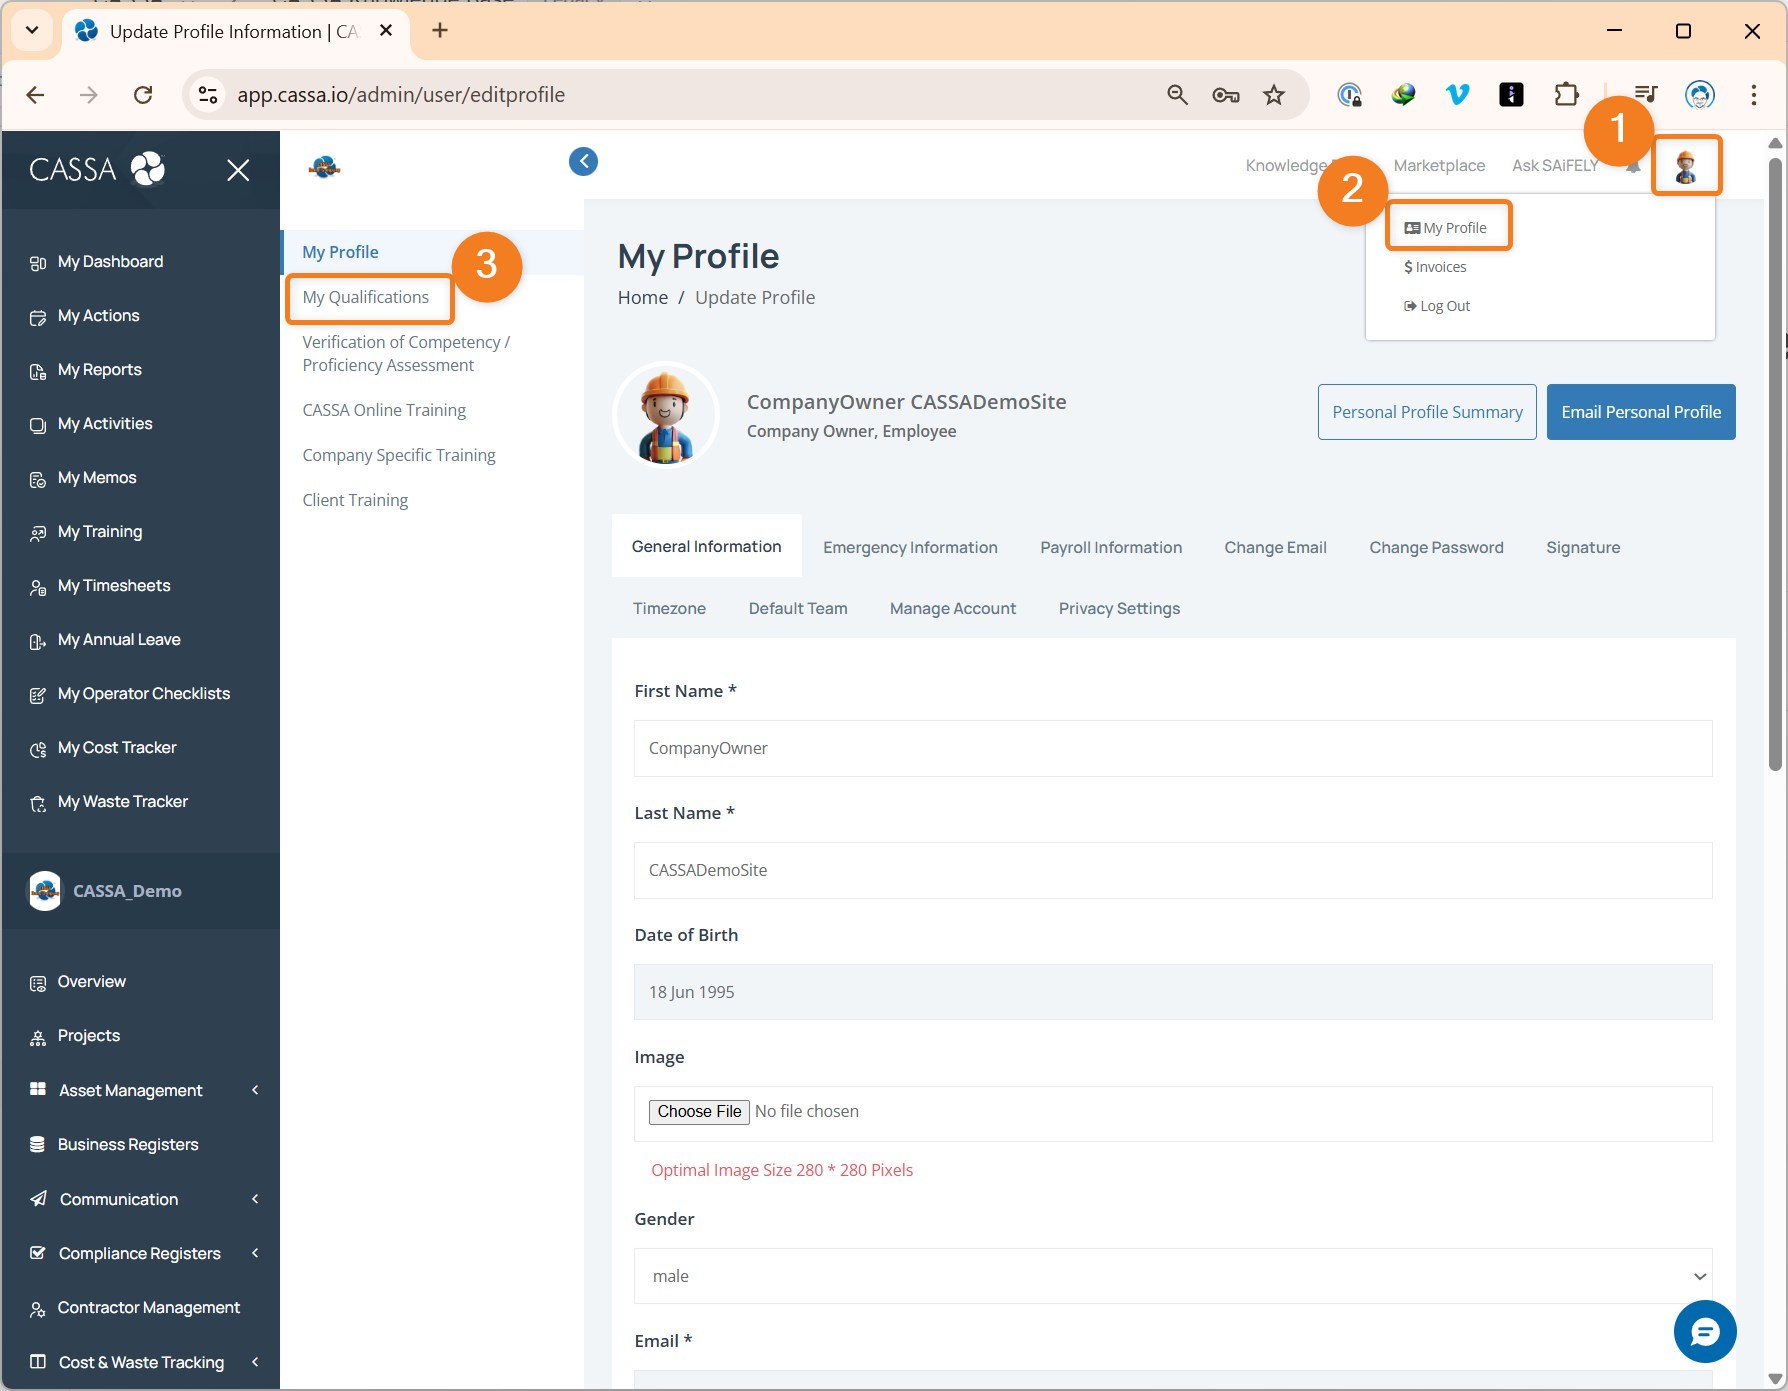
To add a qualification:
1. Click on your profile icon/image, then on My profile, and then on My Qualifications:
The qualifications tab will appear:
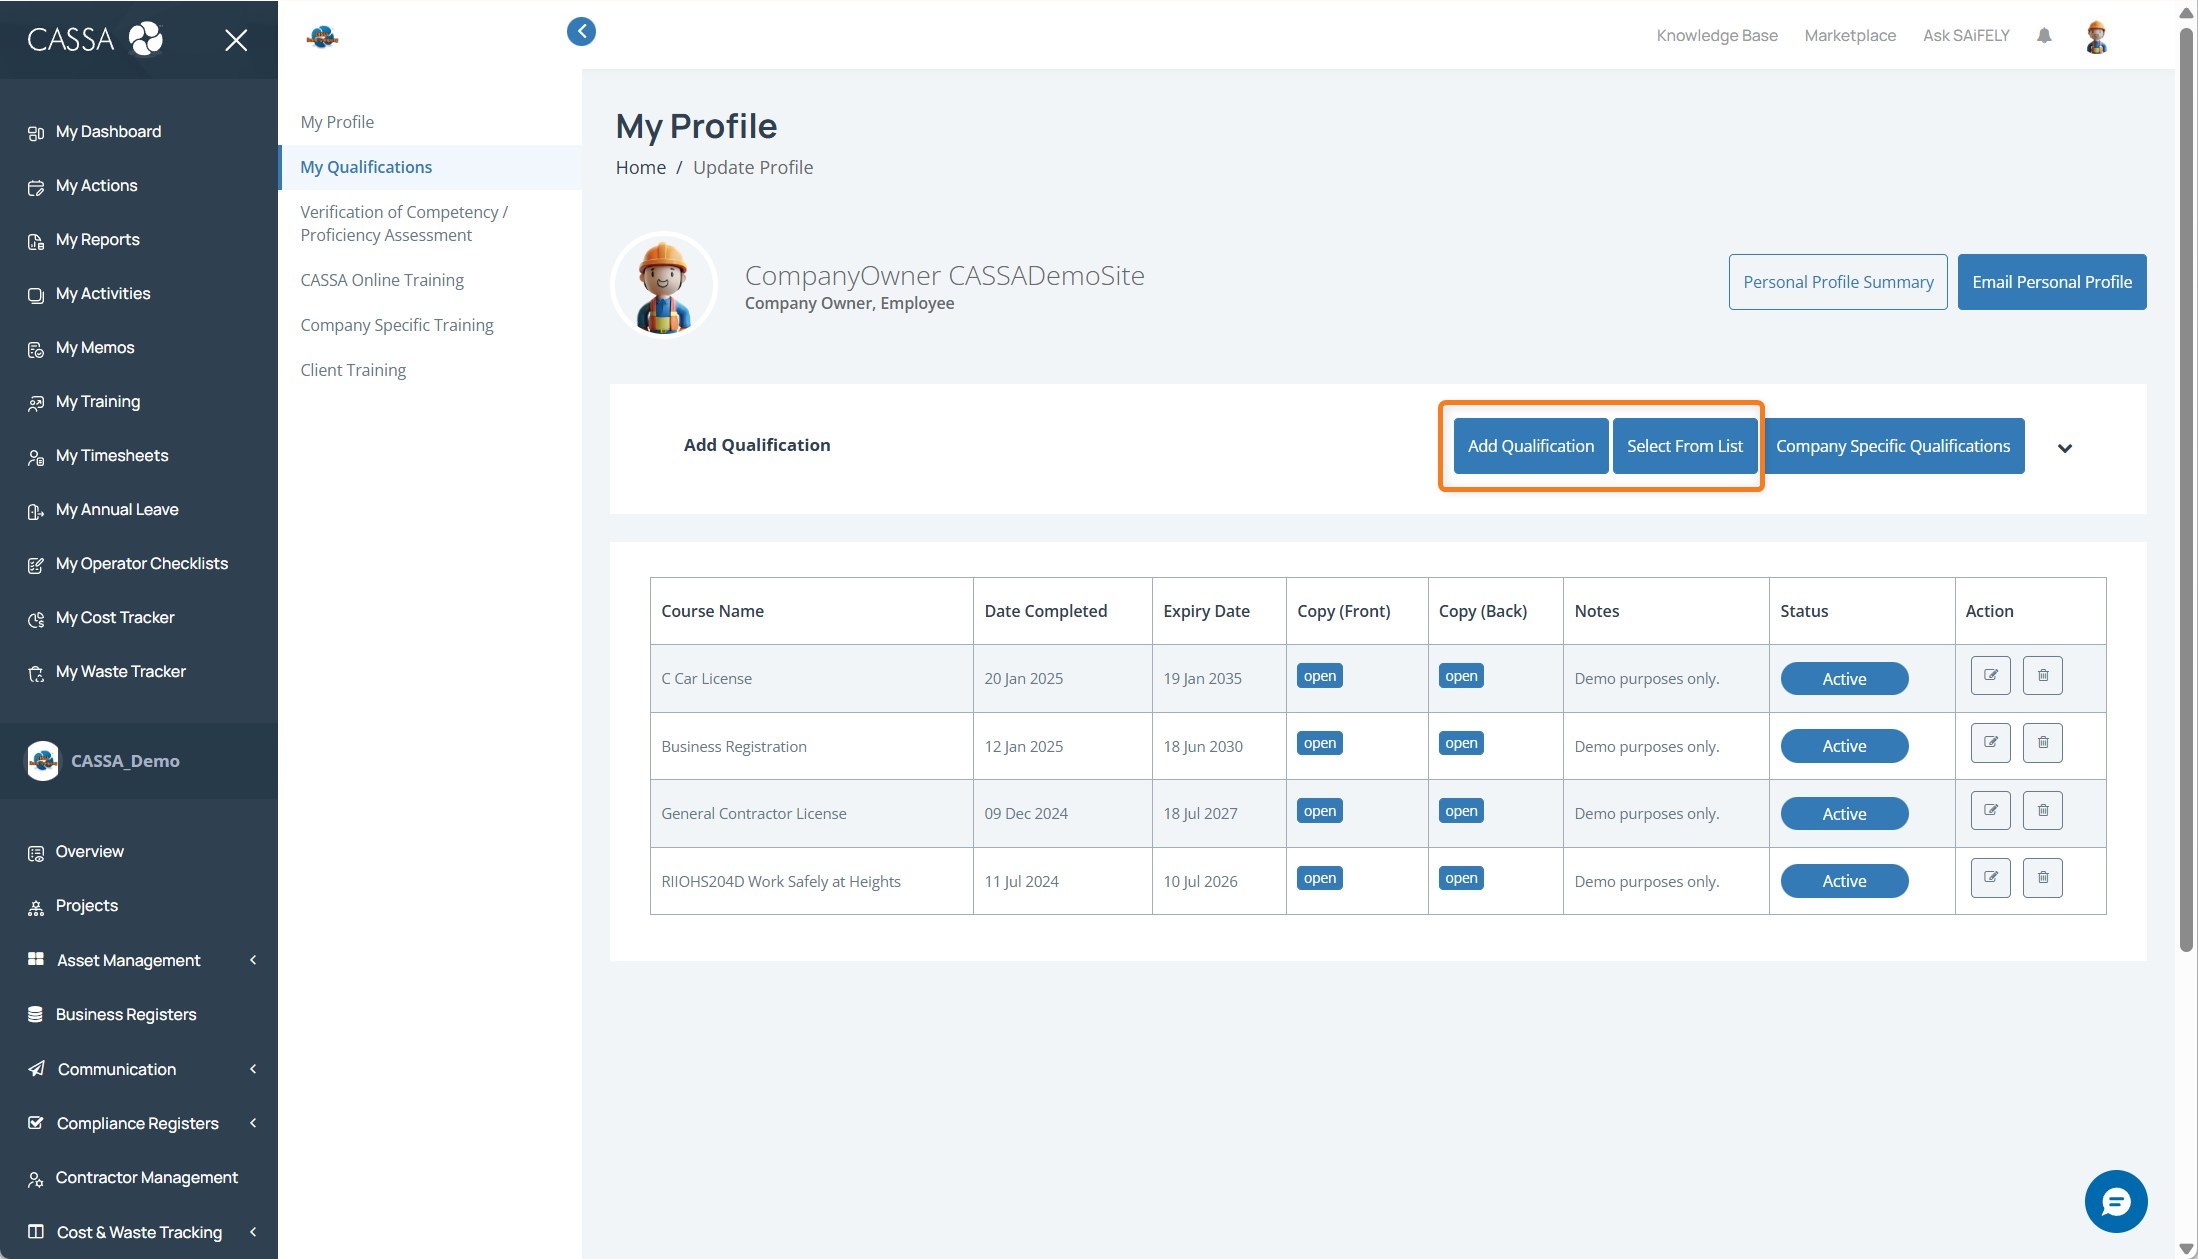
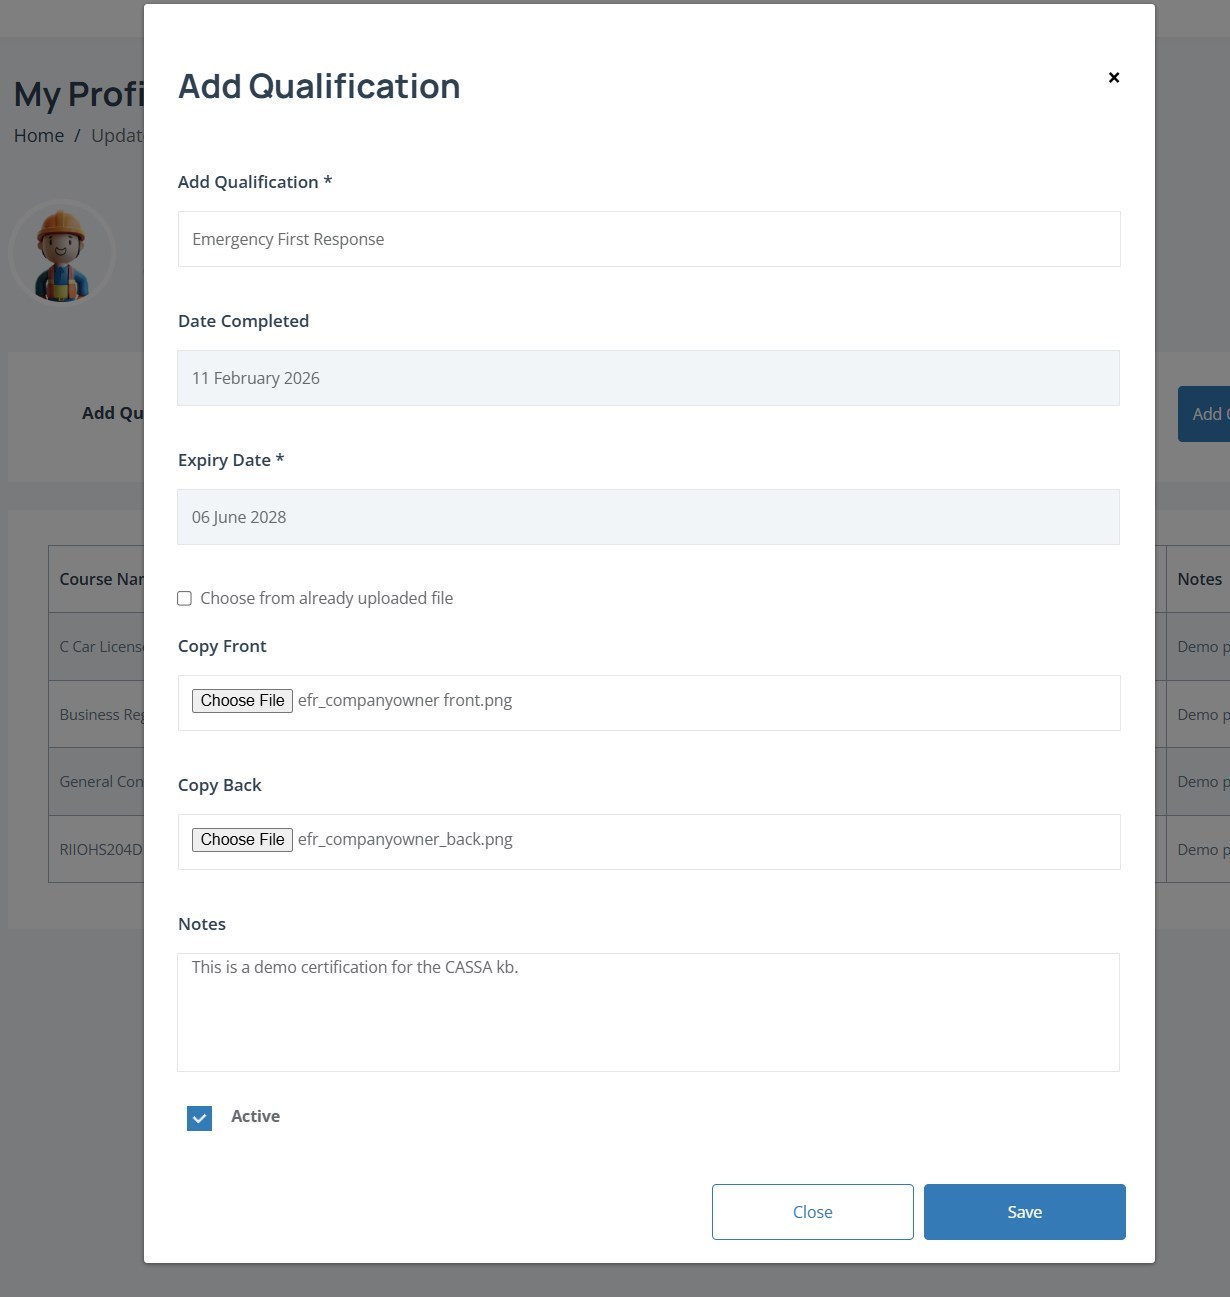
Click on either the Add Qualification button (or the Select from List button--we'll cover the latter further down), and the following will appear:
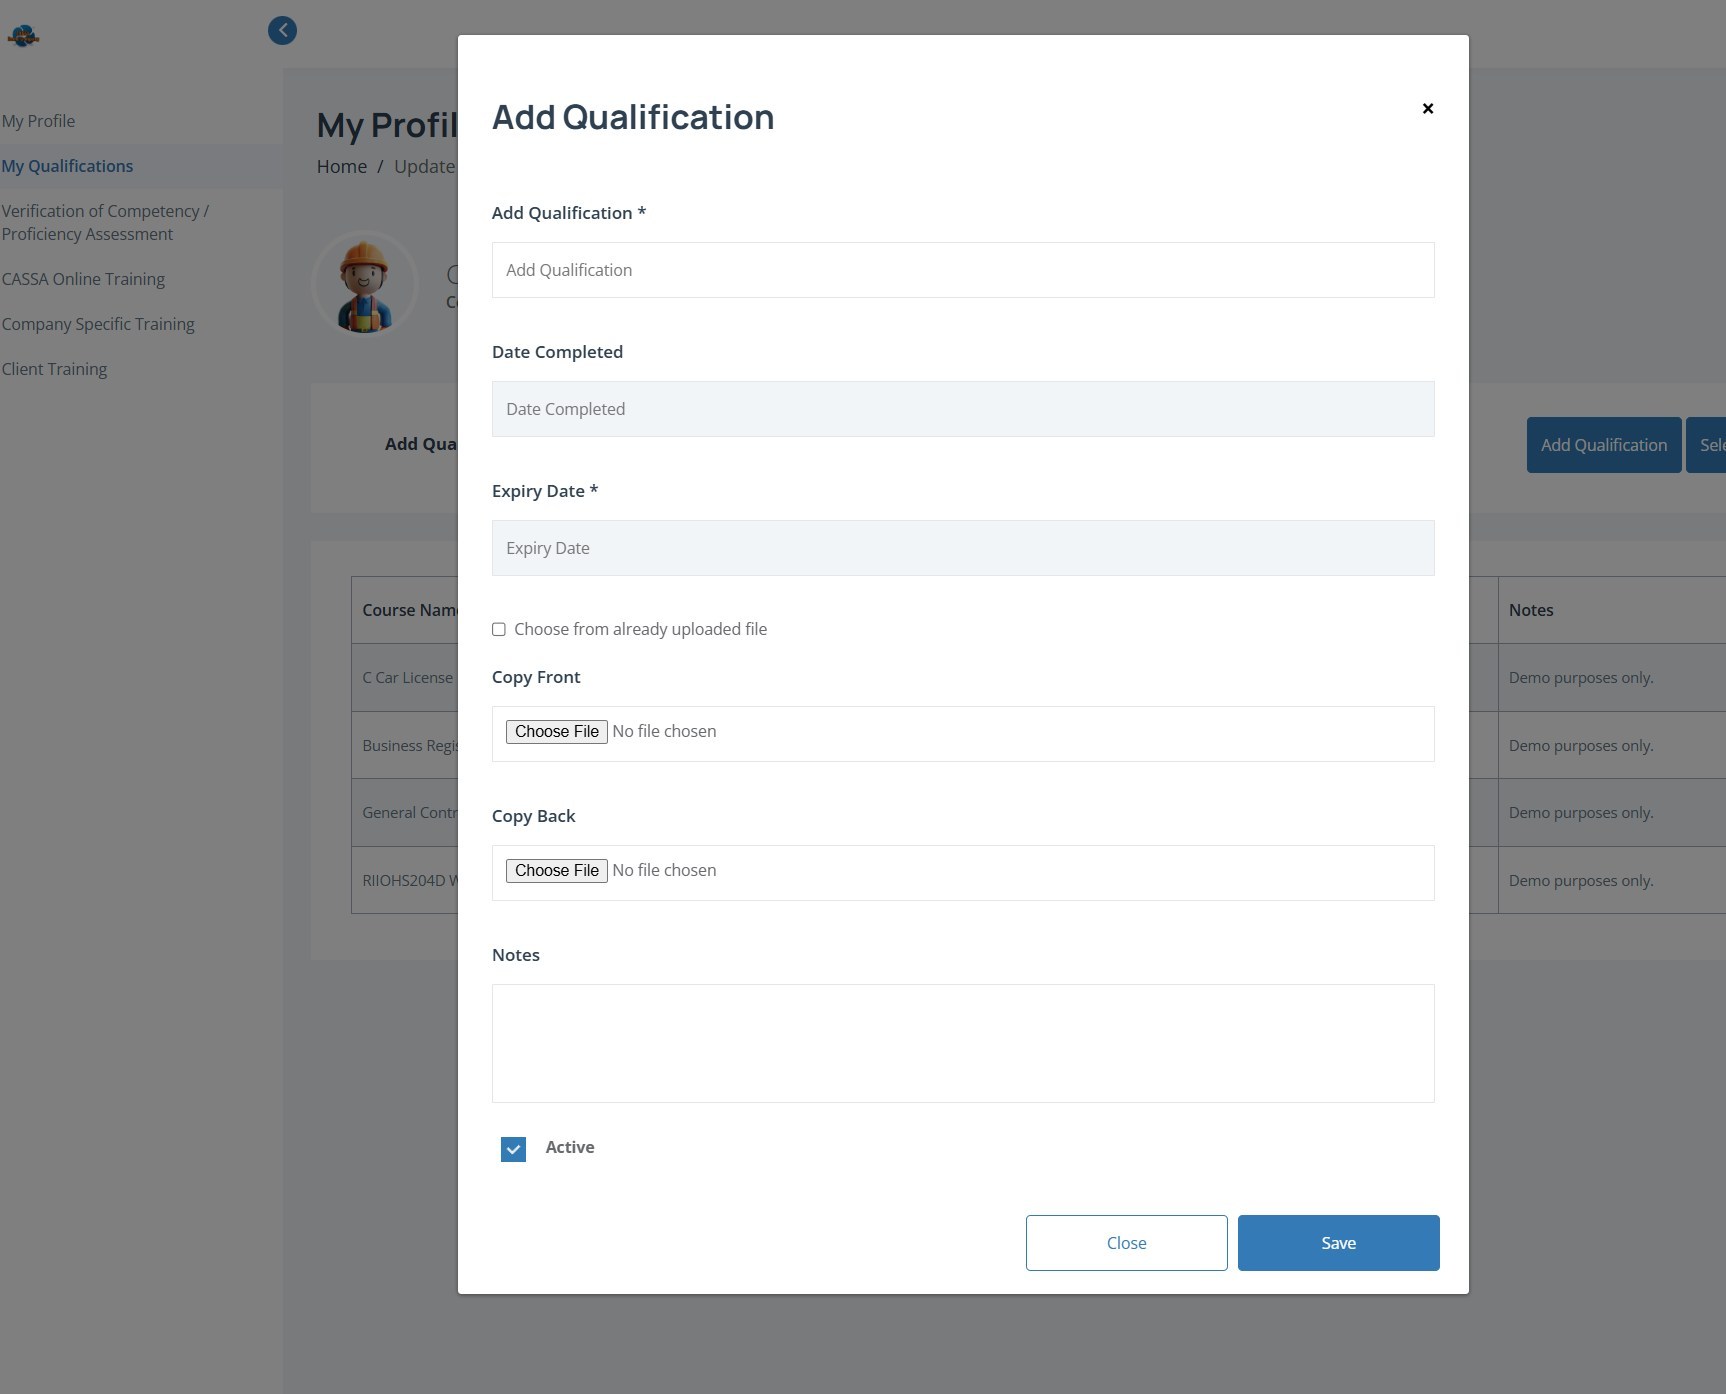
You can now add the following information: Add Custom Qualification, Date Completed, Expiry Date, add a photograph of your qualification, add custom notes, and select whether this is an ‘active’ qualification for this position.
Enter the name of your qualification into the Add Qualification field.
Next, select the date you completed this qualification:
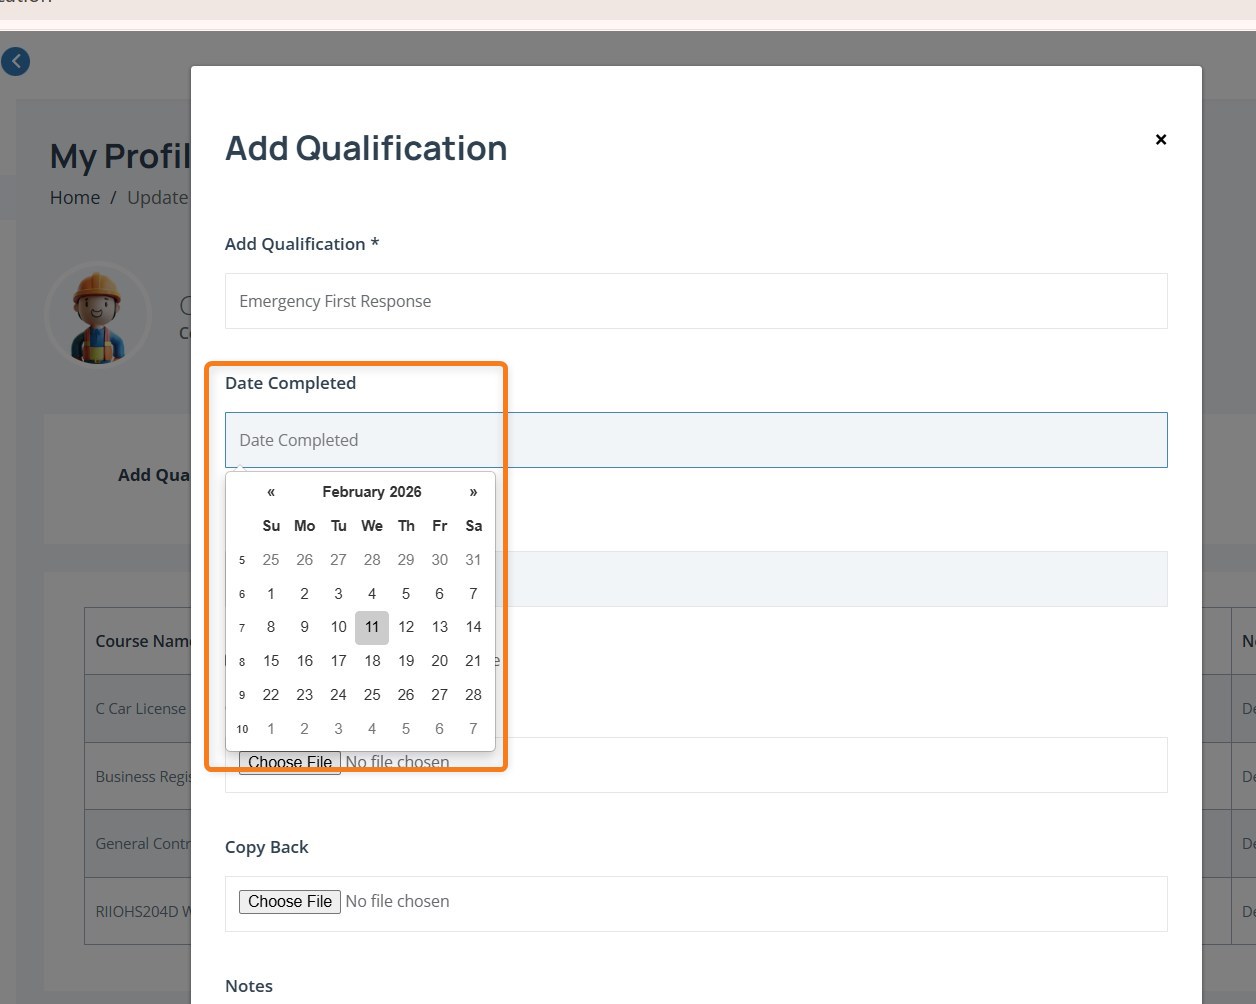
If you haven’t seen this type of date selector before, you will drill-down into month and then day once you’ve selected the appropriate year. If the year you require isn’t shown, click on either the << or the >> to navigate to the correct decade and then select the year you need.
Now you can add a copy of the actual qualification itself.
If this is the first time for this qualification, then you can upload a copy for both the front and the back of the certificate.
Note: Before you upload your images, bear in mind that you only have a finite storage capability with your account. So, first, make sure you optimise your images (refer to Optimising and Uploading Images for further information); and, second, if you are ever in the situation where a copy of your certification has already been uploaded and you need to refer to it again, then you can tick the Choose from already uploaded file option.
Click on the Choose File button in the Copy front field and then navigate to and select the front copy of your certificate.
Then do the same for the back copy.
If you need to add any notes, you can do them in the notes field.
The final field on this form is the Active checkbox, and it’s selected by default.
This checkbox is used to mark this qualification and certificate as being active for whichever employer you’re working for.
The way CASSA works is, if a qualification is required for a role then it will be visible in the company register. If that qualification expiry date then passes, this will then be flagged as expired in the company register and will need to be actioned.
However, if a qualification has expired and/or is not required for any role you’re carrying out then marking it as inactive will ensure it does not appear in any register.
When the form is complete, it will look like this:
Click on the Save button and the form will close. The qualification will then be added to your profile:
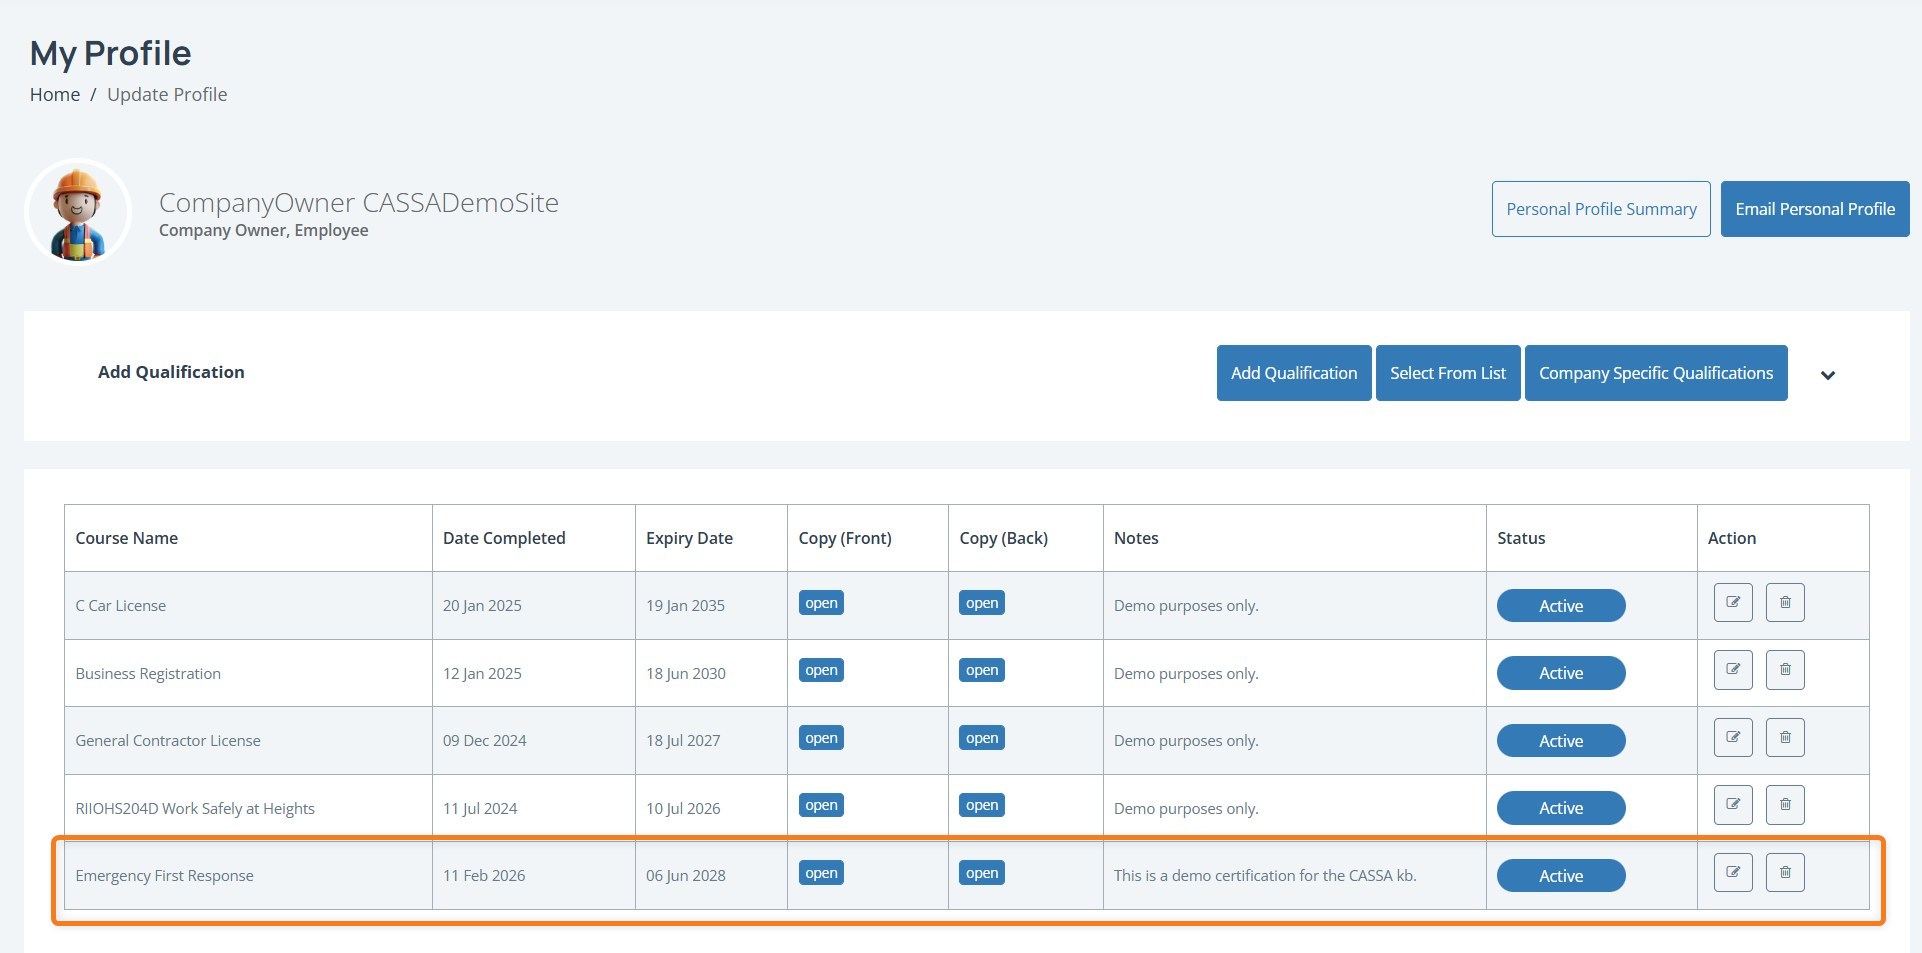
As you can see, you can now view the images you’ve uploaded, the status is set to Active, and you can perform either Edit or Delete actions, as required.