Here's how to reassign a corrective action:
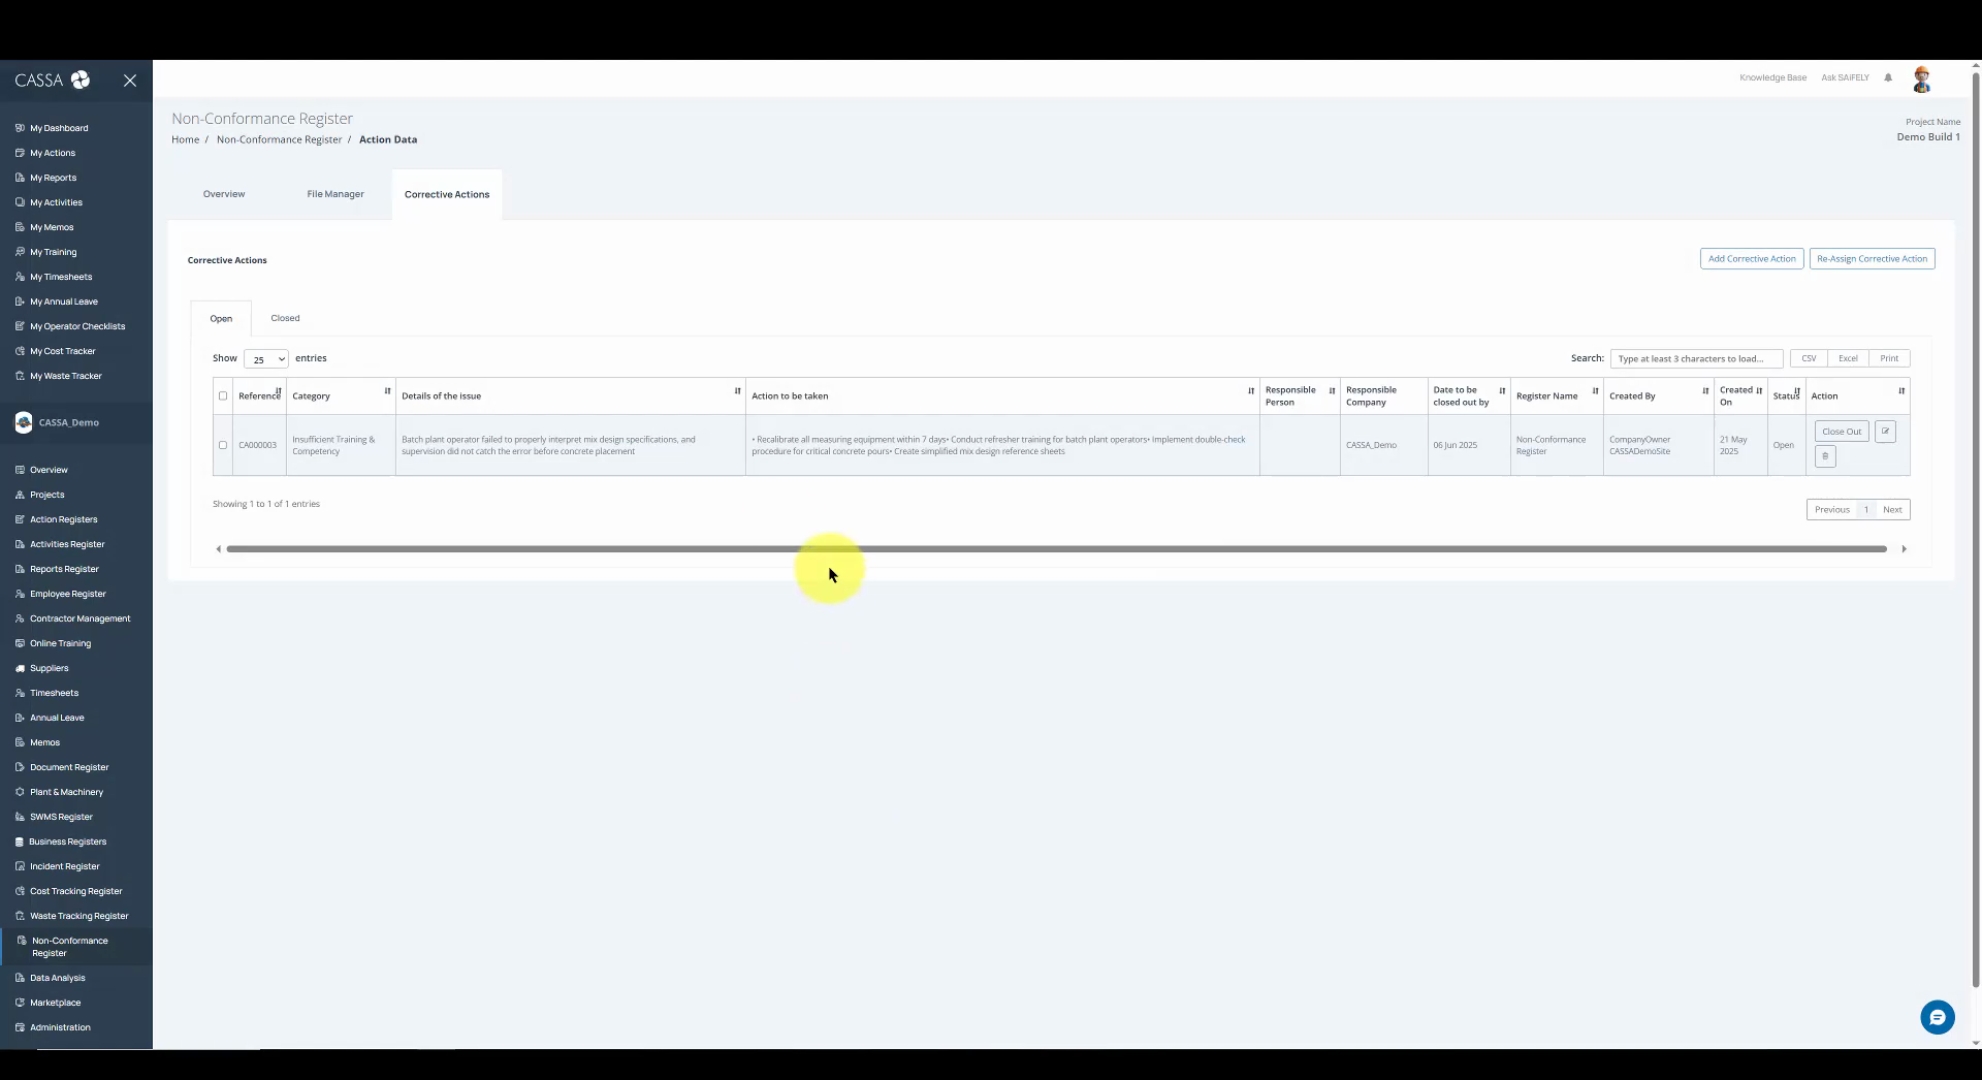
Navigate to the Corrective Actions tab where you will find two action buttons: Add Corrective Action and Reassign Corrective Action.
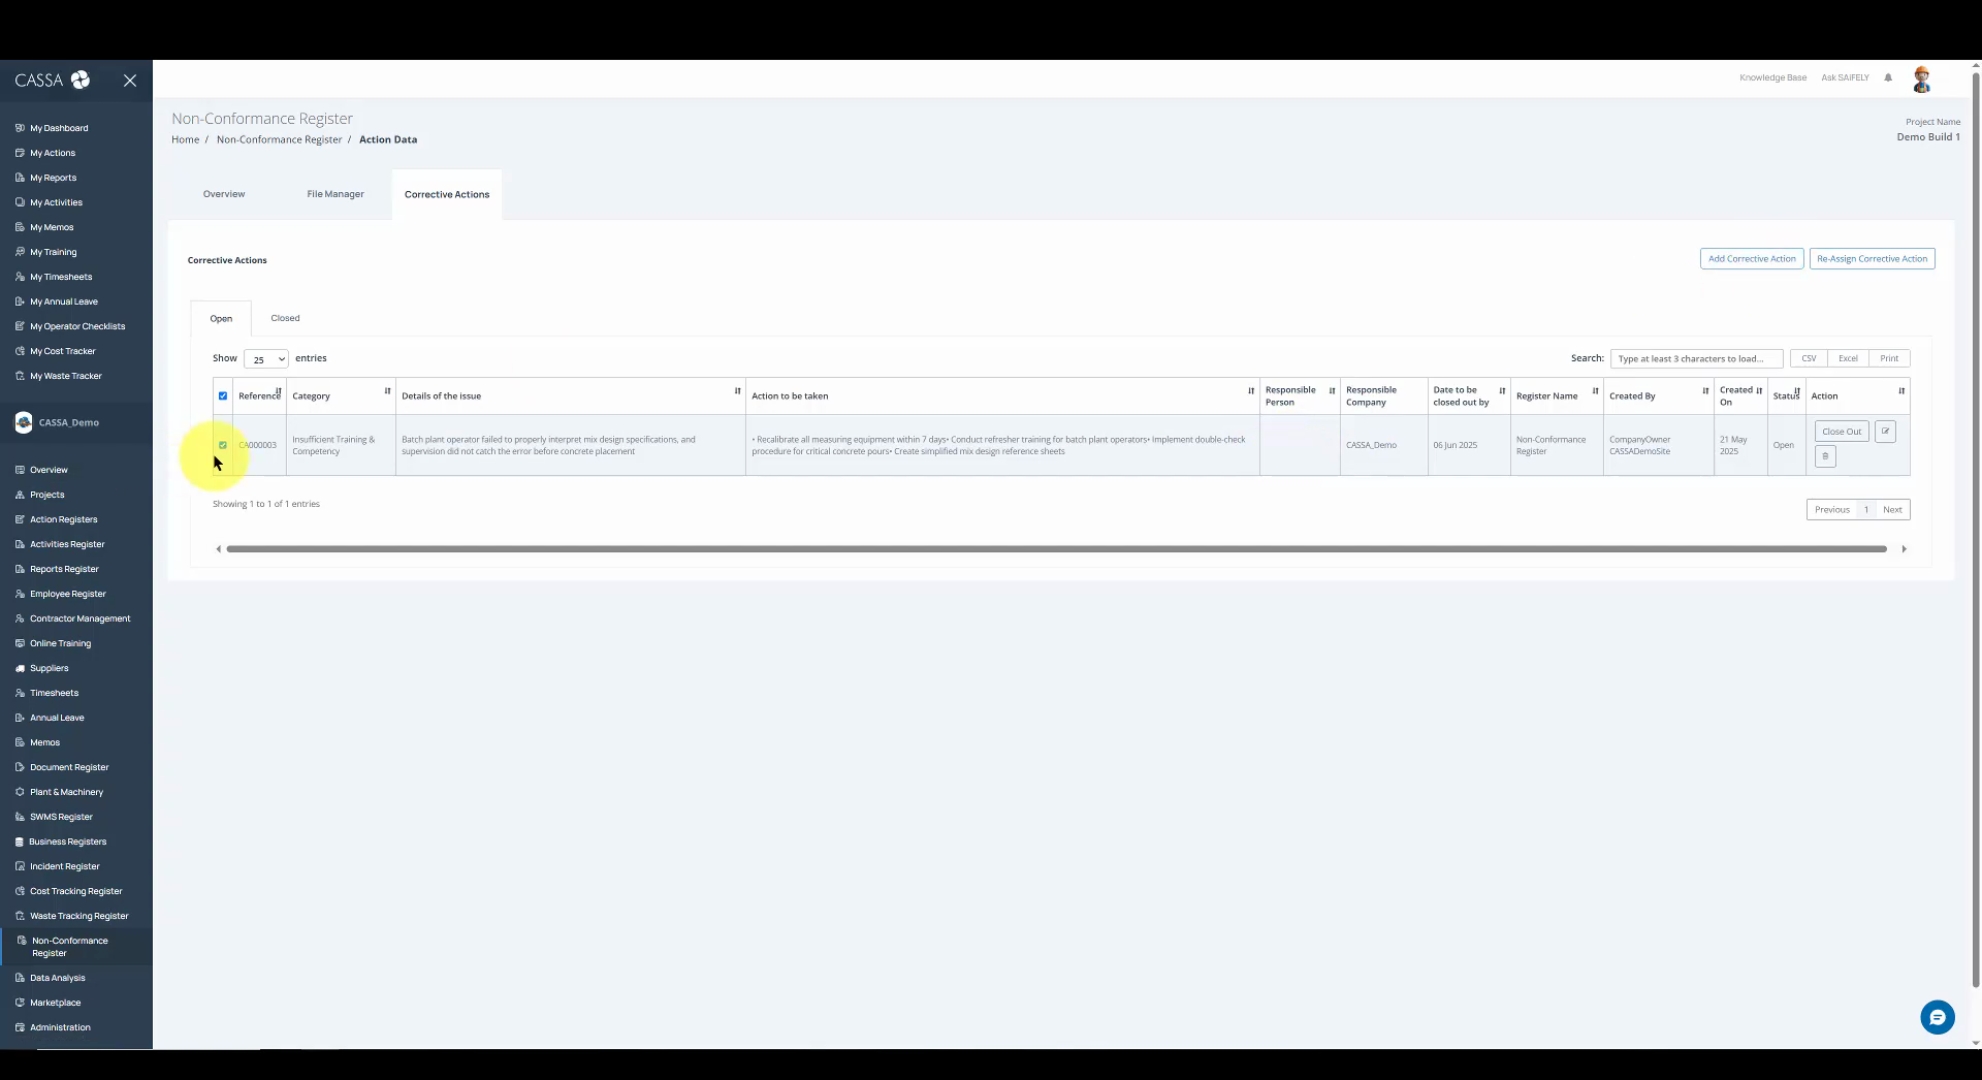
To reassign a specific corrective action, first select the checkbox for the item you wish to reassign.
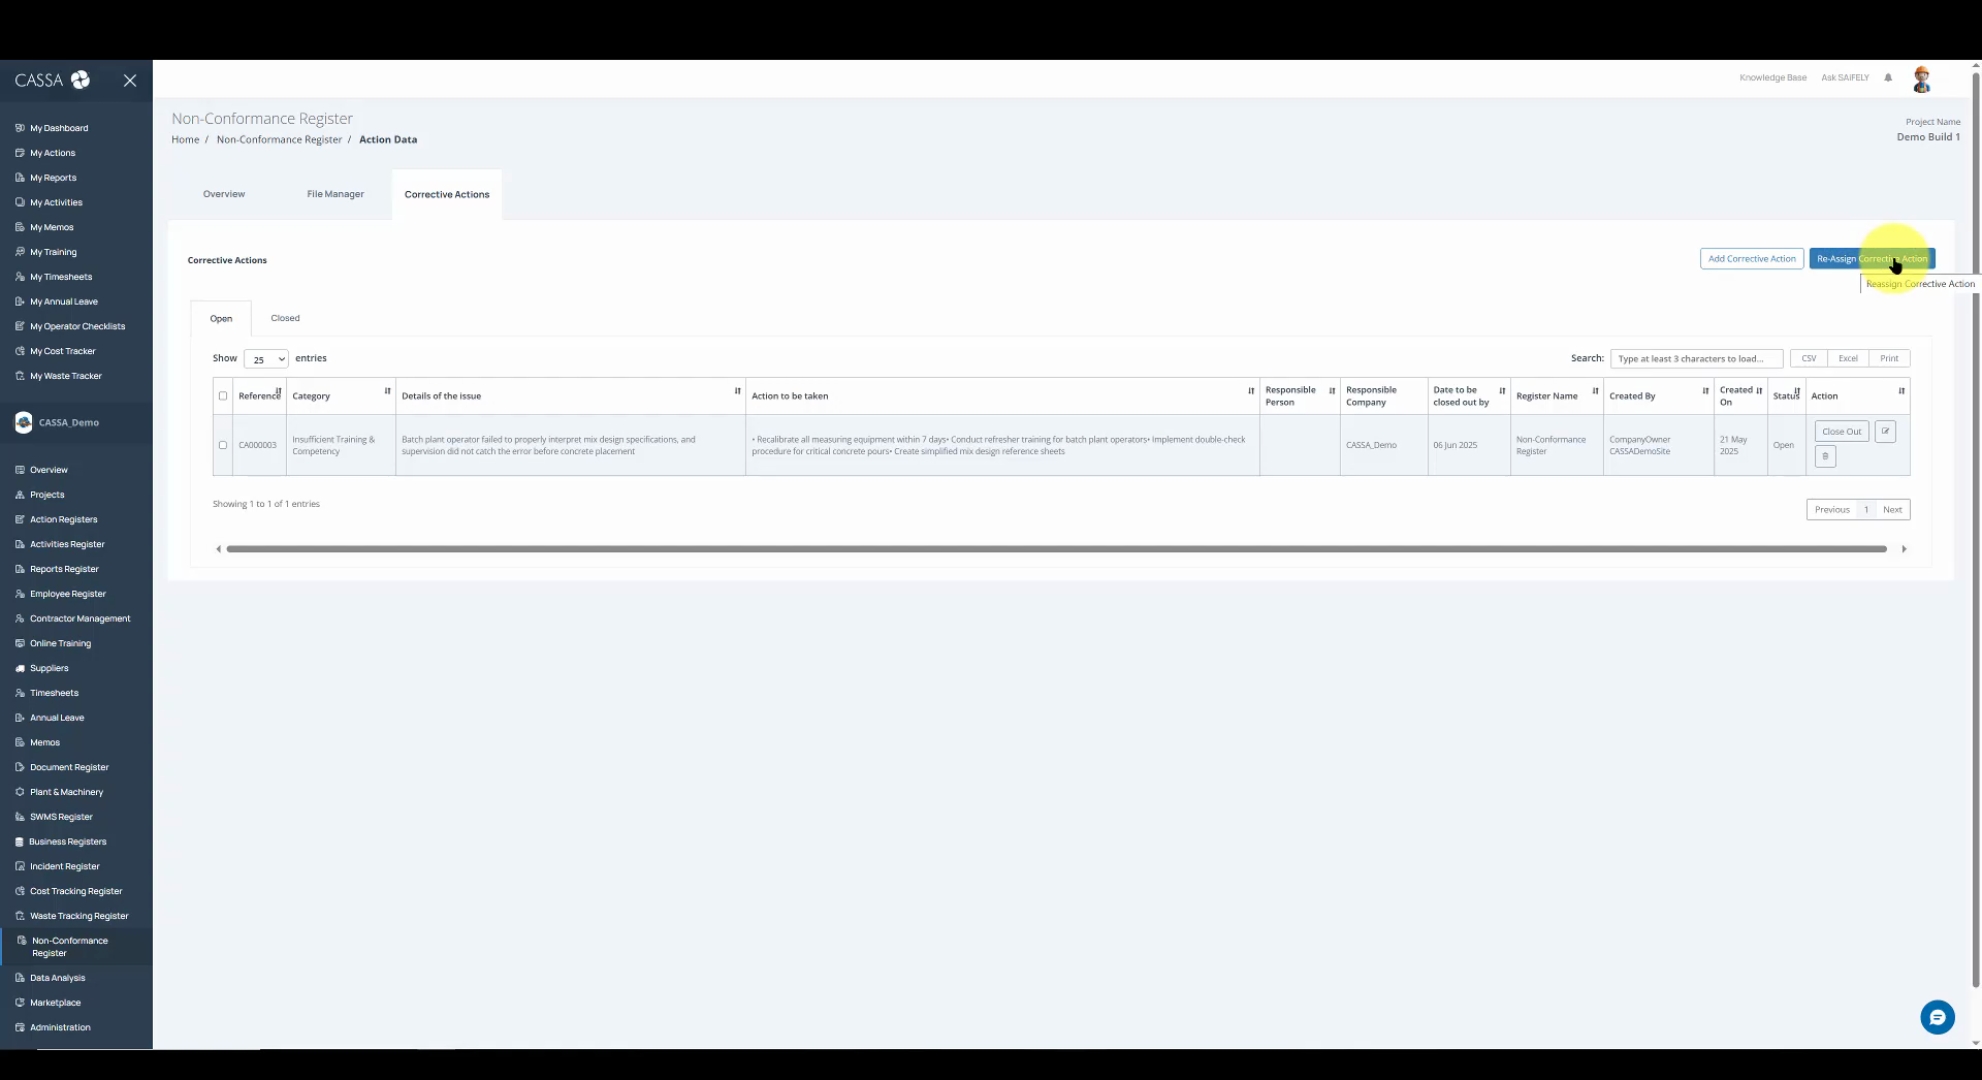
After selecting the checkbox for the desired corrective action, click on the Reassign button.
If you manage multiple companies, you can change the company associated with the corrective action. In the Responsible Persons box, start typing the name of the person you wish to assign it to.
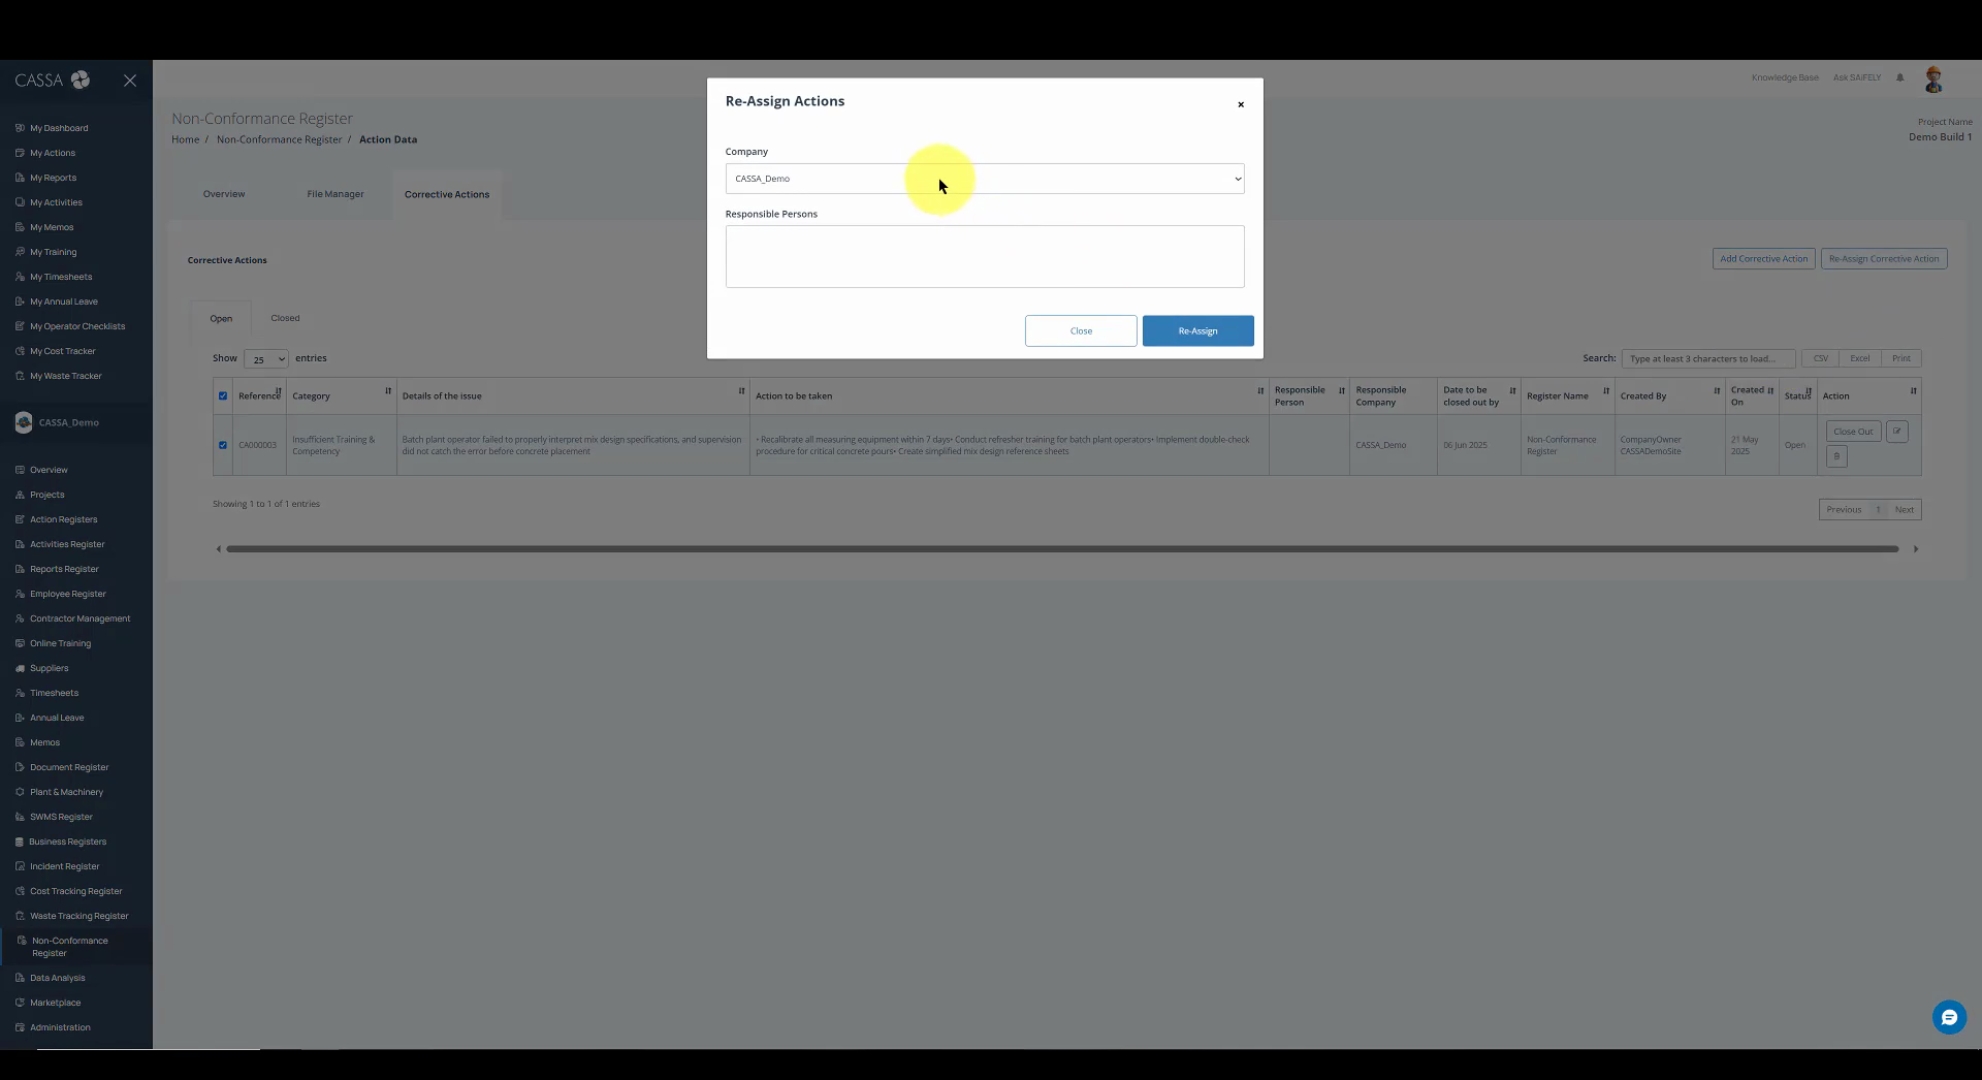
As you type the first few characters of the name, you will see a matching suggestion. You can assign the action to multiple individuals by continuing to type their names, separating each with a comma.
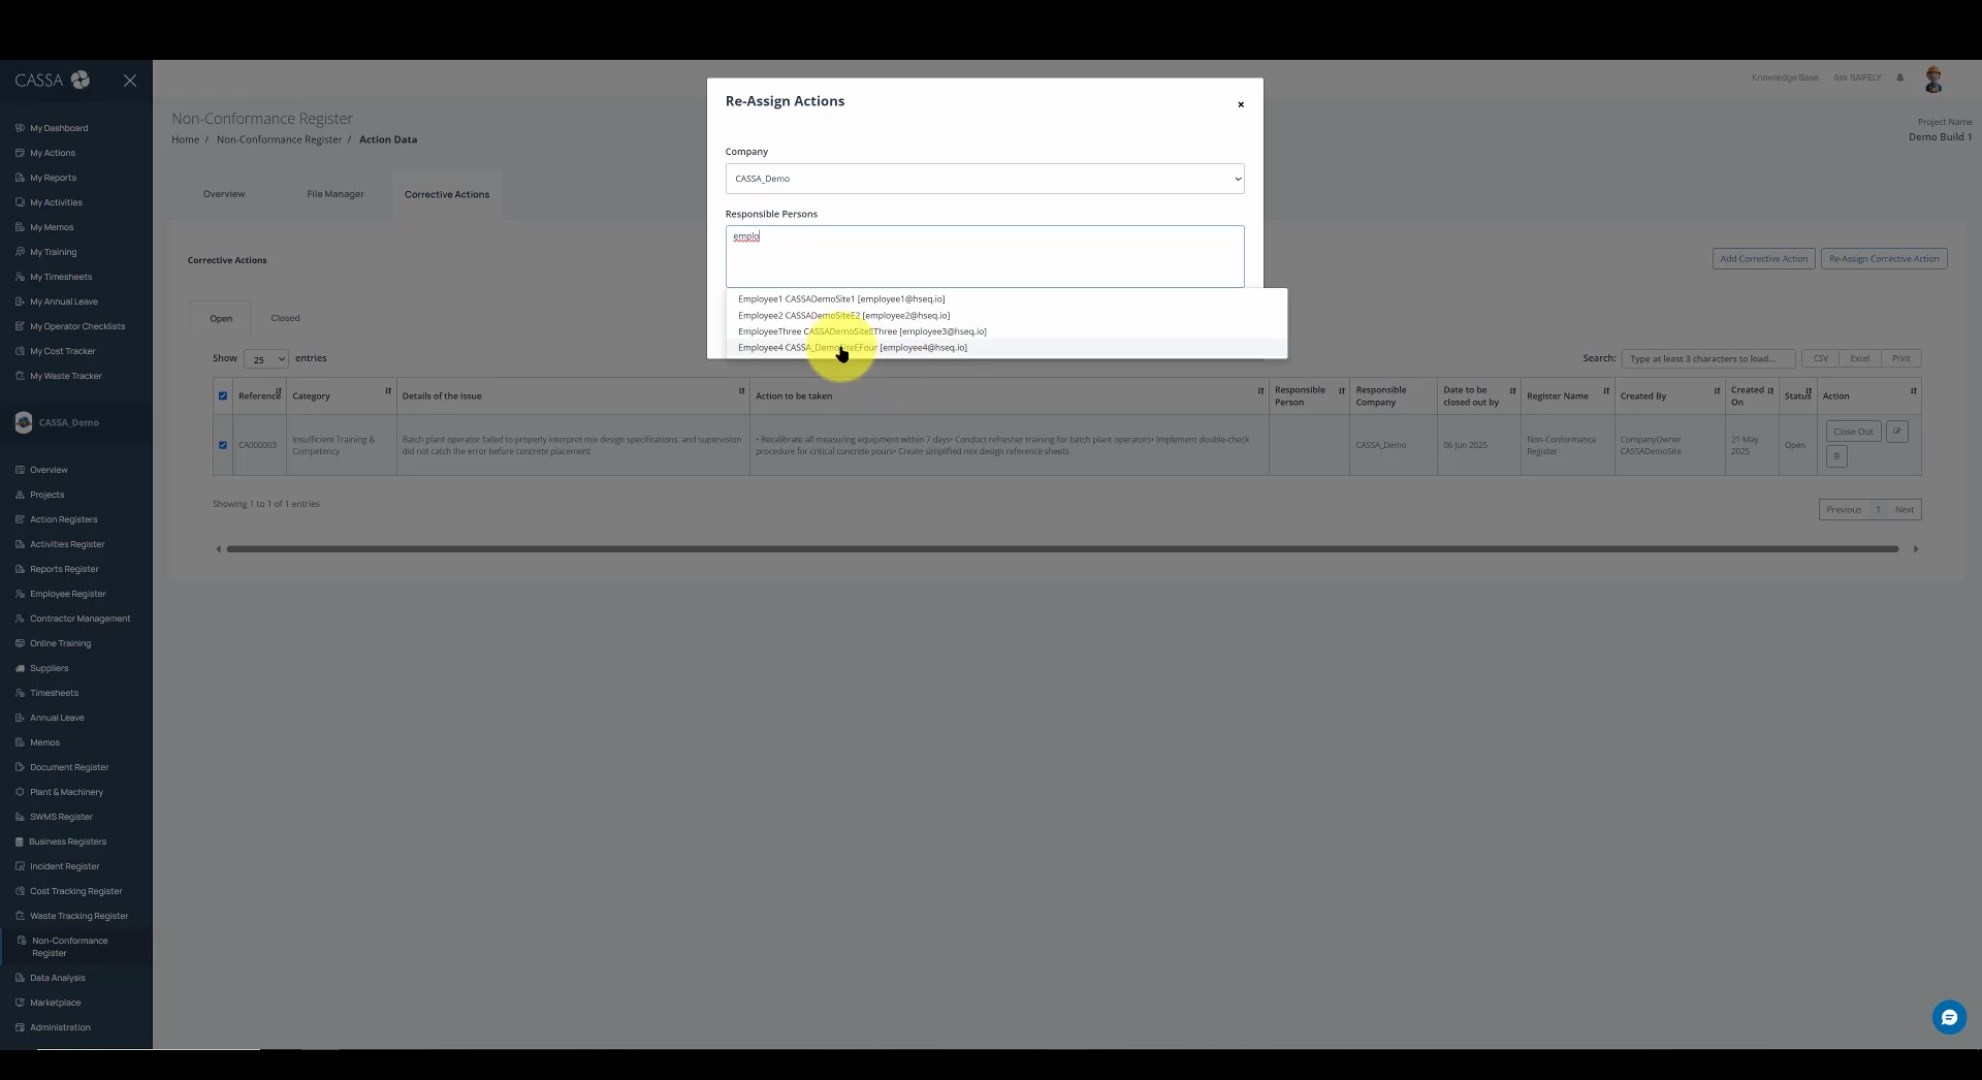
When assigning multiple persons, ensure that each name or email address is separated by a comma. (This format is referred to as comma delimited.)

The system will automatically insert the necessary commas for you. If you accidentally delete them, simply click and they will be restored.
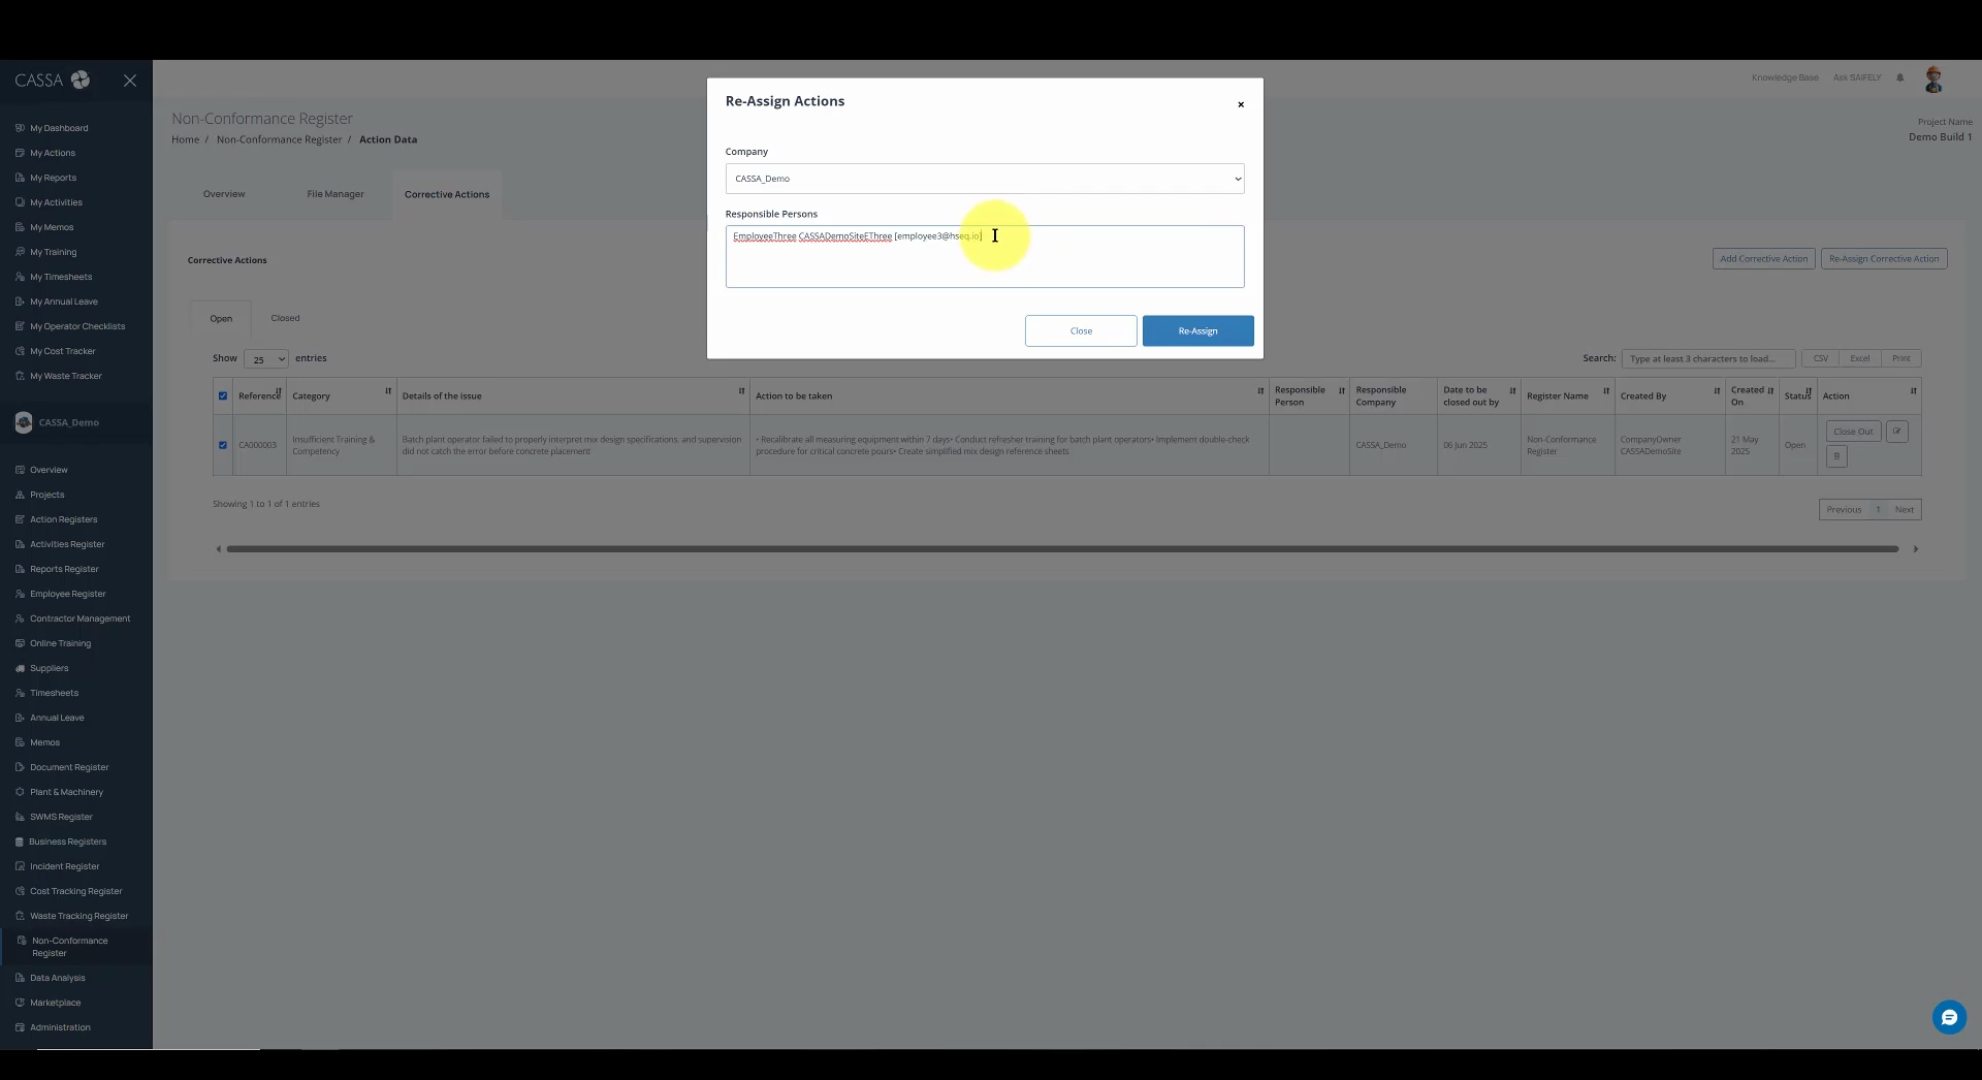
Finally, click on the Reassign button to complete the process. You will receive a confirmation message indicating that the action has been successfully reassigned.
The responsible person, in this case, Employee Three (for me), will be notified of their new assignment.
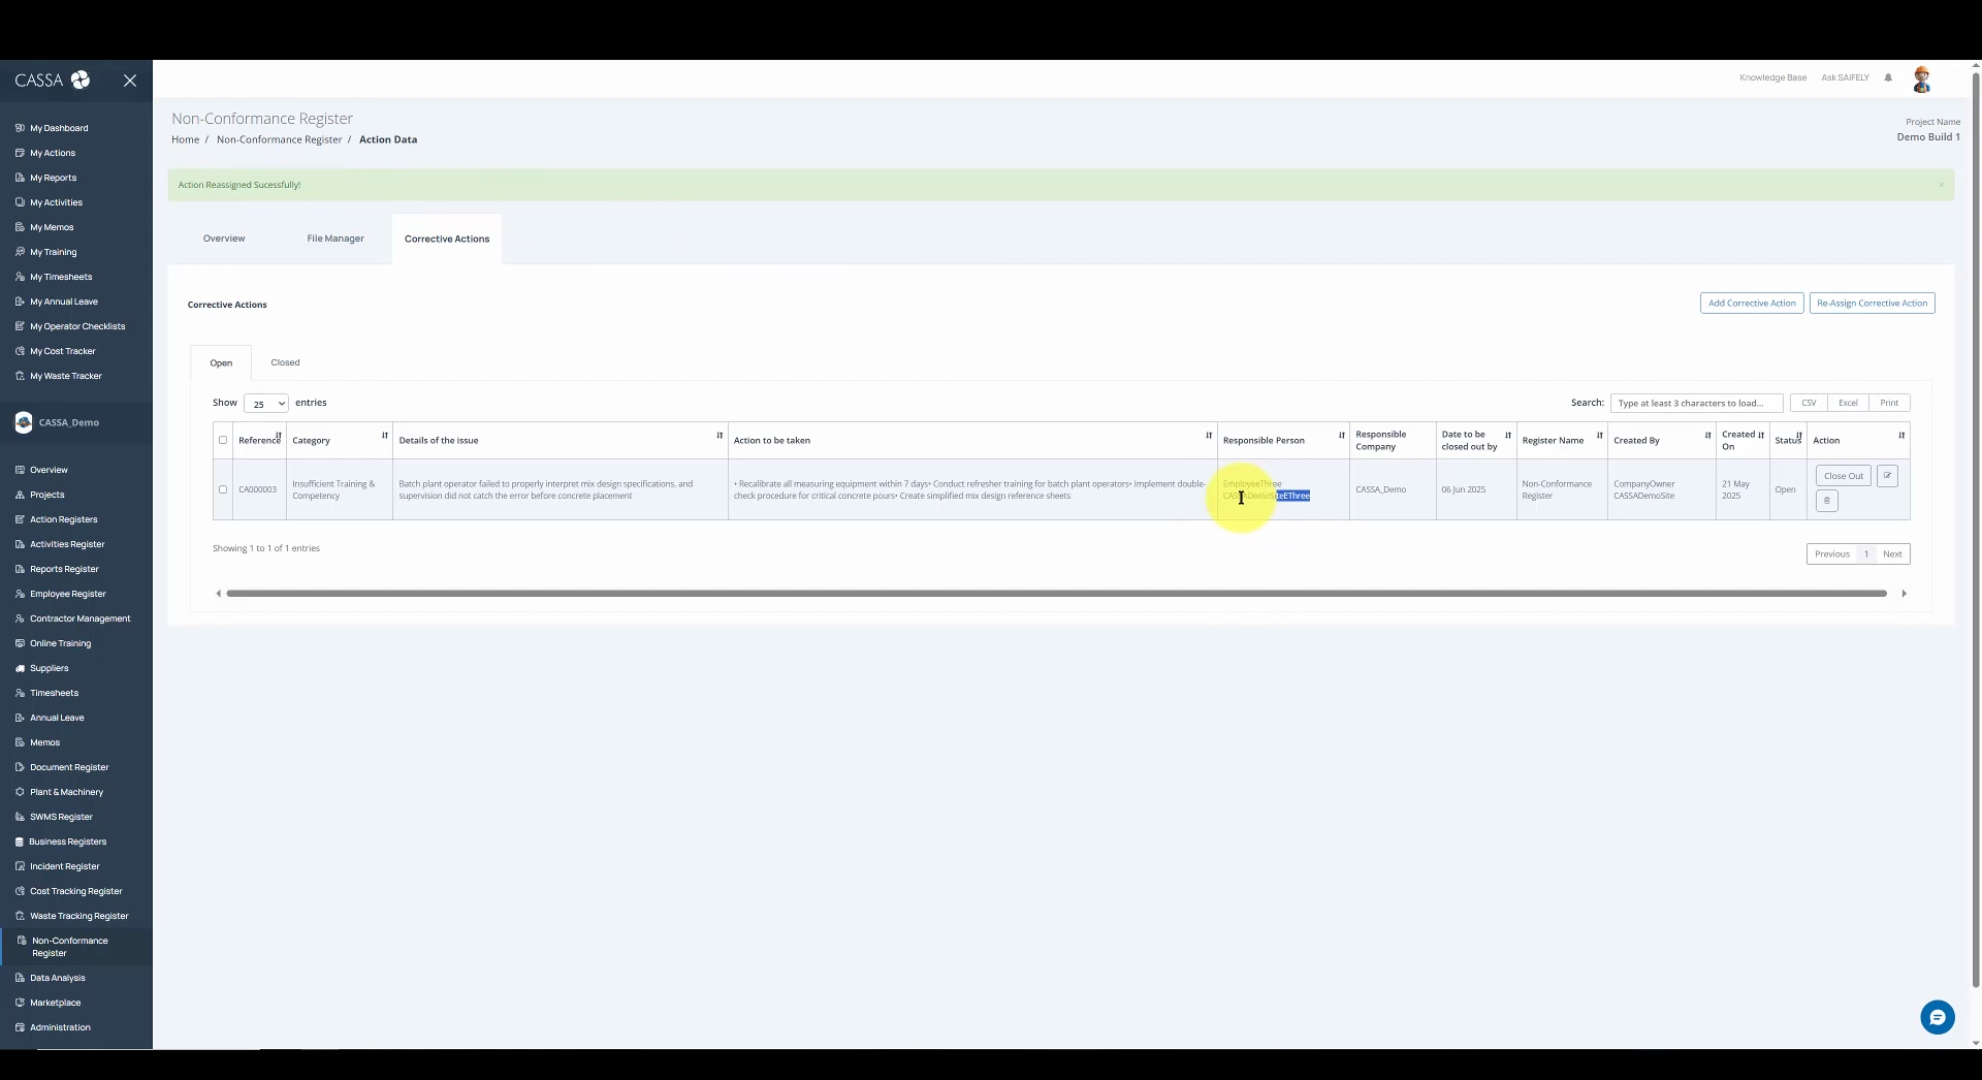
That's it. You've successfully reassigned a corrective action and notified the responsible person.